
This post contains affiliate links. Please see our disclosure policy.
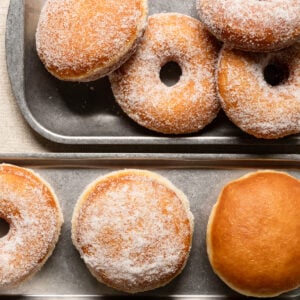
If you prefer a light airy yeast donut over a more dense cakey donut, these are for you. Same day fluffy tender brioche donuts that seem to disappear faster than I can fry them. Enjoy them plain, tossed in sugar, glazed or filled.
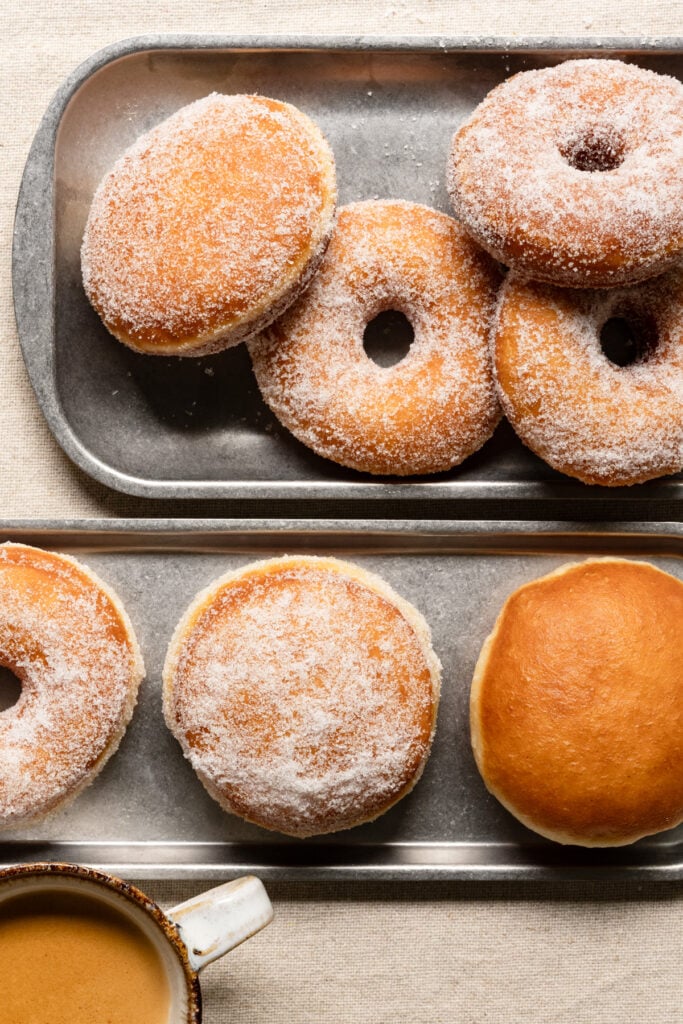
I have to be honest, eating these doughnuts is like eating a brioche cloud. The enriched dough has plenty of butter and eggs to give it loads of flavor, but not so much that it becomes heavy. The dough has a lovely, luxurious texture that’s easy to work with and produces a soft, tender crumb that gets even better with an optional overnight cold proof in the fridge.
My personal favorite way to eat them is hot, just after tossing them in sugar. One bite takes me straight back to being a kid in North Carolina, standing in line at Krispy Kreme for doughnuts hot off the conveyor belt. A doughnut from a cold display case will never compare to the deliciousness of one that’s freshly fried and still warm. Especially when it’s homemade.
Tender Brioche Donut Ingredients
- All Purpose Flour: There are as many doughnut recipes as there are people who like eating doughnuts. Many recipes use bread flour for added chewiness and a super-strong texture, but I really love the softness of these doughnuts, thanks to all-purpose flour with a protein content of around 11- 11.7%.
- Note: Swap evenly for Bread Flour with 12-12.7% protein, for a slightly chewier more open crumb texture.
- Buttermilk: Slightly warmed buttermilk or milk creates a softer, richer doughnut crumb compared to water, which tends to create more chewiness. I also like the subtle tanginess it provides the dough after an overnight rest in the fridge. When warming the buttermilk, keep it unter 110F (43C), too hot and it will kill the yeast.
- Note: Buttermilk can be swapped evenly with whole milk. If you do swap, I want to point out that since milk lacks the acidity of buttermilk the dough may proof a bit quicker, so keep an eye on it.
- Instant Yeast: Weigh the yeast for accuracy and check the expiration date to make sure it’s still active.
- Eggs: The use of whole eggs, provides structure and richness for a light, bread-like interior. Be sure they’re at room temp and weigh them. One large egg should weigh approximately 50 grams without the shell.
- European-Style Butter: More fat means more flavor! You can swap European-style butter for American butter, which has a slightly lower butterfat content.
- Granulated Sugar: I’ve added just enough sugar to the dough for structure and flavor. The extra sweetness comes from coating the doughnuts in sugar or finishing them with a sugar glaze.
Let’s Make Donuts
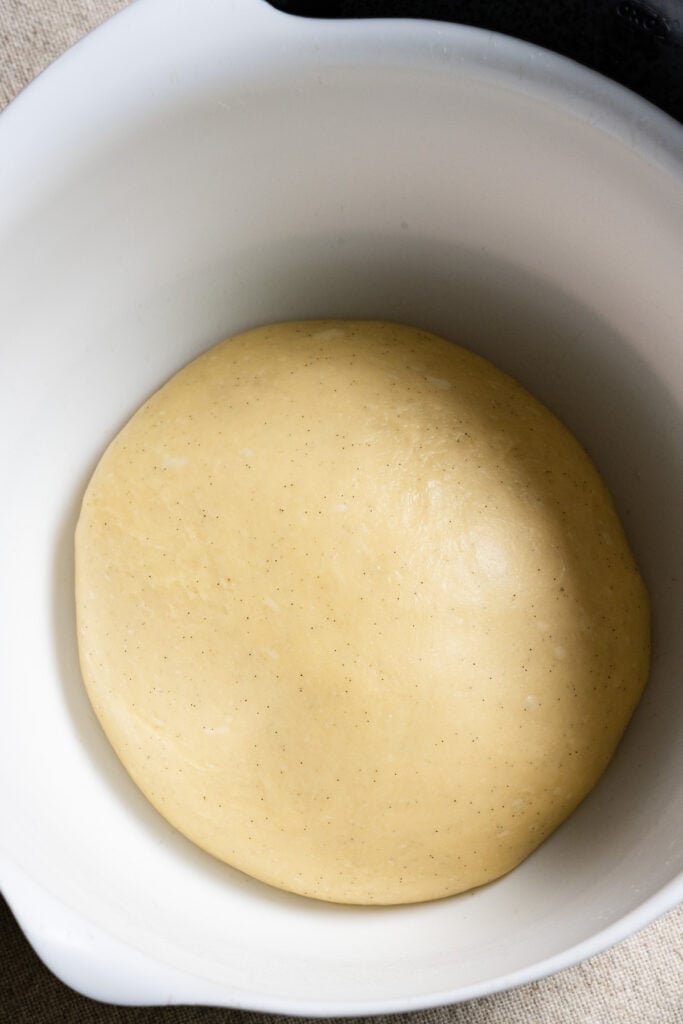
- Make the dough and shape into a ball. Place in a greased bowl, cover, and let rest until almost doubled in size.
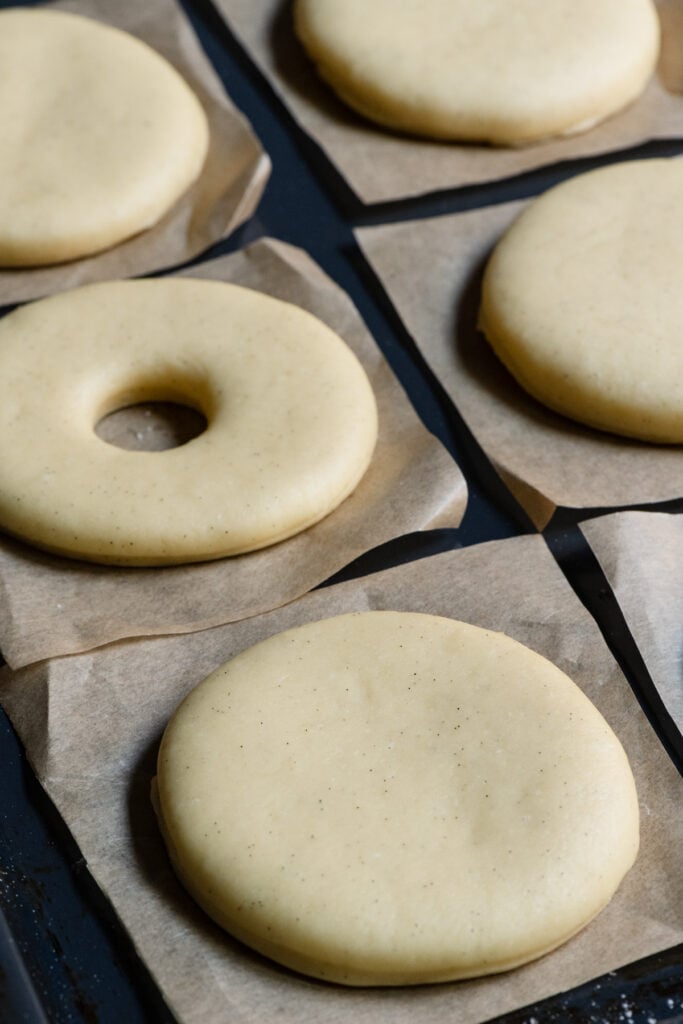
- Roll dough out to 1/2-inch thickness. Using 3.5-inch round cookie or biscuit to cut out donuts. For ring donuts, use a 1-inch cutter for the center holes. Place on individual pieces of parchment paper, cover, and let proof until puffy.
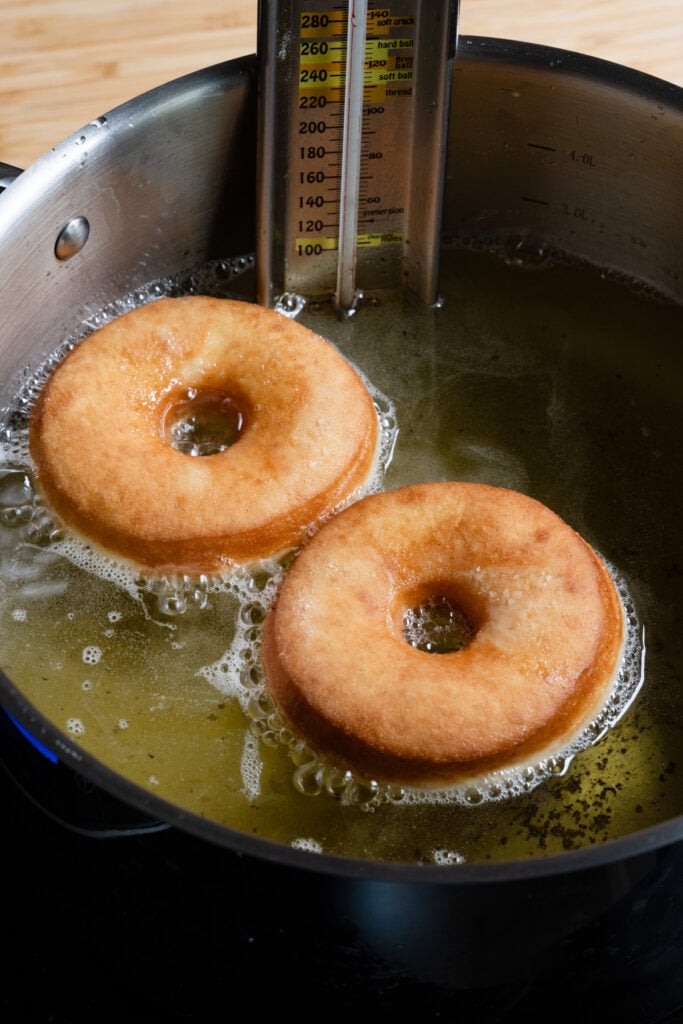
- When the donuts are almost proofed, heat the oil to 345℉-350℉ (174℃-180℃). Carefully lower the donut by the parchment paper into the oil, then pull away the paper with tongs. Cook donuts 60-90 seconds per side for a medium golden brown color.
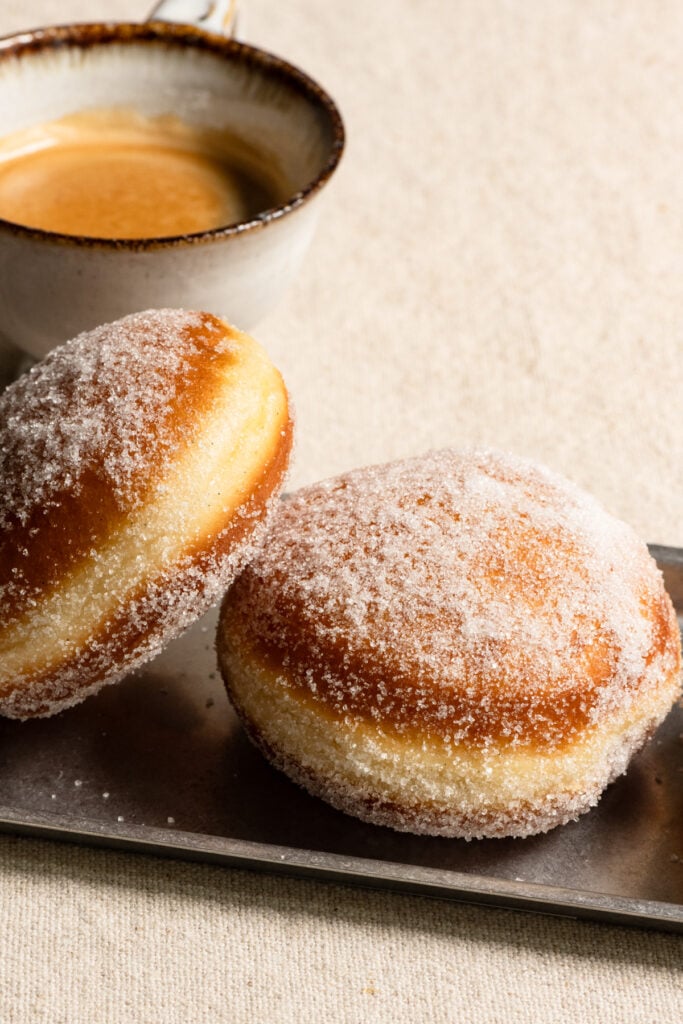
- Place warm donuts on a paper towel lined tray to absorb excess oil. Toss warm donuts in granulated sugar. Or let donuts cool before glazing.
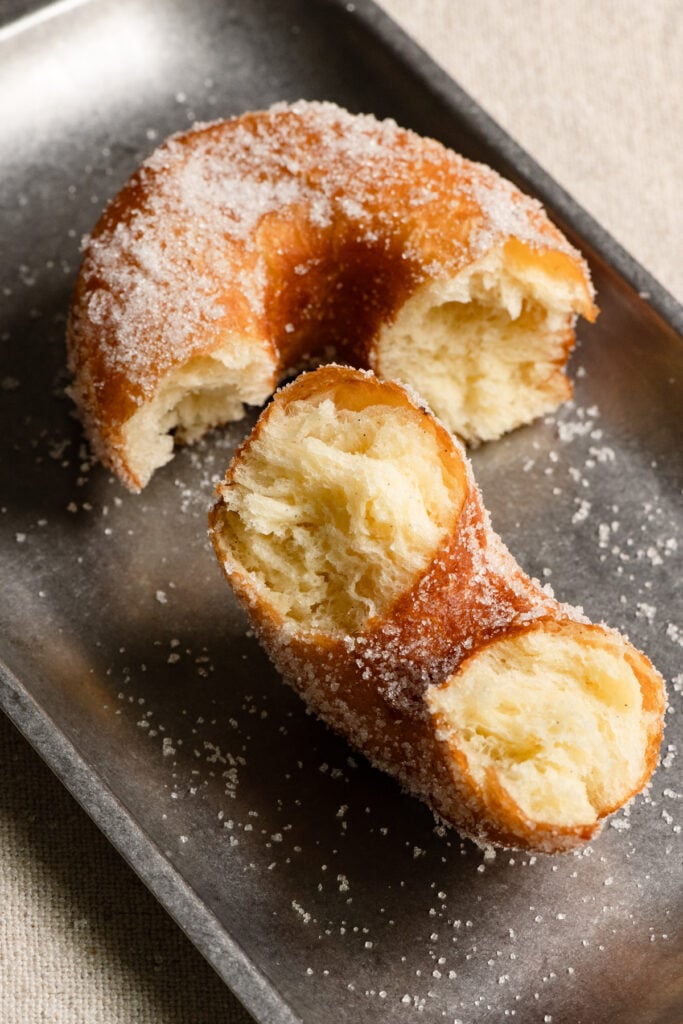
Donut Making Tips
- Same Day Bake, Allow For Time: You can make these brioche donuts start to finish in one day, without an overnight rise. Plan for at least 5 hours. Most of that time is hands-off while the dough proofs, but you’ll want to keep an eye on it since proofing times can vary.
- Overnight Proof: For a little flexibility and improved flavor and texture, let the dough rise at room temperature first, then ferment overnight in the refrigerator. The next morning, shape the donuts and let them rise again at room temperature. Since the dough will be cold, this second rise will take a bit longer.
- Check the Dough Not the Clock: Every kitchen has a different temperature, so it’s important to pay attention to the dough rather than relying solely on the timing in the recipe. To check if the donuts are fully proofed and ready to fry, I use a gentle poke test. Lightly press your fingertip or knuckle into the dough.
- If the indentation springs back quickly, the donuts need more time.
- If it slowly springs back but leaves a slight indentation, they’re ready to fry.
- Set Up A Fry Station: I like to have a tray lined with paper towels for the freshly fried donuts, a bowl of sugar for tossing, and a second tray for the finished donuts. Think of it as a little assembly line. Having everything ready ahead of time makes the frying and coating process much easier and keeps things moving smoothly.
- Fry the Scraps: Re-rolling the dough multiple times can alter the inside texture of the donut. If you have leftover dough scraps, proof them next to the donuts and fry them as smaller treats. I like to coat the fried scraps in sugar and eat while they’re still warm.
Types of Donut Filling
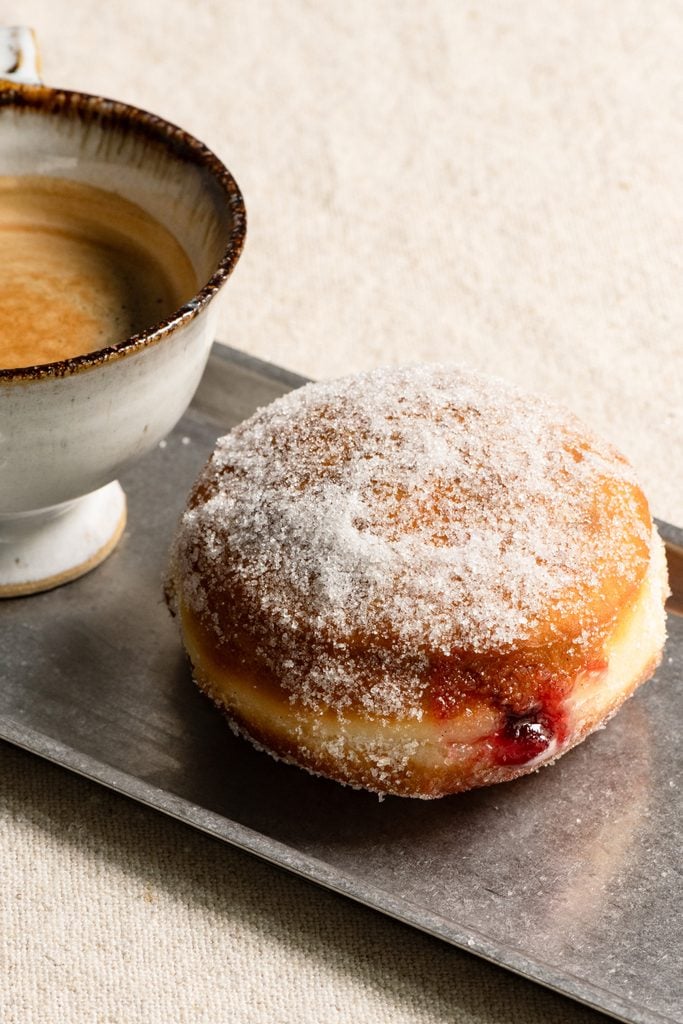
Solid donuts without a center hole are perfect for filling with fruit jam, pastry cream, whipped cream, or chocolate spread. I recommend rolling the donuts in sugar or dipping them in glaze before filling
Once the donuts have cooled, use a small paring knife or chopstick to make an opening in the side, working about halfway into the center. Fill a piping bag with your desired filling and insert the tip into the opening. Gently squeeze while slowly pulling the piping tip back out. You’ll feel the donut become a little heavier as the filling is added.
Be careful not to overfill! Too much filling can cause the donut to split open on the opposite side, and everything will leak out into a sticky mess.
Vanilla and Chocolate Donut Glaze
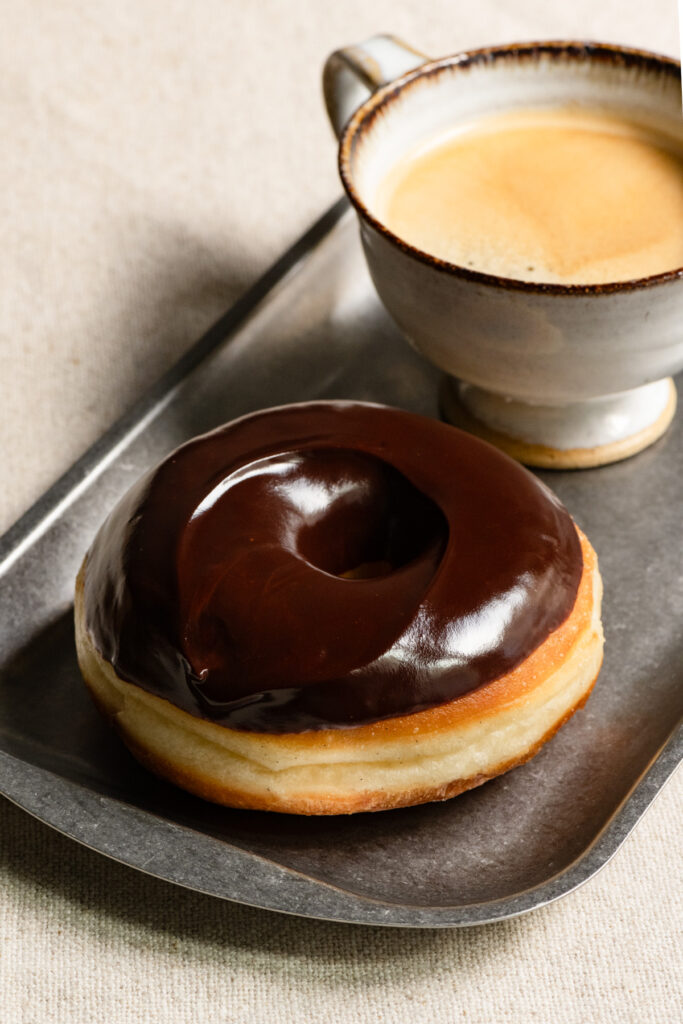
Donut glaze is pretty easy to make and offers another layer of flavor. To make the vanilla glaze, mix powdered sugar, vanilla, milk, and melted butter. The chocolate glaze uses chopped dark chocolate, honey, water, and butter. Both leave a shiny, thick coating for beautiful, bakery-worthy donuts.
Each glaze recipe is enough to coat all the donuts. Choose one flavor, or divide the ingredients in half for a mixed batch of both vanilla and chocolate glazed donuts. I recommend waiting until the donuts are cool and the glaze is warm before you start dipping.
★★★★★ Please leave a star rating and review below if you make this recipe! THANK YOU!!
Tender Fluffy Brioche Donuts
Equipment
- large pot
Ingredients
Dough
- 7.5 grams instant yeast
- 50 grams granulated sugar
- 140 grams buttermilk , or whole milk, slightly warm
- 150 grams (3 large) eggs
- 15 grams vanilla bean paste
- 385 grams all purpose flour, 11-11.7% protein (or bread flour with 12-12% protein)
- 7 grams fine sea salt
- 110 grams unsalted European style butter (82% butterfat), cut into cubes, softened
Frying Oil
- 1000 grams/ml neutral oil (vegetable, canola, or sunflower)
Topping
- granulated sugar
Vanilla Donut Glaze
- 240 grams powdered sugar, sifted
- 60 grams whole milk, warm
- 42 grams unsalted butter, melted
- 1 tsp vanilla extract or vanilla bean paste
Chocolate Donut Glaze
- 200 grams 70% dark chocolate, chopped
- 20 grams water
- 28 grams honey , maple syrup or golden syrup
- 60 grams unsalted butter
- ½ tsp instant espresso powder
Instructions
Make the Dough
- In the bowl of a stand mixer, gently hand whisk together the yeast, sugar, buttermilk eggs, and vanilla.7.5 grams instant yeast, 50 grams granulated sugar, 140 grams buttermilk , 150 grams eggs, 15 grams vanilla bean paste
- Add in the flour and salt. Using the dough hook attachment on medium speed (Number 5 on a KitchenAid), mix until all the flour is absorbed and the dough begins to pull away from the sides of the bowl. It will look like it needs more flour at first, but will come together as it builds strength. About 8 minutes.385 grams all purpose flour, 7 grams fine sea salt
- Increase the speed to slightly (Number 6 on a KitchenAid) and begin adding in a couple butter cubes at a time until all of the butter has been incorporated. Stop and scrape the sides of bowl with a bowl scraper, and pull the dough off the hook into a blob halfway through.
- Continue to knead the dough on medium-high until it becomes, smooth, strong, and passes the window pane test. About 5-6 minutes.
- The dough should pull away from the sides of the bowl, clinging to the dough hook and just the bottom of the bowl. This is a soft dough that will be stretchy, and tacky, not super sticky. To check if the dough is ready, tear off a small piece and carefully spread it out between your fingertips. If it stretchy and becomes translucent without easily tearing it has developed enough gluten. If not, mix for another minute and check again.
- First Proof: Scrape the dough into a lightly greased bowl and shape it into a ball. Lifting and tucking the dough underneath itself. Cover with plastic wrap.
- To bake the same day: Set the bowl aside and let the dough proof at room temperature until doubled in size. About 1.5-2hrs. I will set mine in a cold oven with the light on or use an electric proofing box.
- To ferment overnight and bake the next day: After the first rise, gently press down the dough to de-gas it. Cover the bowl with plastic wrap and place in the fridge for 12-24 hrs for a slow cold ferment to bake the next day. Cold dough will be easier to handle, but will take a bit longer during the second proof. This step also creates a more flavorful tender donut.
Shape and Second Proof
- Before rolling out the dough, line a large pan with 4×4-inch squares of parchment paper.
- Turn the dough out onto a lightly floured surface. Sprinkle a little flour on top and press the dough flat with your hands to remove the gas. With a rolling pin, roll out the dough to 1/2-inch thickness.
- Take a 3.5-inch round cutter and cut out eight circles. Leave them whole for donuts you would like to fill. Or take a 1-inch cutter and cut a hole in the center of each circle. Carefully place each donut onto a square piece of parchment paper.
- Pack the dough scraps back together and shape into a smooth disc. Let rest for 10-15 minutes to let the gluten relax or the dough will spring back. Roll out to 1/2-inch thickness and cut two more donuts. Transfer to individual squares of parchment paper. Save any weird shaped scraps and fry them as small bite sized snacks.
- Loosely cover the tray of donuts with plastic wrap. Let rest until visibly puffy and almost doubled in size. This can take anywhere from 45 min to 1.5 hrs with same day dough, depending on how cold it is in your kitchen. Dough that has chilled in the fridge overnight will be colder and can take closer to 3 hours to double in size.
- To check if the dough is fully proofed, gently press your fingertip into the side of a donut. The dough should fill back in slowly and leave a small indent. If it springs back immediately it needs a little more time.
Fry Donuts
- While the donuts are puffing up, prepare your fry station.
- Place two baking pans near the stovetop lined with paper towels. Set a medium sized bowl filled halfway with granulated sugar for coating close by.
- Fill a heavy bottom pot or deep stainless steel pot with 3-inches of neutral oil. Fit with a thermometer to check temperature.1000 grams/ml neutral oil (vegetable, canola, or sunflower)
- Heat the oil on medium heat until it reaches between 345℉-350℉ (174℃-180℃). This is the optimum heat range for frying donuts. Any colder and they won't puff or cook, absorbing a lot of oil. If the temperature gets hotter, the outside of the donut will burn and the inside will be raw.
- When the donuts are ready and the oil is the right temp, carefully add 2-3 donuts on their parchment paper to the hot oil. Careful not to crowd them. I like to fry a single donut first to test the oil and timing needed. The donuts should float on the surface of the oil.
- Use tongs or kitchen tweezers to jiggle away and discard the paper squares after they hit the oil.
- Fry the donuts about 60-90 seconds on each side. Use a slotted spoon to gently flip them over. The dough will puff up and bob in the oil. When it's flipped you'll notice a light colored saturn ring or belt around the center. This is a sign of properly proofed dough.
- Using a slotted spoon carefully remove donuts from the oil and place them on the paper towel lined trays.
- While they're still warm gently coat in granulated sugar or let cool completely for a sugar glaze.granulated sugar
Vanilla Donut Glaze
- Combine all ingredients into a bowl and stir with a fork until smooth. Place in a shallow bowl and dip the top of warm donuts then nvert donut on a plate glaze side up to set. Warm the glaze if it starts to thicken too much.240 grams powdered sugar, 60 grams whole milk, 1 tsp vanilla extract or vanilla bean paste, 42 grams unsalted butter
Chocolate Donut Glaze
- Add all the ingredients to a medium saucepan on medium heat. Stir slowly and continuously with a psatula until everything is melted and smooth. Remove from the heat and dip cooled donuts in the glaze. Reheat slightly if it gets to thick.110 grams unsalted European style butter (82% butterfat), 200 grams 70% dark chocolate, 20 grams water, 28 grams honey , 60 grams unsalted butter, ½ tsp instant espresso powder
Notes
- Flour:
- King Arthur All Purpose Flour 11.7 % protein
- French Farine T55 and T65 with 11-12% protein
- Swap evenly for Bread Flour with 12-12.7% protein, for a slightly chewier more open crumb texture.
- Butter: European Style President Unsalted Butter 82% butterfat
