
This post contains affiliate links. Please see our disclosure policy.
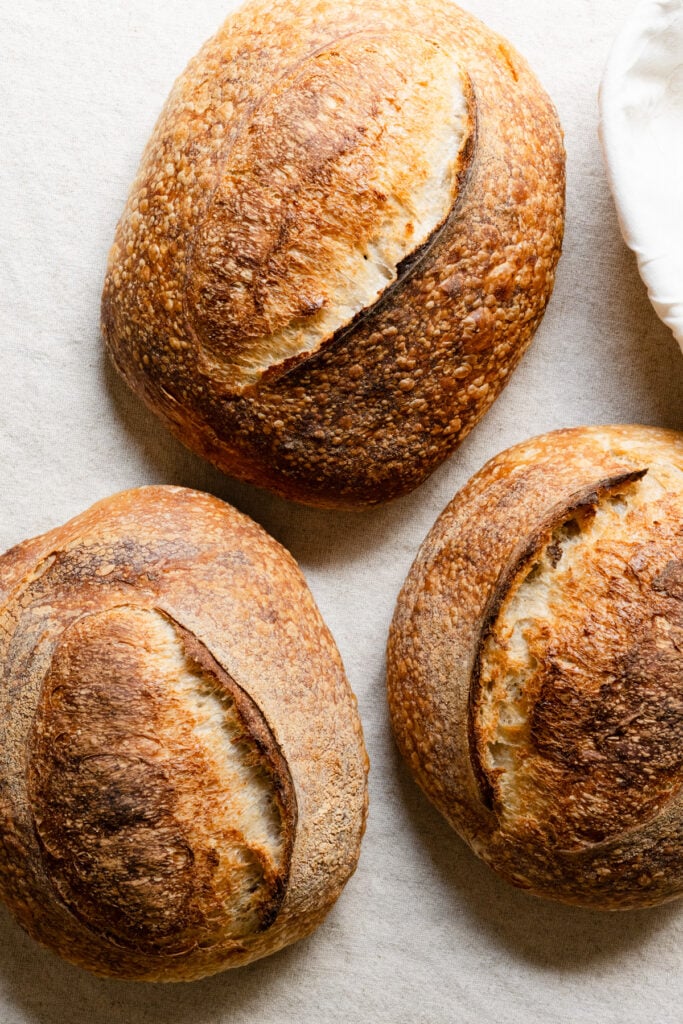
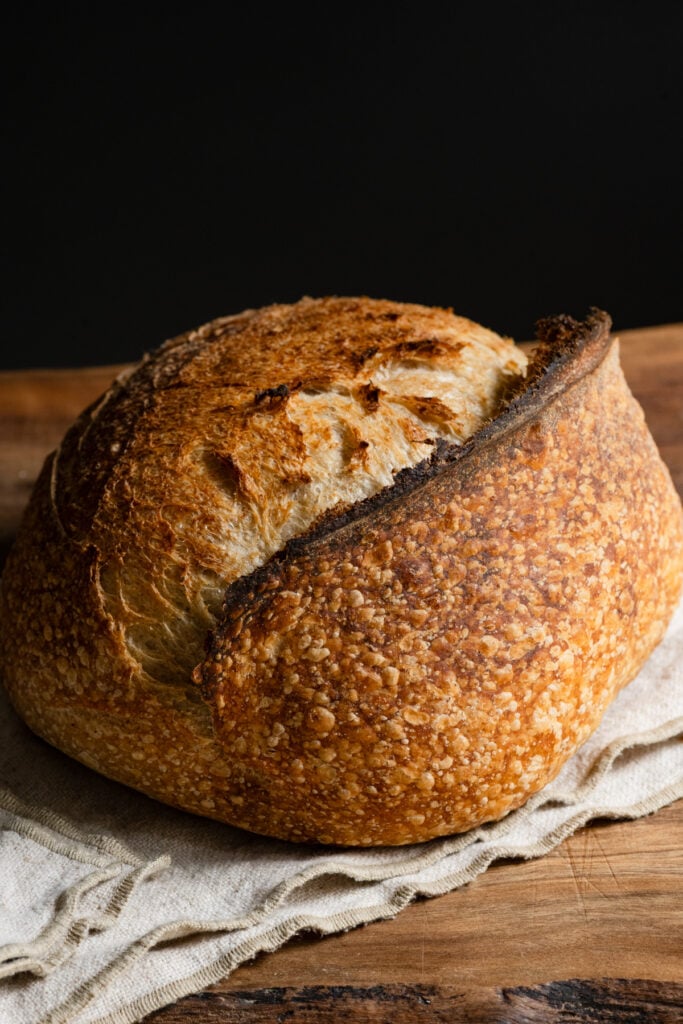
There’s nothing more exciting to a baker than pulling a homemade loaf of sourdough from your own oven. This is my everyday sourdough recipe, yielding a golden, blistered crust, a medium open crumb, and that delicious, naturally tangy sourdough flavor. Below is my guide to making bakery-worthy sourdough loaves at home.
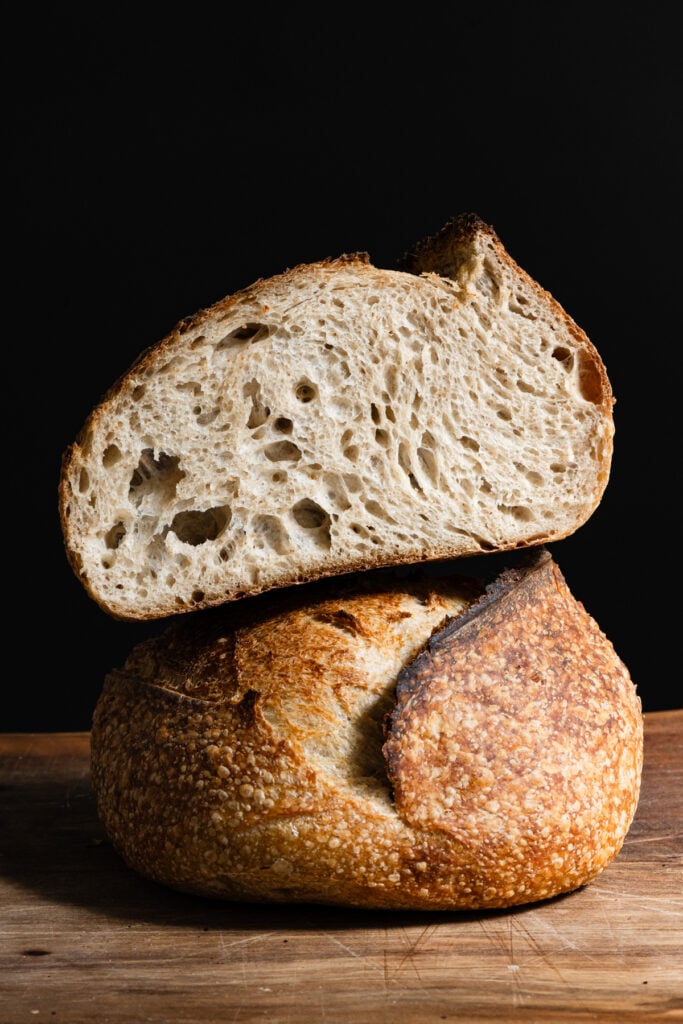
Table of Contents
- Sourdough Terms
- Homemade Sourdough Bread Ingredients
- Stand Mixer or Mixing Dough by Hand
- Basic Equipment for Sourdough Bread
- Next Level Sourdough Equipment
- Baker’s Percentage and Hydration
- Sample Schedule for Sourdough Bread
- Temperature and Rise For Bulk Fermentation
- How to Make Sourdough Bread
- Jenn’s Sourdough Bread Tips
- Storing Baked Bread
- Everyday Sourdough Bread Recipe
I’ve combined the country loaf recipe from Tartine Bread with techniques I learned in French baking school to create what has become my ideal loaf. After testing many different flours, including French flours, I found that my favorite flavor and chewy crust come from a combination of 00 flour and whole-wheat flour.
I make my sourdough starter with a combination of all-purpose flour and rye flour, which I use to create a separate levain on baking day. The addition of whole grains gives the bread a deeper, more complex flavor. Plus, it adds a little extra kick to the rise and structure.
Sourdough Terms
- Sourdough Starter (also known as Levain): A living culture of wild yeast and beneficial bacteria made by fermenting flour with water. Once established and healthy, your starter can be used to make a levain for baking bread.
- Levain: A portion of active sourdough starter mixed with fresh flour and water. Levain is left to ferment until active and bubbly, around 2 hrs. I make a small, separate levain specifically for baking day rather than using my entire starter.
- Bassinage: This is the process of adding a small amount of reserve water to the dough after the initial mix and rest. A French technique that increases the dough’s hydration and helps the salt mix in more easily.
- Coil Folds: A gentle folding method used to build strength in the dough. I use it in place of stretch-and-folds, since it’s gentler and helps retain the air bubbles formed during bulk fermentation. With damp hands, I grab the dough at the sides of the center, lift it stretching upwards, and fold it underneath itself.
- Fermentolyse: Mixing the flour, water, and levain together first, resting the dough, then adding the salt. This rest gives the flour time to fully hydrate and development gluten before the salt is incorporated.
- Note: This method is similar to autolyse, where the water and flour are mixed together and rested before proceeding with levain and salt.
- Bulk Fermentation: The first stage of fermentation, beginning when the levain is mixed into the dough and continuing until the dough is ready to be divided and shaped. During this time, the dough develops flavor, strength, and volume from carbon dioxide gas bubbles.
- Bench Rest: The short resting period after the dough has been divided and pre-shaped, before the final shaping. This allows the gluten to relax, making the dough easier to shape without tearing.
Note: If you’re just starting our sourdough journey and haven’t made a starter yet, learn how to make a sourdough starter from scratch. You can also purchase them ready to go or ask a bread baking friend for some.
Homemade Sourdough Bread Ingredients
- Levain: Rather than adding my mature starter directly to the dough, I build a separate levain, a freshly fed culture made specifically for baking day. This French-style method gives me more control over the strength and timing of fermentation and acts as a fresh “power feed” for the dough.
- My sourdough starter and levain are both made with a mixture of bread flour, rye flour, and water. The rye gives a little extra kick start to the fermentation.
- Note: If your sourdough starter is ripe and ready to go, you can definitely use it instead of making a separate levain.
- My sourdough starter and levain are both made with a mixture of bread flour, rye flour, and water. The rye gives a little extra kick start to the fermentation.
- 00 Flour or Bread Flour: I like my sourdough with a chewy crust and a sturdy crumb that holds up well for sandwiches. For this loaf, I’m using 00 flour with 13% protein. Using a strong bread flour may require additional water to fully hydrate (around 20-50 grams).
- Note: My favorite flours to use are Caputo Cuoco (Chef’s) 00 Flour, Caputo Bread Flour or King Arthur Bread Flour.
- Whole Wheat Flour: A touch of whole wheat flour adds a subtle nuttiness and enhances the bread’s overall flavor.
- Note: Use a quality organic wheat flour for the best flavor. In France, I use T150 biologique flour, which is equivalent to US whole wheat flour.
- Water: I adjust the temperature of my mixing water based on the room temperature and the temperature of my flour. The French master bakers I learned from in France taught me to use this approach, known as the base temperature method.
- Note: I use cooler water in a warm kitchen and warmer water in a cool one to keep my dough at 76–78°F.
- Salt: Besides seasoning the bread, salt regulates fermentation and strengthens the gluten network, helping the dough develop structure and hold its shape.
- Note: I use fine sea salt, which dissolves easily into the dough and distributes evenly throughout the loaf.
Stand Mixer or Mixing Dough by Hand
Maybe it’s because I’m getting older, or because I learned to make bread alongside French bakers who all use mixers, but I prefer mixing my dough with a stand mixer. I find it creates a stronger dough that’s easier to shape, giving me loaves with good oven spring and even crumbs.
Stand Mixer: The biggest thing to watch when using a stand mixer is speed. Keep it low to avoid overheating the dough. Adding cool water and checking the dough temperature with a thermometer, is my way to keep it below 84°F (29°C). I use my KitchenAid stand mixer on speed 2 with the dough hook for the initial mix and again after adding the salt and reserved water. To finish building the dough, I perform gentle coil folds by hand.
Mixing By Hand: You can absolutely make excellent bread by hand. It just takes a little more elbow grease and time to develop the gluten. If you prefer mixing by hand, stick with it. There are no hard and fast rules when it comes to making bread.
Basic Equipment for Sourdough Bread
- Stand Mixer: While you can absolutely make sourdough by hand, I was taught by French bakery chefs to use a stand mixer to develop a strong gluten network from the start. It also makes the process much easier on your hands and wrists.
- Large Bowl or Plastic Bread Tub: Use a container that’s about double the size of the dough to perform coil folds and for resting.
- Bannetons: The little nesting baskets that hold shaped loaves for their final long cold fermentation in the fridge.
- Plastic Cover: I really love using plastic shower caps with elastic bands that easily fit around my bowl. But you can also use large plastic bags that will fit over your mixing bowl and bannetons.
- Bread Lame: It doesn’t really matter whether you use a long or short-handled lame. Make sure you have a sharp blade for scoring your dough.
- Dutch Oven: I love baking bread at home, and it’s so easy using a Dutch oven. The covered pot traps moisture released by the dough, creating a steamy environment similar to that of a professional steam oven. Steam is what helps the bread rise and develop a beautifully crisp, shiny crust.
- Silicone Bread Sling: While you can definitely use parchment paper, I really like how easy it is to transfer my dough with a bread sling.
- I flip my cold dough from the banneton directly onto the silicone mat and use the long sides to lower it safely into the hot Dutch oven.
- The thickness of the silicone also slows heat transfer to the bottom of the bread, preventing a burnt undercrust.
Next Level Sourdough Equipment
You can absolutely make sourdough at room temperature without any special equipment. But if you bake often or want more control over fermentation, these two pieces of equipment can be game changers. Totally optional, of course!
- Sourdough Home: This is where I keep my sourdough starter. It creates a temperature-controlled environment with a small fan, so I can keep my starter warm for daily feedings or cold when I’m not baking or traveling. It also means my starter doesn’t take up space in the refrigerator and I can keep it at a consistent temperature.
- Proofing Box: A foldable, temperature-controlled box that sits on the counter and can be tucked away when you’re not using it. I use it for my levain and dough, which makes it much easier to control fermentation. Whether my kitchen is too warm or too cold, I can set the temperature I want and more easily track how it affects my dough.
Baker’s Percentage and Hydration
Baker’s percentage is a simple way to compare every ingredient in a bread recipe to the total amount of flour. The flour is always 100%.
This recipe is a 75% hydration sourdough, with 20% levain, and 2% salt.
- 00 flour: 900g
- Whole wheat flour: 90g
- Rye Flour: 10g
- Total flour: 1,000g = 100%
- Water: 750g
- Levain: 200 g
- Salt: 20g
750g water ÷ 1,000g flour × 100 = 75% hydration
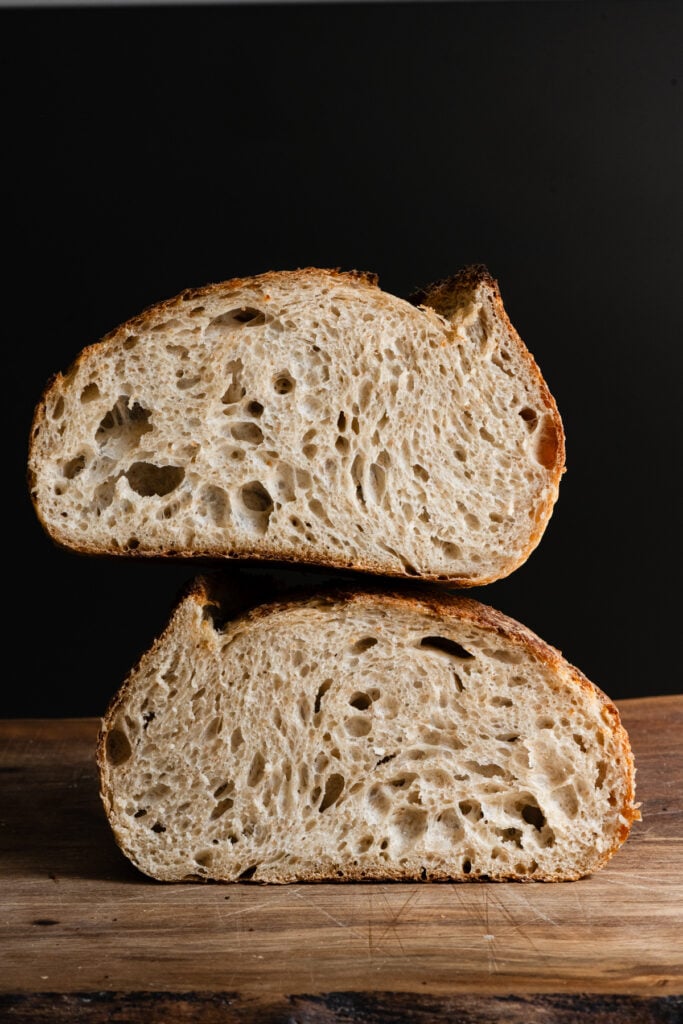
Hydration affects how the dough feels and how the finished bread looks. I prefer a medium-open crumb: enough airiness to make a beautiful loaf, but with plenty of surface area for spreading butter or jam.
- Lower hydration: Stiffer, easier to handle dough with a tighter crumb
- Higher hydration: Softer, more delicate dough with larger open crumb holes
- 75% hydration: A nice middle ground, soft enough for a light crumb, but not so open that your butter and jam fall through the holes!
Tip: Weigh your ingredients with a digital scale! Measuring in cups does not account for ingredient density. Not properly weighing can lead to using too much or too little of an ingredient for a dough that’s dry, dense, or overly sticky.
Sample Schedule for Sourdough Bread
Homemade sourdough takes time and attention, but most of the work is hands-off. The times below are flexible, depending on when you mix your dough and plan to bake.
This schedule is a timeline example and not meant to be followed exactly. Your dough schedule may vary depending on the temperature of your dough/starter, the activity of your starter, and the temperature of your environment. I keep my dough at a temperature of 78-82ºF (25-28ºF). If your dough is colder, fermentation can take much longer. On the other hand, if your dough is warmer, it will ferment faster.
| Day 1 | Make Dough |
|---|---|
| 8:00 AM – 12:00 PM | Mix Levain (or feed your starter): Mix together ripe sourdough starter, water and flour to make levain. Let rest at 78-82ºF (25-28ºC) doubled in size and bubbly about 2-3 hours. |
| 12:00 PM | Mix together levain, water, and flours. Fermentolyse by resting for 40 min. Bulk fermentation has now begun! |
| 12:30 PM | Mix in reserve bassonage water and salt. Rest 30 min. |
| 1:00 PM | Perform 1st set of coil folds, then rest |
| 1:30 PM | 2nd set of stretch and folds, then rest |
| 2:00 PM | 3rd set of stretch and folds, then rest – check gluten formation, if dough feels weak and not holding shape, you can add one more set of coil folds after 30 min. for a 4th coil fold |
| 2:00 – 5:00 PM | Rest dough for remainder of bulk fermentation (this could take longer if dough is colder, up to several hrs.) |
| 5:00 PM | Divide dough into two halves, pre-shape and rest on the counter uncovered. |
| 5:30 PM | Final shaping, place loaves in banneton, refrigerate for 12-48 hrs |
| Day 2 | Bake |
|---|---|
| 10:00 AM | Preheat oven with the dutch oven inside |
| 11:00 AM | Bake loaves |
| 12:00 PM | Let loaves cool for at least 1hr before slicing. |
Temperature and Rise For Bulk Fermentation
After your final coil fold, let the dough rest for the remainder of the bulk fermentation. The temperature of your dough can help you know when it’s ready. I don’t always wait for the dough to double in size. Instead, I check its temperature, watch how much it has risen, and look for signs that it’s ready to shape.
The warmer the dough, the faster it ferments, so it needs less rise. Cooler dough ferments more slowly, so it needs more time and a greater rise.
For example, if you mix your dough at 8am and it stays around 75°F (24°C) throughout bulk fermentation, it may be ready to divide and shape after about 5–7 hours, once it has risen about 50%.
Use these as general guidelines, not strict rules. Your starter, flour, and kitchen temperature can all affect fermentation time. Summer baking usually goes faster than winter baking, unless you use a temperature controlled environment.
- 80°F (27°C): 30% rise (about 3.5 to 5.5 hours)
- 75°F (24°C): 50% rise (about 5 to 7 hours)
- 70°F (21°C): 75% rise (about 8 to 12 hours)
- 65°F (18°C): 100% rise (about 12 to 16 hours)
How to Make Sourdough Bread
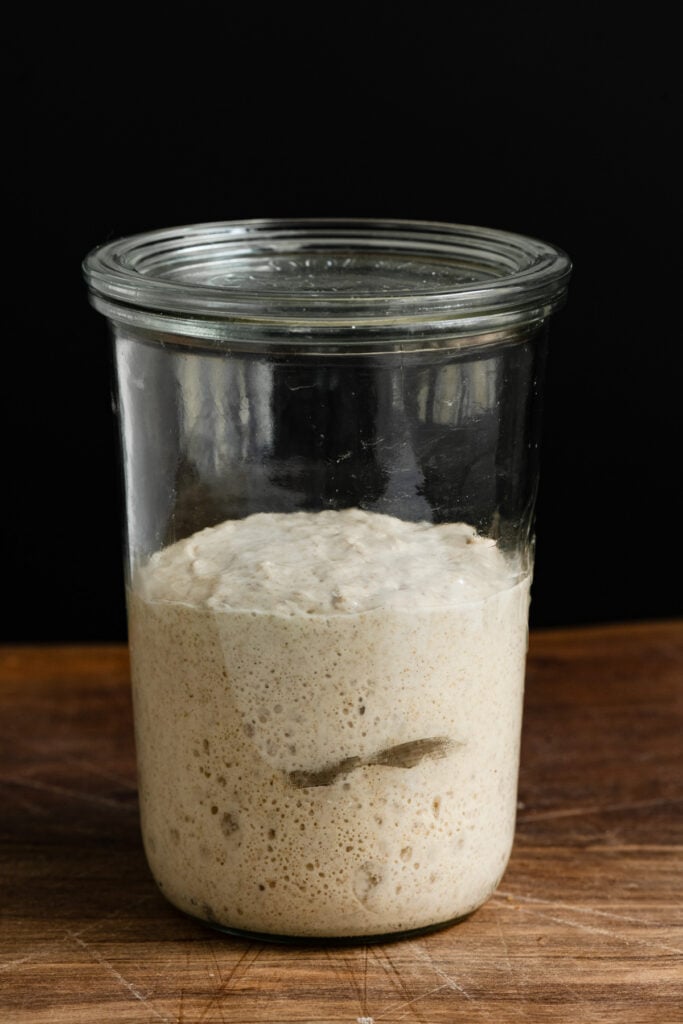
- Feed your sourdough starter or build a fresh levain (min-starter). Let rise until doubled and slightly domed.
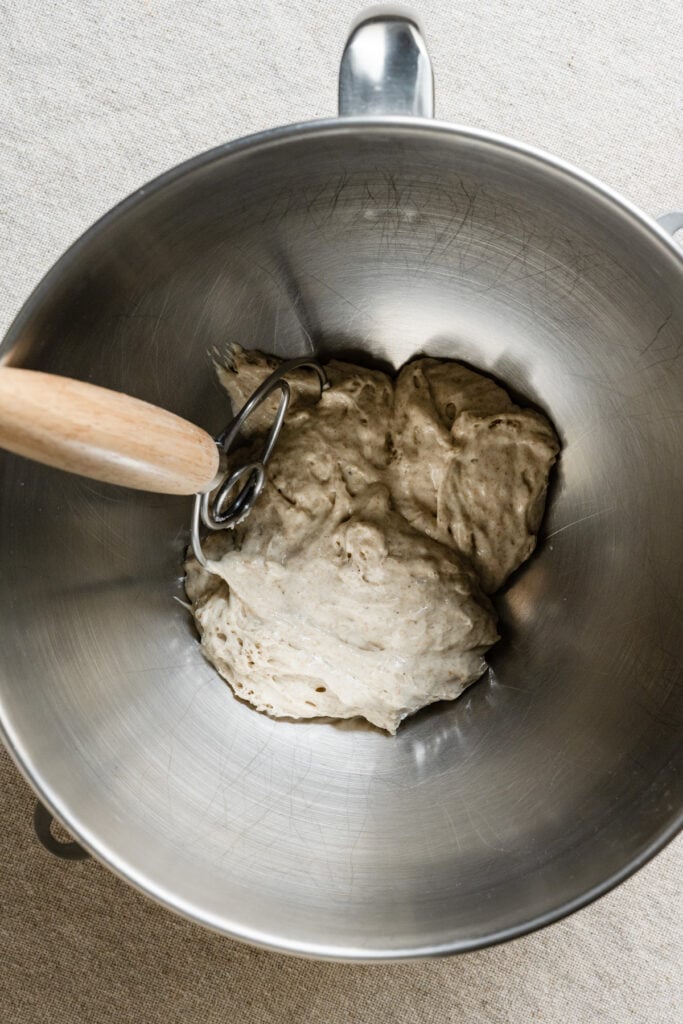
- Measure out the ripe levain and place it in the bowl of stand mixer. Or a large bowl if mixing by hand.
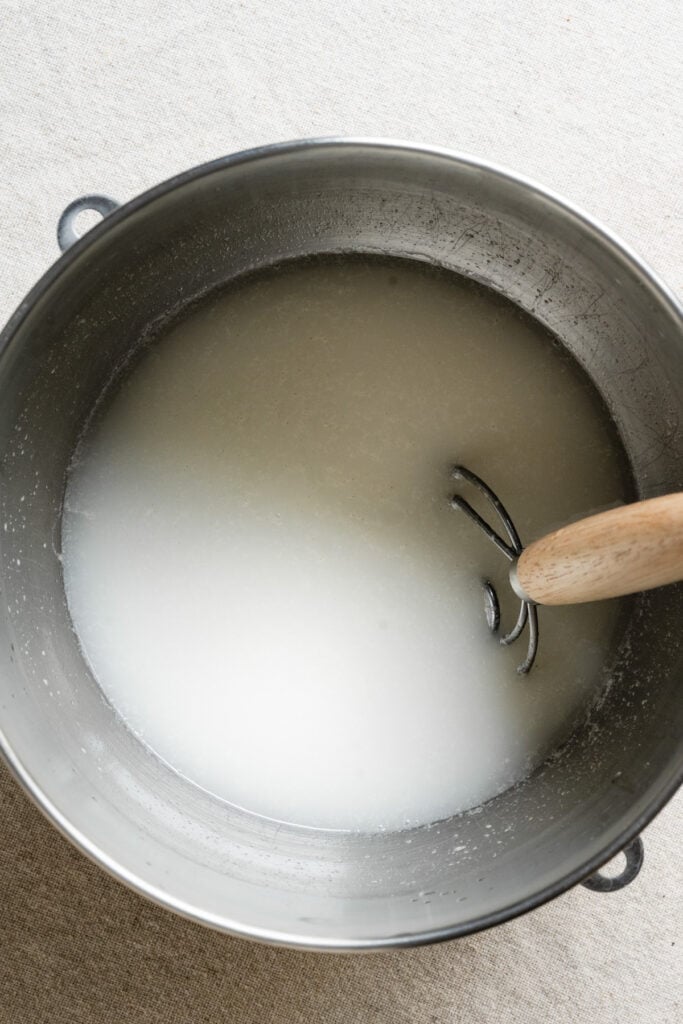
- Pour water #1 into the bowl with the levain and mix together using a dough whisk.
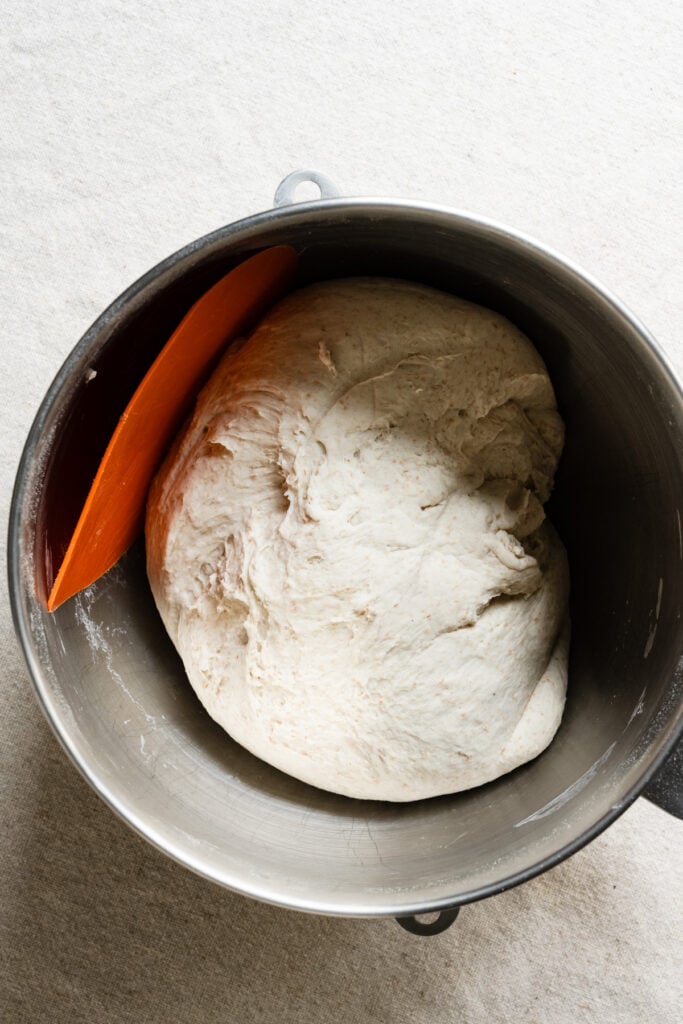
- Add the flours and mix on low speed with dough hook for about 3 minutes until the dough comes together. Or by hand to form a thick shaggy dough. Rest for 40 minutes.
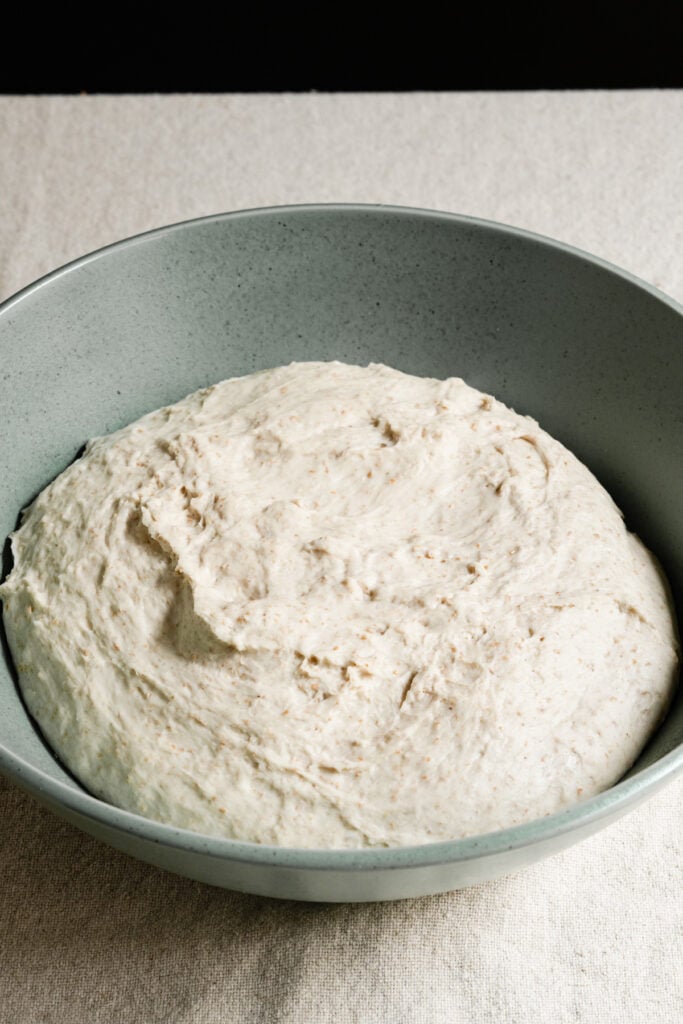
- Mix in the salt and water #2 (bassinage) while slowly mixing on low speed. Or mix in by hand by grabbing and squeezing the dough to work in the water and salt. It will be tacky and strong. Rest for 30 minutes.
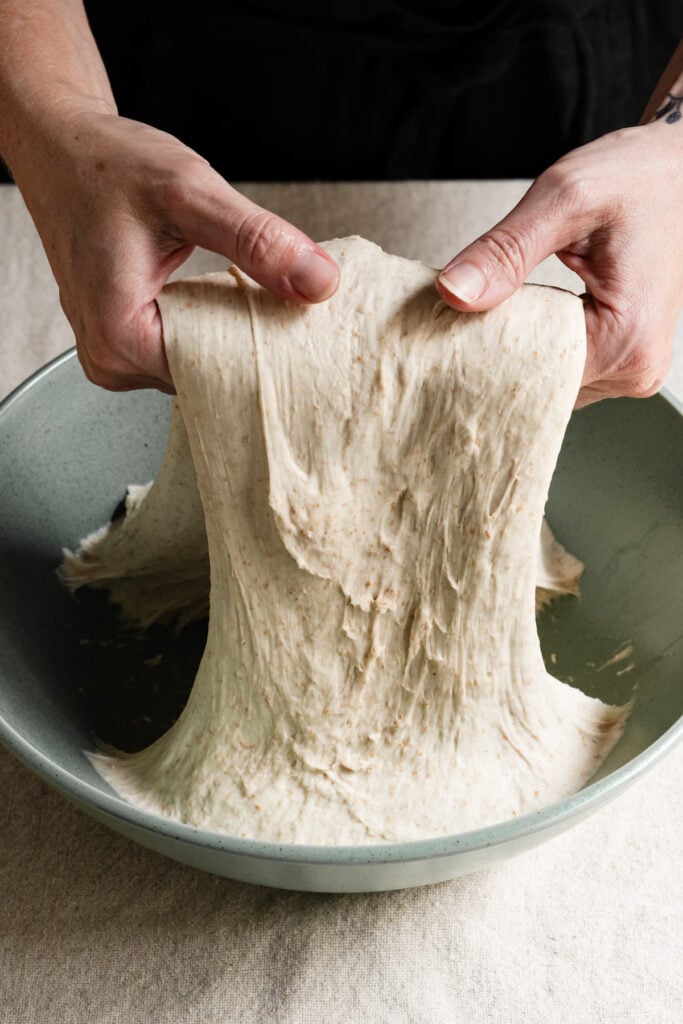
- Coil Folds 1: Perform the first set of coil folds. Lightly wet your hands, then gently lift the dough from the center and fold it back onto itself. The dough will stick to the bowl some and feel stretchy at first.
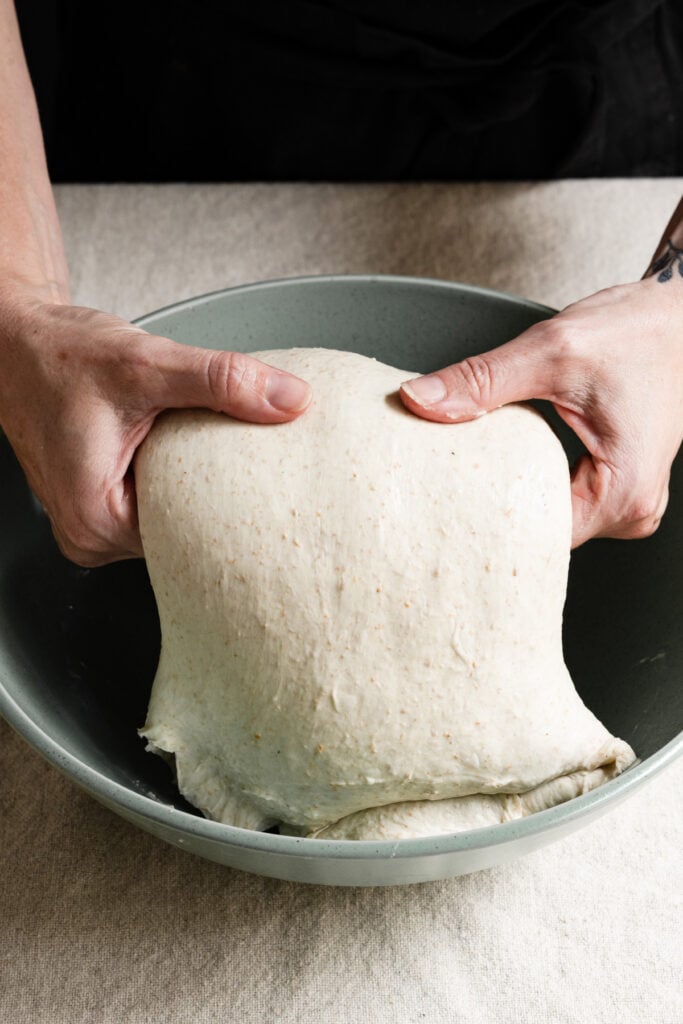
- Wet your hands for each fold. Rotate the bowl and repeat until the dough feels stronger, holds its shape, and has some tension.
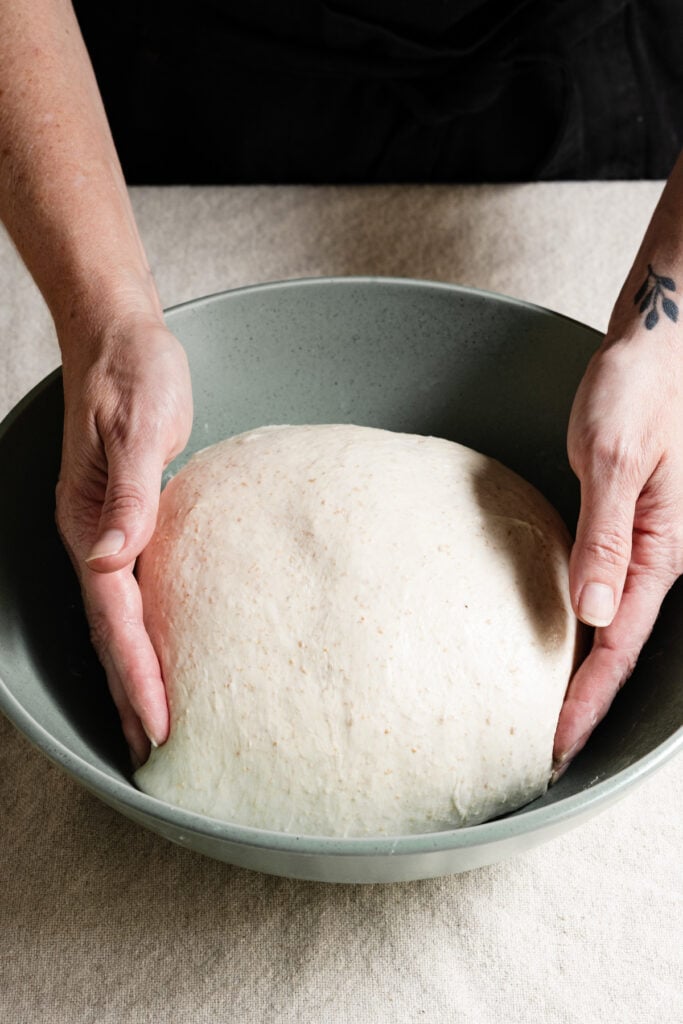
- It will become smoother with each fold. I usually only do one from each side. Cover and let rest 30 min. Repeat two more times, resting between each set for a total of 3 coils folds.
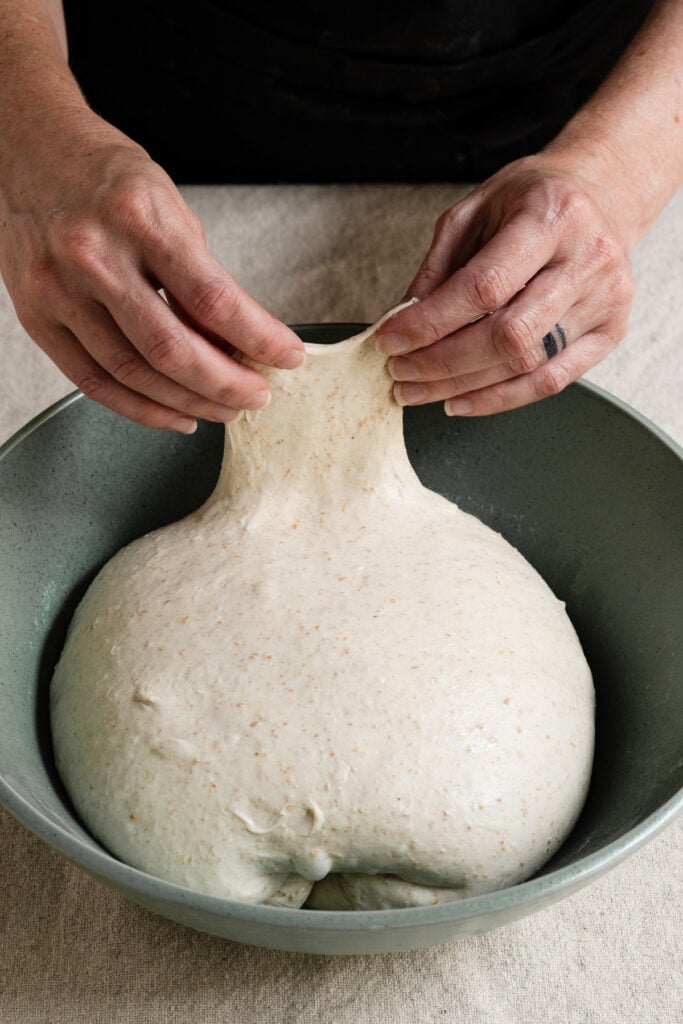
- After the third coil fold, check the temperature of the dough to gauge how long it may still need to rest. Pull up a corner for a window-pane-test to check gluten formation. If the dough easily tears do one more round of coil folds, but if its strong cover and rest.
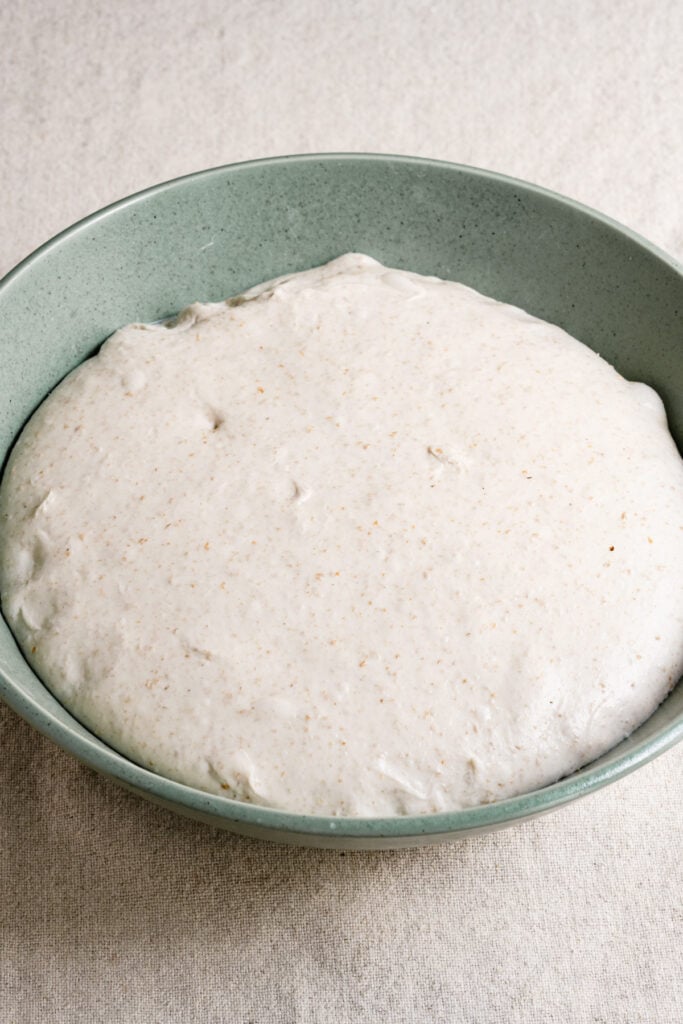
- Continue to bulk ferment until ready to shape. Keep an eye on your dough, checking often as the clock isn’t the best indicator. The dough characteristics will let you know when its ready.
When is bulk fermentation complete and dough ready shape?
- Risen about 40% at 78-80ºF (if your temperature is cooler you want the dough to rise more)
- Doming toward the middle and pulling away from the edges of the bowl
- Puffed up, jiggly in the center, and a few scattered bubbles on the surface
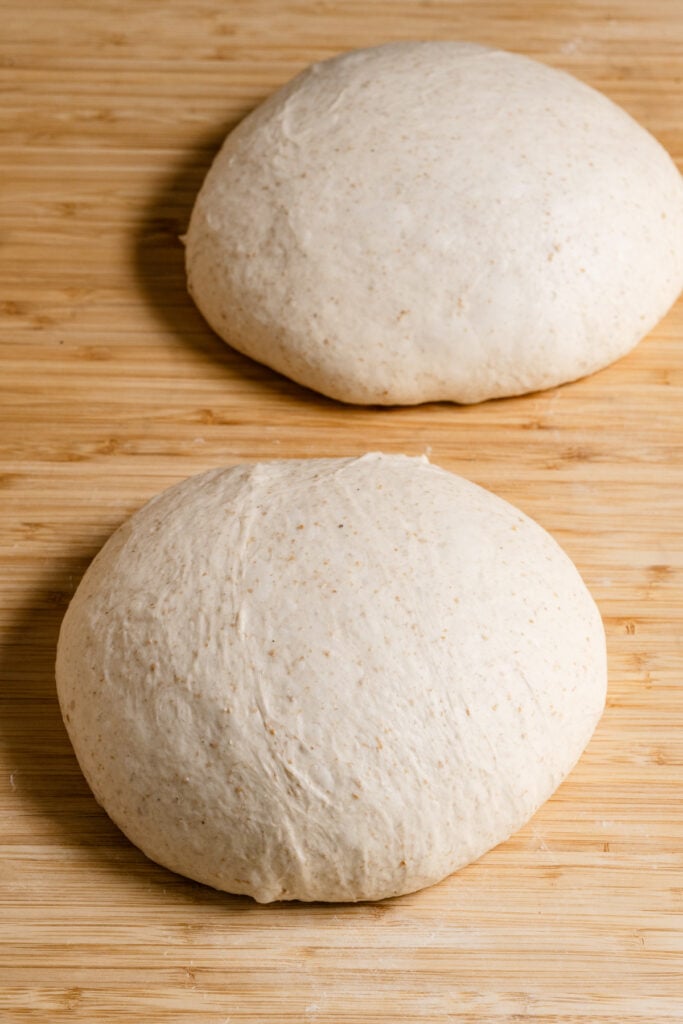
- Divide the dough into two halves and gently shape into rounds using your hands or a bench scraper. Cupping the dough and moving away and back towards yourself in a circular motion. I like to spray my hands lightly with water instead of using flour. The work surface should be plain or very lightly dusted with flour to be able to grip the dough without drying it out.
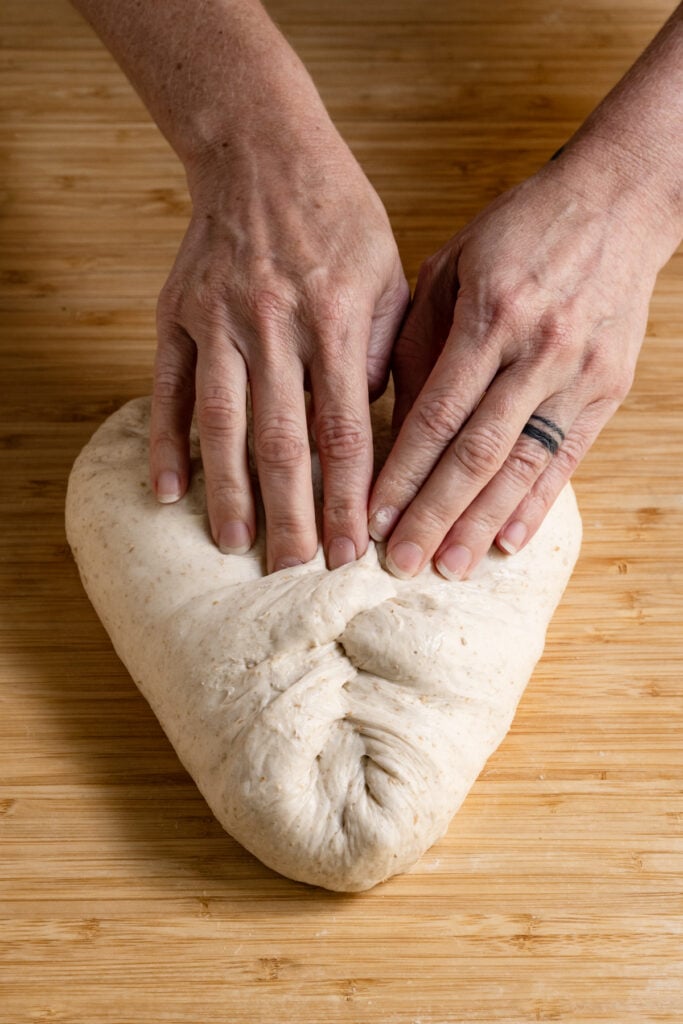
- Start shaping by flipping the pre-shaped dough upside down on the work surface. Wet your palms lightly with water and grab a piece of dough at the “shoulders” and fold them inwards to towards the middle.
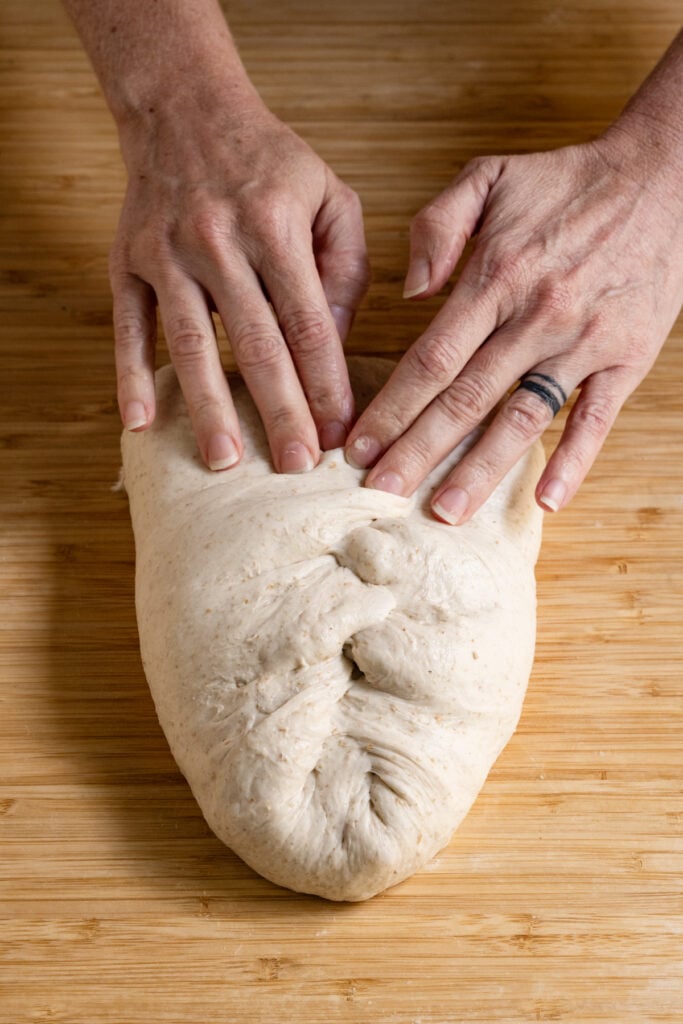
- Repeat in the middle “knees” and the lower corners “toes”.
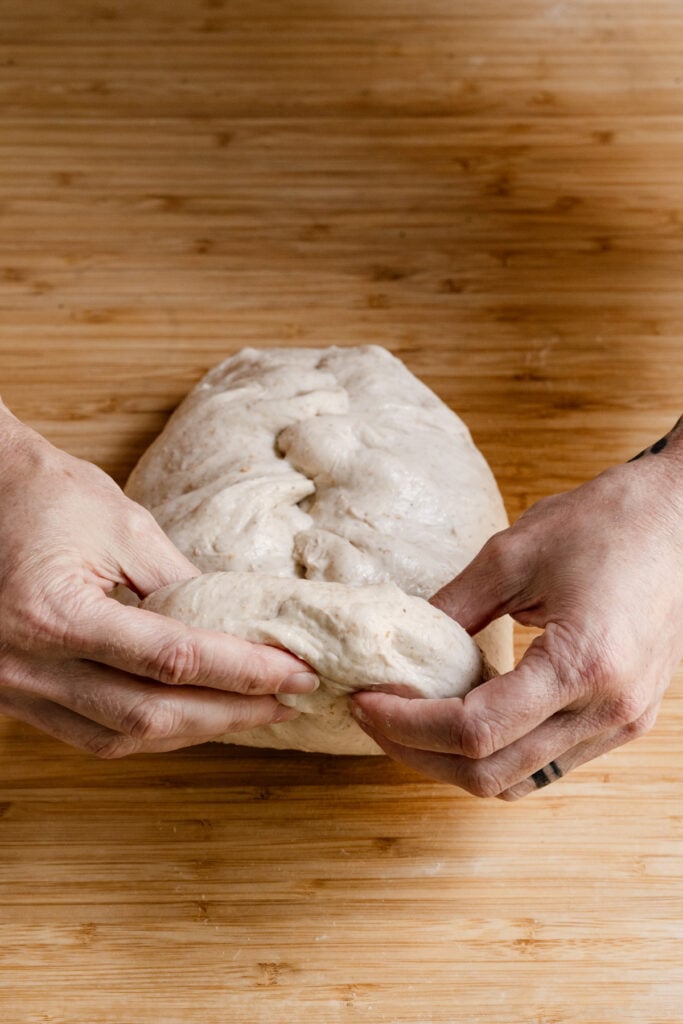
- Grab the dough gently at the top and lightly stretch upward and then roll the dough inwards onto itself to create a log.
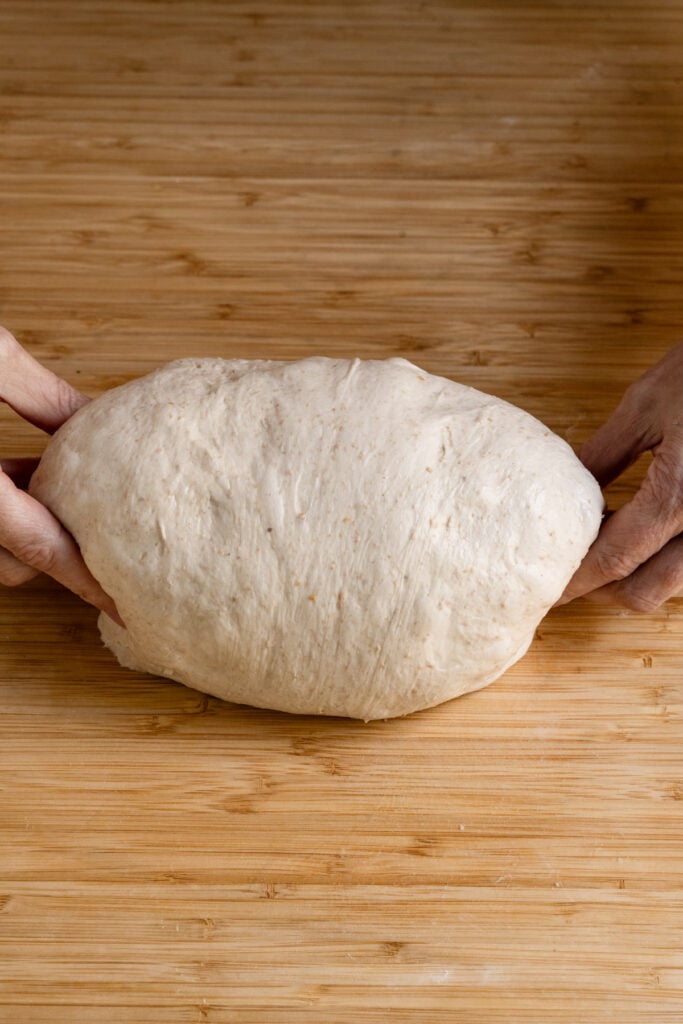
- Gently pinch and tuck the ends together.
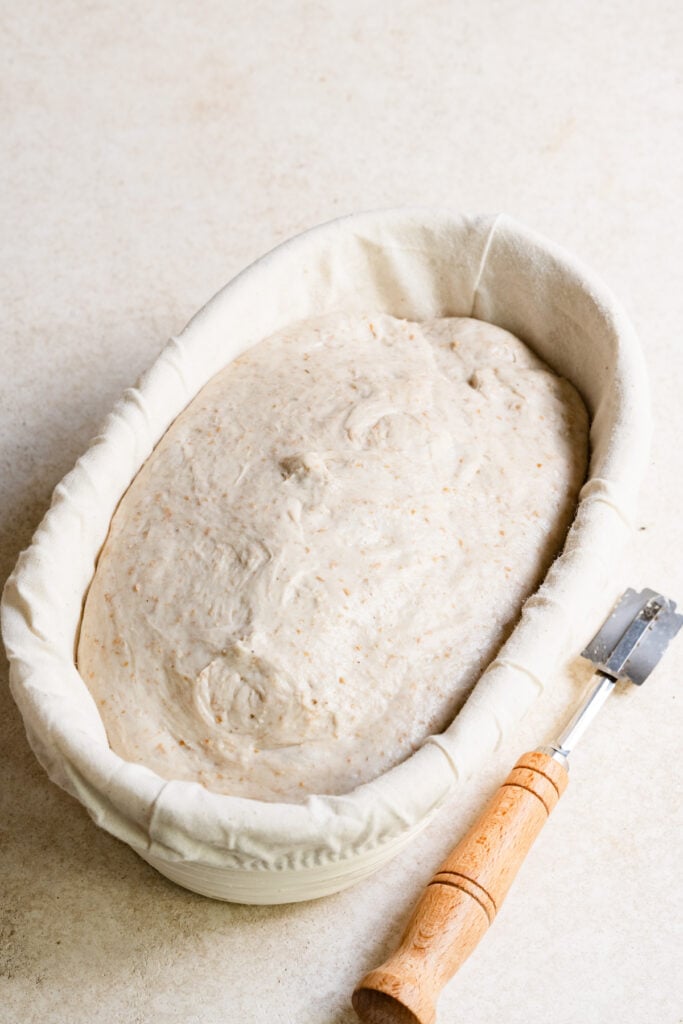
- Using a bench scraper, carefully flip the dough seem side up and set in into the banneton. Pinch the seem together, cover and refigerate for 12-16hrs.
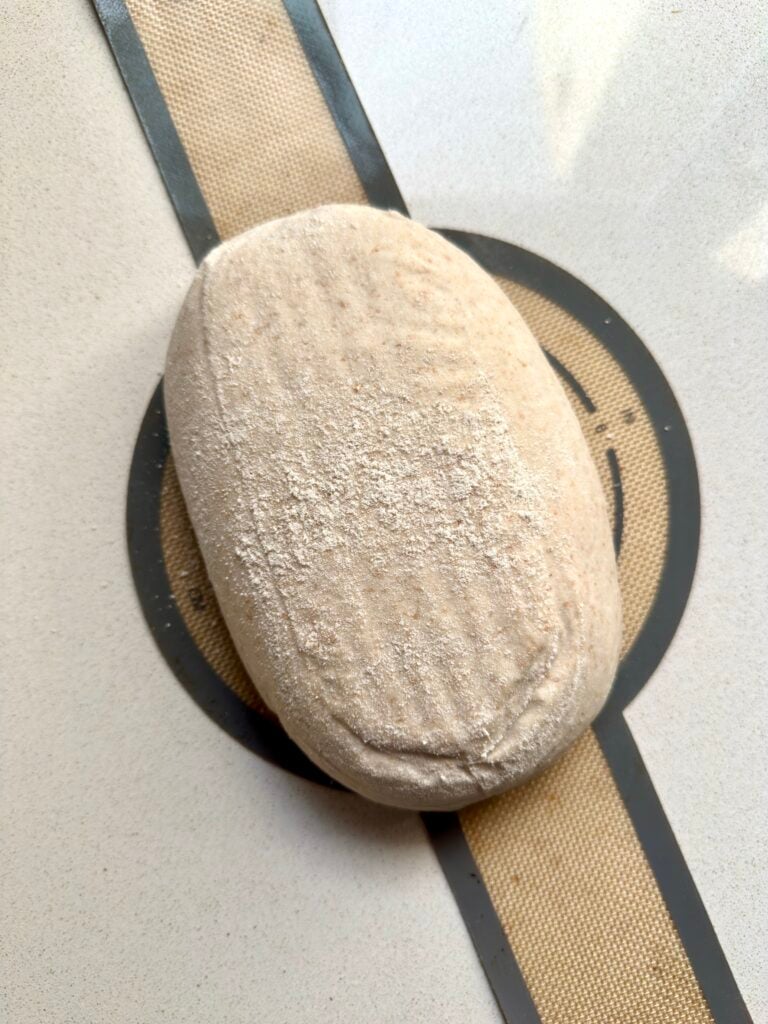
- Flip the cold overnight proofed dough onto a silicone dough sling or parchment paper. Lightly spritz with water and score one long cut, slightly off center at a 45 degree angle.
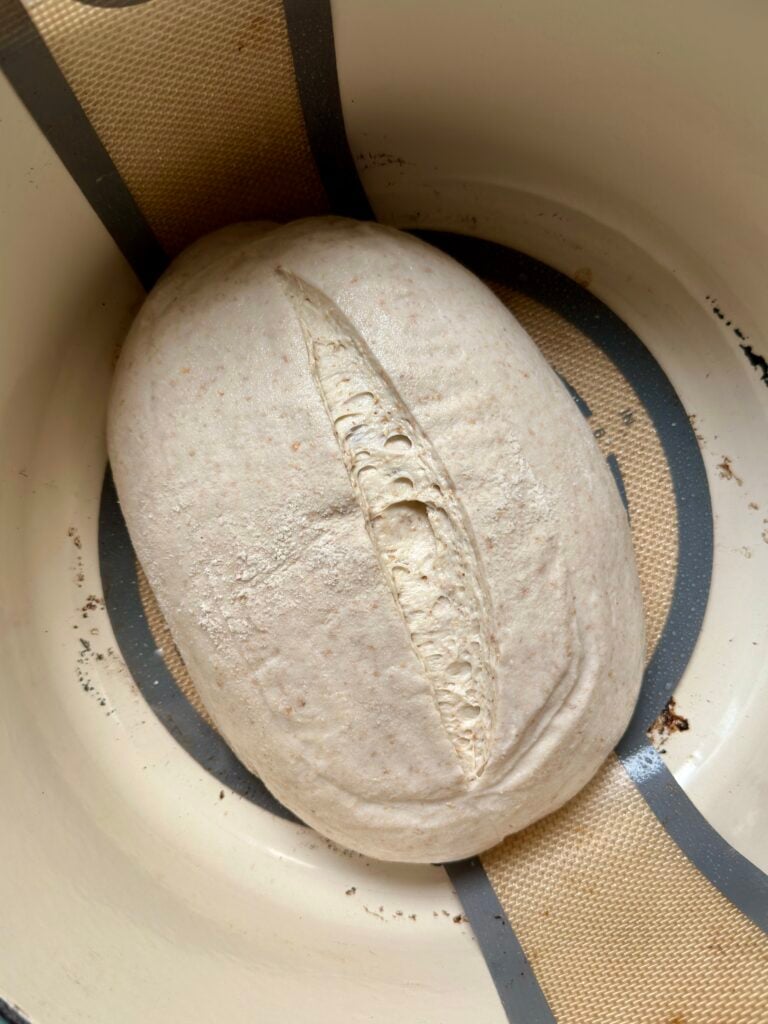
- Lower the dough into the pre-heated hot dutch oven and bake for 30 minutes.
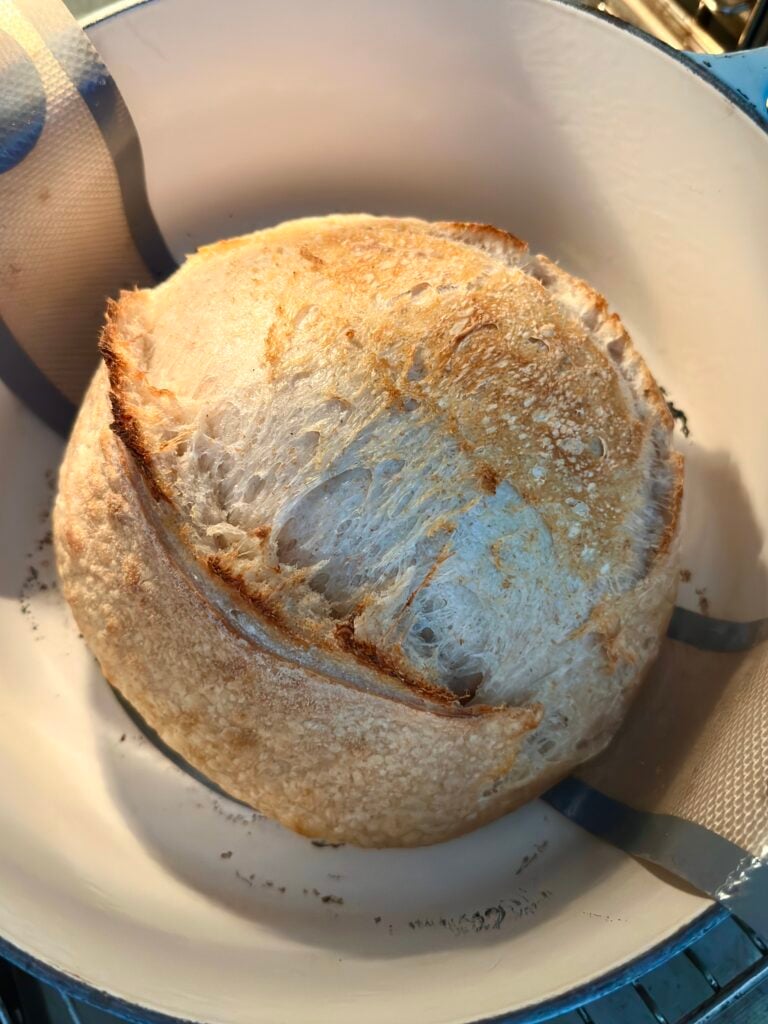
- Remove the lid and lower the temp. Continuing baking another 15 minutes until dark golden.
Jenn’s Sourdough Bread Tips
- Use a Kitchen Scale: Breadmaking requires precise measurements of flour and water to track hydration. Measuring with cups won’t cut it, sorry!
- Use a Strong Starter: Successful sourdough bread depends on a helathy starter.
- A well-maintained sourdough starter that is fed either daily or twice daily before baking is ideal.
- Using the levain method to create a mini-starter the morning you make the dough gives a sluggish or from-the-fridge starter a good jump start.
- Use Active Levain: A levain or starter that has doubled in size and peaked (domed) will have the most active yeast and the least acidity.
- Temperature Matters: The temperature of your dough (and starter) affects how quickly it will rise. I use a thermometer to check my dough’s temp to estimate how long bulk fermentation will last. Again, things move faster with warmer dough.
- The temperature of your kitchen will change throughout the year, which will affect bulk fermentation time.
- Wait Before You Slice: Cutting into a hot loaf of bread releases trapped steam, resulting in a gummy, sticky crumb. Try to be patient and let it cool for 1-2 hrs before slicing.
Storing Baked Bread
Room Temp: Store leftover sourdough bread in an airtight container or bread bag at room temperature for a day or two.
Freezer: Cut the bread into slices and put a piece of parchment in between each slice. Wrap in freezer safe film and freeze for up to three months.
★★★★★ Please leave a star rating and review below if you make this recipe! THANK YOU!!
Everyday Sourdough Bread
Equipment
- electric stand mixer optional
- 2 banneton bread baskets
- 6 qt. dutch oven
- 1 bread lame
- spray water bottle optional
Ingredients
Levain
- 50 grams sourdough starter
- 50 grams 00 bread flour (13% protein)
- 50 grams medium or light rye flour
- 100 grams warm water
Everyday Sourdough Bread
- 900 grams 00 bread flour (13% protein), I use Caputo Cuoco (Chef's) 00 flour or Caputo Bread Flour
- 90 grams whole wheat flour, or French T150
- 10 grams medium or light rye flour, or French T130
- 730 grams water #1, cool
- 200 grams levain or ripe sourdough starter
- 20 grams fine sea salt
- 20 grams water #2 (bassinage), cool
Extras
- rice flour, for dusting bannetons
Instructions
Build Your Levain
- This recipe starts with a separate levain made from your main sourdough starter. If you already have a ripe, bubbly, active starter ready to use, you can skip this step and use it in place of the levain.
- To make the levain, mix the sourdough starter, flours, and warm water in a clear jar with a lid. Mark the level of the mixed levain with a rubber band or marker. Cover and let sit at warm room temperature (78–80°F) for 2–3 hours, until bubbly and doubled in size. Once the levain has reached its peak height, it’s ready to use.50 grams sourdough starter, 50 grams 00 bread flour (13% protein), 50 grams medium or light rye flour , 100 grams warm water
- At this point, feed your main sourdough starter (your “mother”) and either leave it at room temperature or return it to the refrigerator.
Mixing Dough with Stand Mixer
- Mix Dough and Fermentolyse: In the bowl of a stand mixer, combine 200 grams of ripe levain and water #1, then mix by hand with a dough whisk to blend the two. Next, add the 00 and whole-wheat flours. Using the dough hook, mix on low speed (No. 2 on a KitchenAid) for 2-3 minutes. Using a higher speed will overheat the dough.900 grams 00 bread flour (13% protein), 90 grams whole wheat flour, 730 grams water #1, 200 grams levain or ripe sourdough starter, 10 grams medium or light rye flour
- Stop halfway through to scrape the bowl's bottom and sides with a bowl scraper, catching any dry bits. This initial mix will help build a strong gluten structure in the dough. The dough should not get warmer than 82°F (28°C).
- Cover and let rest at 78–80°F for 40 minutes. This is the fermentolyse, where the dough rests before the salt is added. You’ll add the salt along with a small amount of reserved water (bassinage) during the final mix.
- Final Mix of Salt and Water: Sprinkle the salt and water #2 over the dough. Mix on low speed with the dough hook until combined, 1-2 minutes. Scrape the dough into a large ceramic or glass bowl, or a plastic dough tub. Cover and let rest for 30 minutes.20 grams fine sea salt, 20 grams water #2 (bassinage)
Optional Mixing By Hand
- Mix By Hand: In a large mixing bowl, use a dough whisk to whisk the levain and water together until well combined. Add the flour and mix by hand until no dry flour remains and a shaggy dough forms. Cover and rest for 40 minutes.
- Final Mix of Salt and Water: Sprinkle the salt and water #2 over the dough. Use your hand to squeeze them into the dough, then perform a few stretch-and-folds to incorporate them fully. Grab one side of the dough, pull it upward, then stretch it back over itself. Rotate the bowl and repeat for two turns, or until the salt and water are evenly incorporated. Cover and let rest for 30 minutes.
Coil Folds
- Now that the dough has been fully mixed, you will give it 3 sets of coil folds at 30-minute intervals.
- Coil Fold #1: Lightly wet your hands, and tuck them underneath both sides of the dough. Scoop underneath and slowly lift, allowing the dough to stretch upward. The ends may still cling to the bowl at this stage, that’s okay. Tuck whatever you can underneath itself.
- Rotate the bowl 90 degrees and repeat. It may take two turns before the dough begins to resist, hold its shape, and form a more round blob rather than loose, shaggy dough. Cover and rest for 30 minutes at 78–80°F.
- Coil Fold #2: Repeat the coil folds. The dough should already feel less shaggy, more stretchy, and more cohesive. Cover and rest for another 30 minutes.
- Coil Fold #3: Repeat the coil folds. The dough should continue to strengthen, becoming increasingly elastic and cohesive. If the dough feels a little slack, meaning not holding it shape or tension, you can do a 4th set of coil folds after an additional 30 minute rest.
- Cover and let rest for 2–3 hours. Keep the dough at room temperature 78–80°F otherwise, it will take longer in a cooler environment.
- End Bulk Fermentation: About 4–5 hours total should have passed since you first mixed the dough. Look for these signs that bulk fermentation is complete: the dough has risen about 40%, small scattered bubbles have formed across the surface, the dough easily pulls away from the sides of the bowl without tearing, the center begins to dome, and the dough feels more elastic.
- If the dough doesn’t look ready, let it ferment for another 30 minutes and check again.
Pre-Shape & Shape
- Prep bannetons with a light coating of sifted rice flour.rice flour
- Pre-Shape: Lightly flour your work surface and gently scrape out the dough. Using a bench knife, divide it in half. Lightly shape each piece into a round. Leave uncovered and rest for 30 minutes.
- Final Shape: Shape each loaf into either a round boule or oval batard using lightly wet hands. Place each loaf seam-side up in a proofing basket and pinch the seams together.
Cold Proof
- Cover the baskets and refrigerate for 12-48 hours.
Next Day Score and Bake
- Preheat the oven to 500°F (260°C) for 1 hour with the Dutch oven inside.
- When ready to bake, remove one loaf from the refrigerator. Turn it out of the banneton onto parchment paper or a silicone bread mat. Lightly mist the surface with water or dust with rice flour, then score the loaf with a bread lame.
- Carefully transfer the loaf to the preheated Dutch oven. Use oven mitts to cover with the hot lid and place on the middle rack. Bake for 30 minutes.
- Reduce the oven temperature to 450°F (230°C). With your oven mitts, remove the lid and bake for another 14–15 minutes, or until the internal temperature reaches 208°F (97°C) and the crust reaches your desired darkness.
- Remove the loaf from the Dutch oven and transfer directly onto a wire rack. Let cool for 2 hours before slicing.
- Repeat with the second loaf, reheating the Dutch oven and returning the oven temperature to 500°F (260°C) before baking.
Notes
- Storage
- Room Temp: Store leftover sourdough bread in an airtight container or bread bag at room temperature for a day or two.
- Freezer: Cut the bread into slices and put a piece of parchment in between each slice. Wrap in freezer safe film and freeze for up to three months.

I intend to give your recipe a try. There are slight differences from my regular routine but otherwise I’m well acquainted with the process. One notable difference for me is that your recipe, like many others I’ve seen, is for 1kg of dough whereas I typically make only 500g, enough for a single loaf. It shouldn’t make a difference but I wonder if some of the trouble I occasionally have might be owing to the difference. Have you attempted the recipe with the reduced dough size?
Looking forward to trying this!
Hi Gordon! I usually make a double batch since we eat a lot of bread. You should be fine with a single loaf, my main tip would be to watch the temp of the dough in the stand mixer. It may not need as long with a smaller amount of dough. Please let me know how it goes!