This post contains affiliate links. Please see our disclosure policy.
A classic Chocolate French Silk Pie made with a lush chocolate mousse filling, all butter pie crust, topped with vanilla chantilly whipped cream and chocolate shavings. It’s silky texture made with eggs, sugar, dark chocolate and whipped cream, have all my French friends saying…oh la la! A gorgeous chocolate pie that’s easy to make, but looks like you ordered it from a pastry shop.

A Chocolate Mousse Pie
French silk pie is an American dessert, with a namesake nod to classic French mousse au chocolat. You start by making chocolate mousse by tempering eggs with sugar for a rich silky chocolate. And then you fold in homemade whipped cream to create a light and airy chocolate pie filling.
The only baking required in this recipe is the blind baked pie crust. Then it’s all about melting chocolate and beating cream before you fill the pie shell. Place the pie in the fridge to set, just like you would my hazelnut chocolate mousse. A few hours later and you’re asking for another slice.
Key Ingredients & Test Notes
- Homemade “all butter” pie crust! My well tested and go-to pie dough recipe for any pie is made with butter.
- Test Note: If you’re in a jam, a store bought 9-inch pie crust will do.
- Bittersweet dark chocolate (60-70% cocoa) is the ideal balance between intense chocolate flavor and subtle sweetness.
- Bittersweet chocolate with higher cocoa butter produces a more stable, silkier mousse filling.
- Using chocolate with a lower cocoa percentage may result in a sweeter, softer filling, while darker chocolate (70%+) will yield a more robust, chocolate flavor.
- Test Note: You can use the same chocolate in the pie for the chocolate shavings. Make sure to select a high quality baking bar, not chocolate chips.
- Heavy whipping cream (33-25% fat) is used to create a fluffy silky mousse texture and then again for a vanilla whipped cream topping.
- The high fat content in heavy cream gives it the stability needed to be whipped into soft peaks for folding into the chocolate mousse, lightening the texture.
- For the topping, whipped cream adds volume and contrast, while its mild sweetness balances the dense chocolate pie filling.
- Mascarpone has a smooth texture and high fat content that works to stabilize the vanilla whipped cream topping so it doesn’t turn to mush right after you assemble the pie.
- Adds an ever so slight tangy flavor that offsets the richness of the chocolate mousse.

How to Make a French Silk Pie
I usually make this recipe over two days. On day one, I make the pie dough and par-bake my crust. The next day is for making the chocolate filling and chilling the entire pie. Just before serving I’ll whip up some vanilla cream!
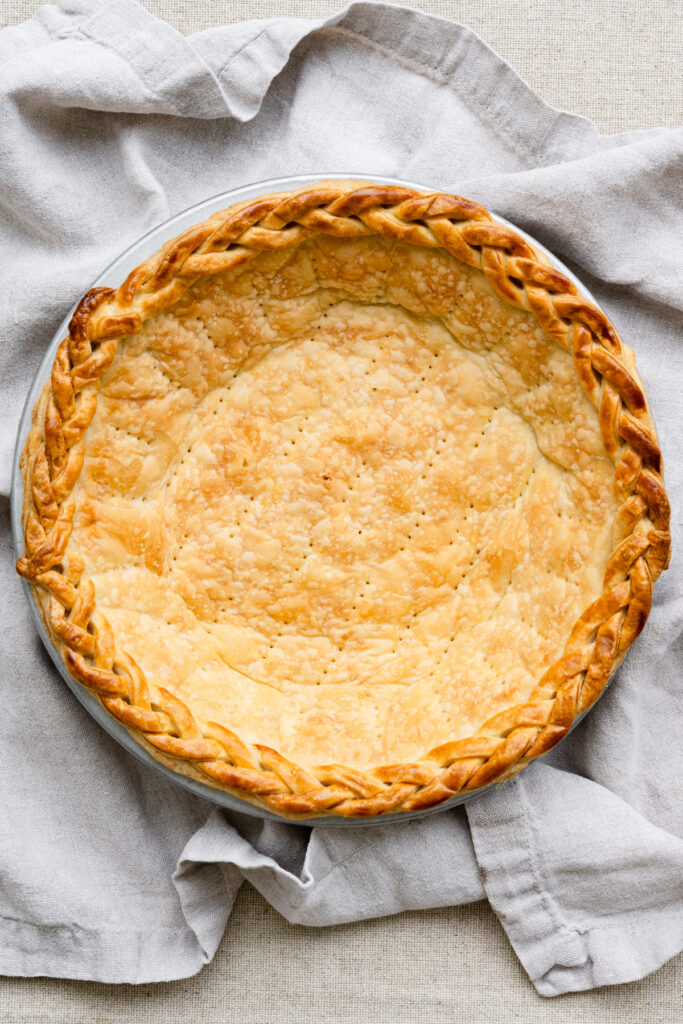
- Blind bake a 9-inch all butter pie crust until golden and cool it completely.
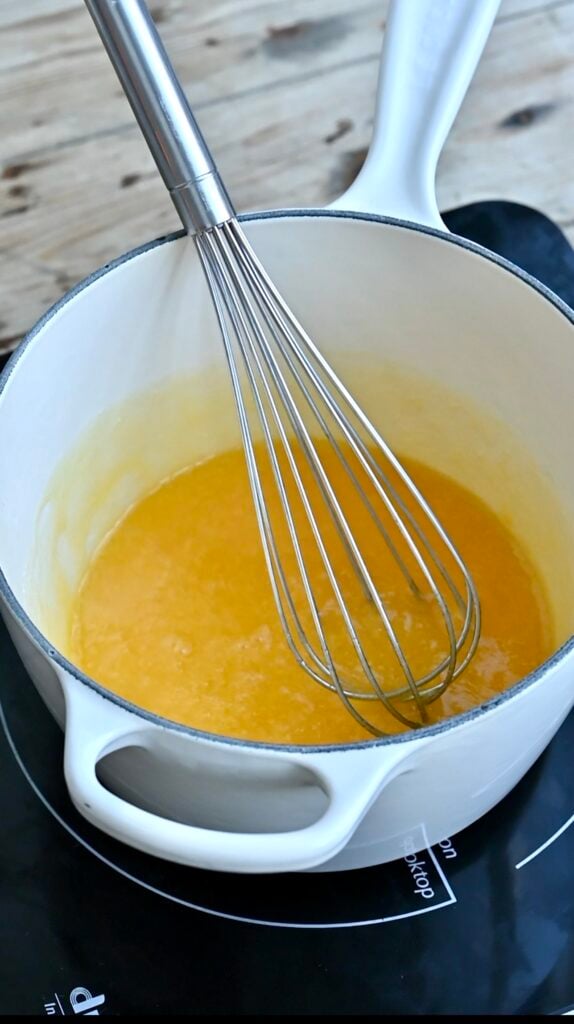
- Whisk eggs and sugar in a medium saucepan on medium low heat until the mixture reaches 160°F (70°C) on an instant read thermometer.
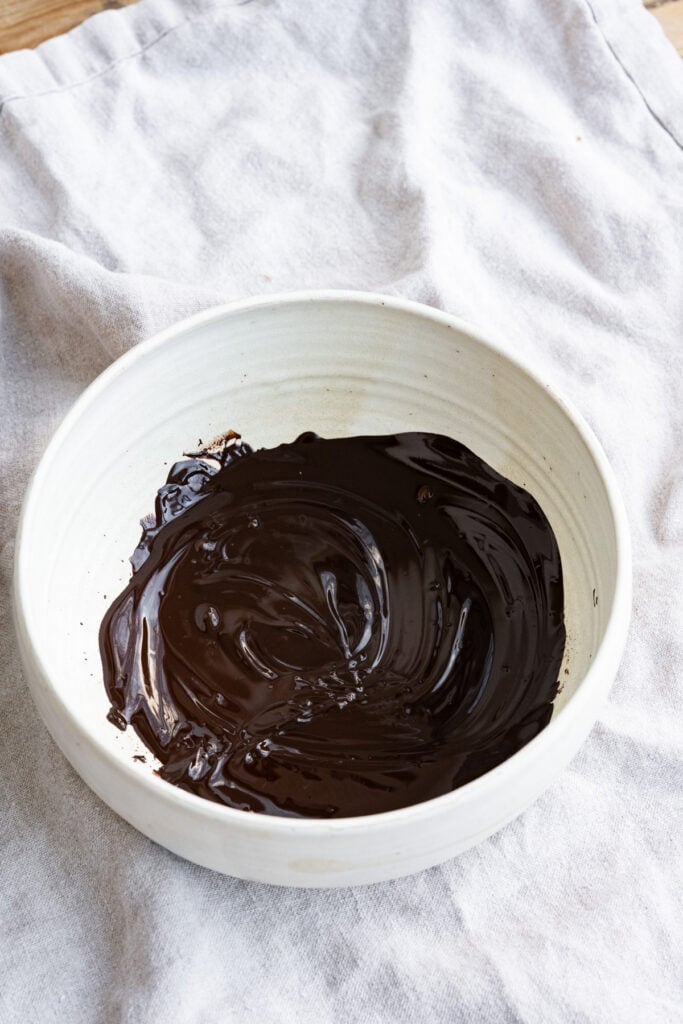
- Melt dark chocolate chunks and stir until smooth.
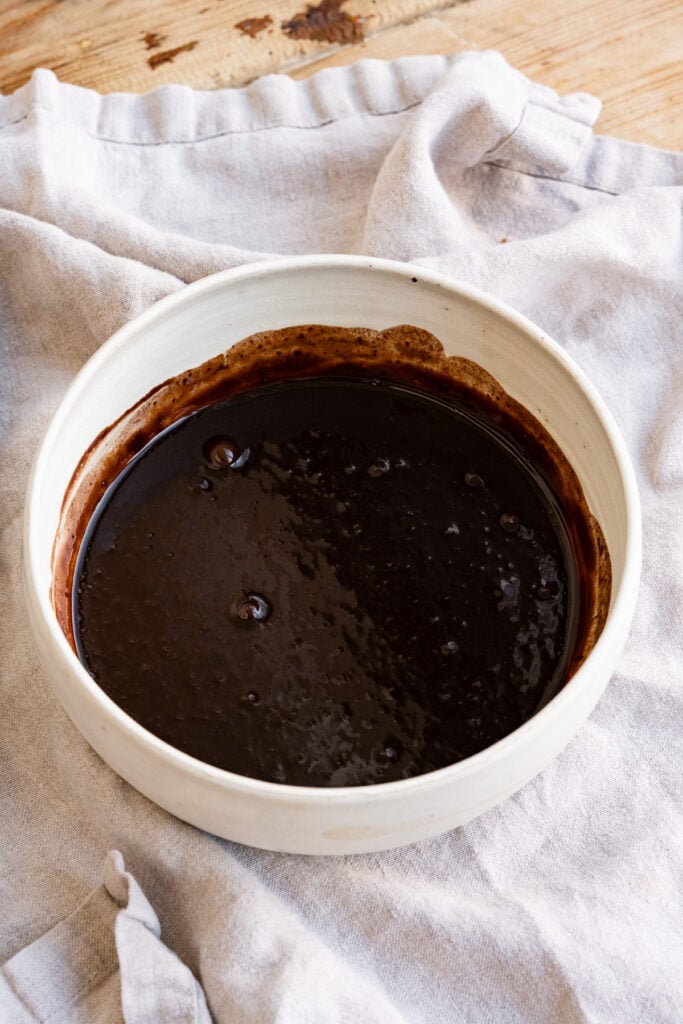
- Whisk the egg & sugar mixture into the melted dark chocolate until it becomes smooth and glossy.
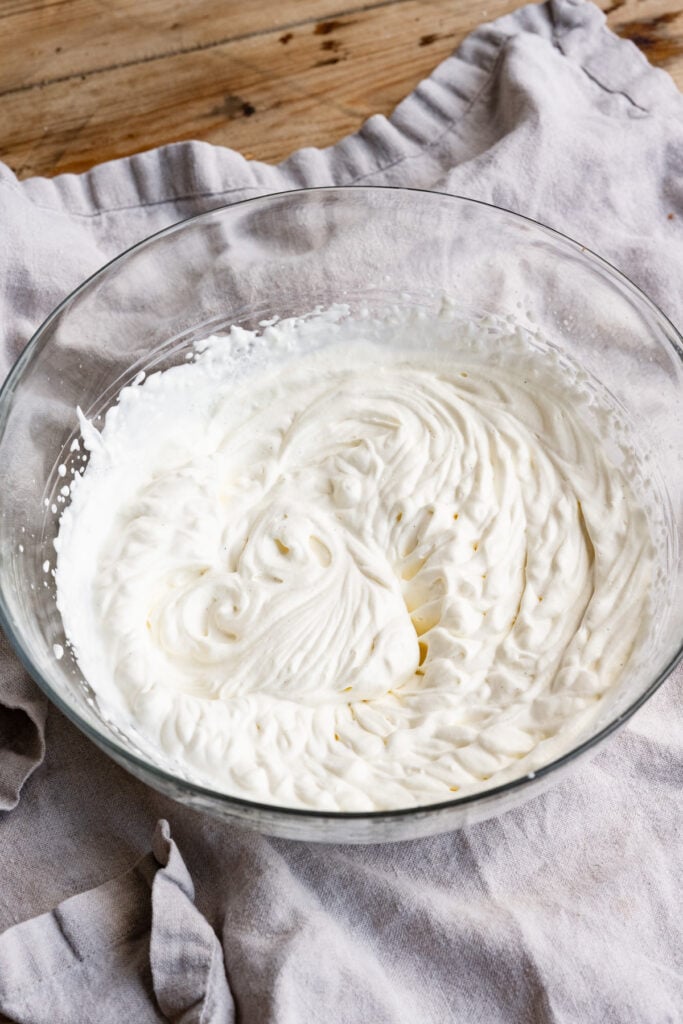
- Whip heavy cream, powdered, sugar and vanilla to form stiff peaks. Place in fridge until ready to use.
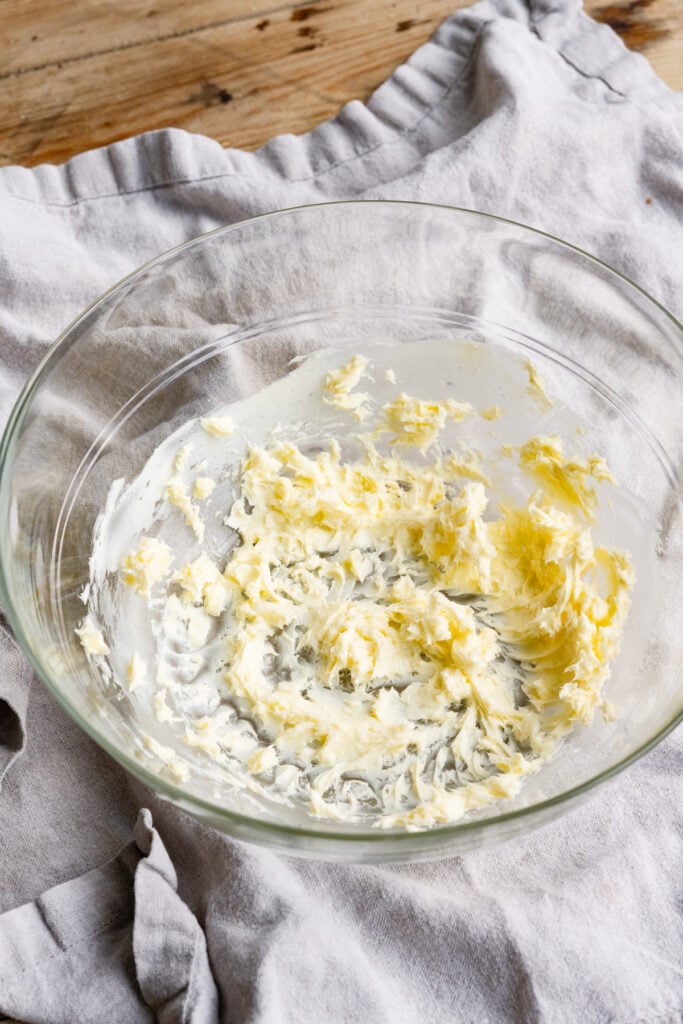
- Beat softened butter until smooth in a large bowl.
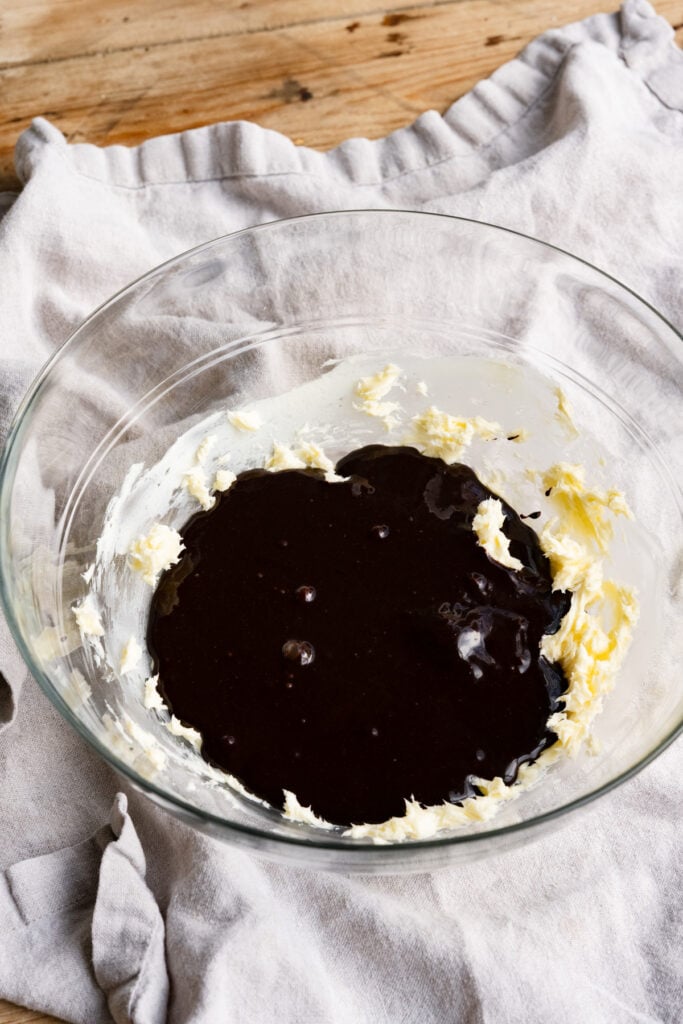
- Pour the silky chocolate and egg mixture onto the whipped butter.
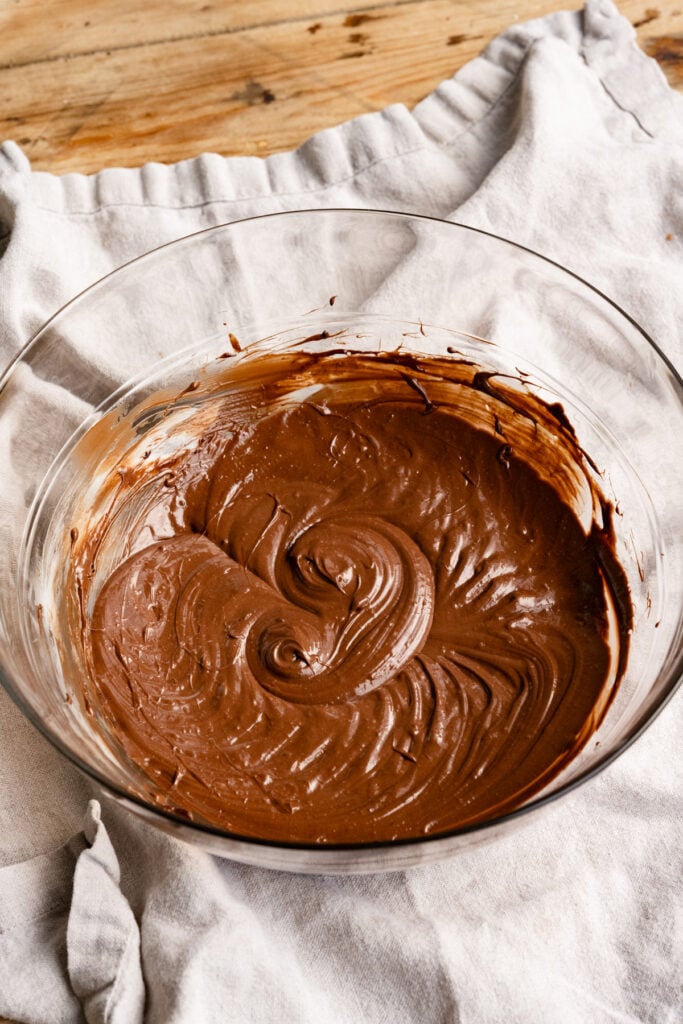
- Whip the chocolate mixture into the butter to make a rich silky chocolate texture.
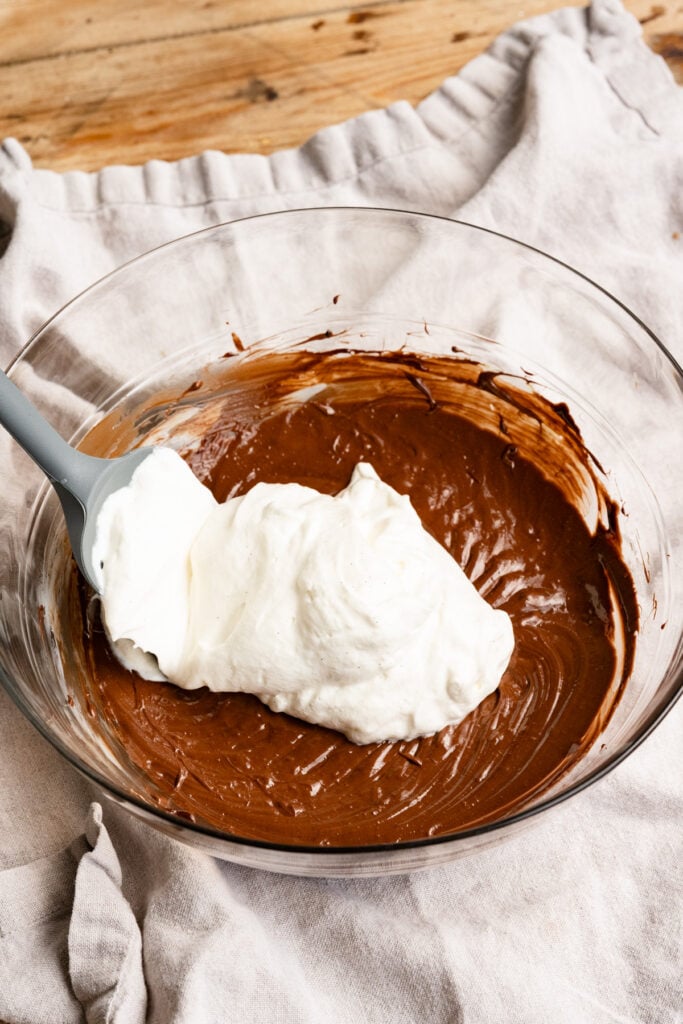
- Spoon a third of the reserved whip cream onto the rich chocolate mixture.
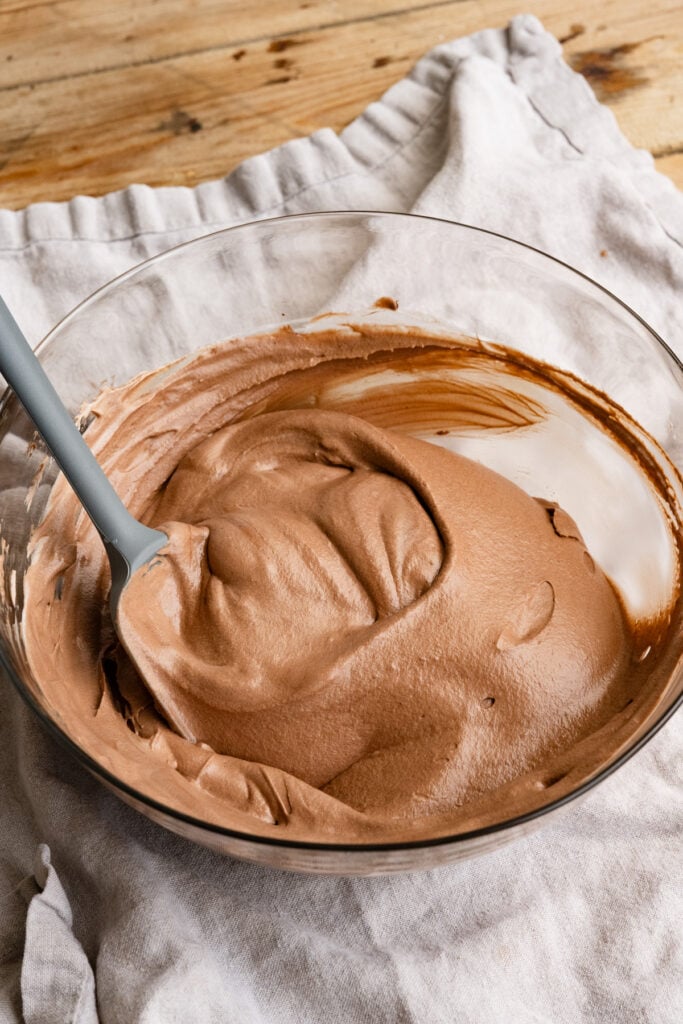
- Fold the whip cream into the chocolate in thirds carefully to form a light and fluffy mousse like filling.
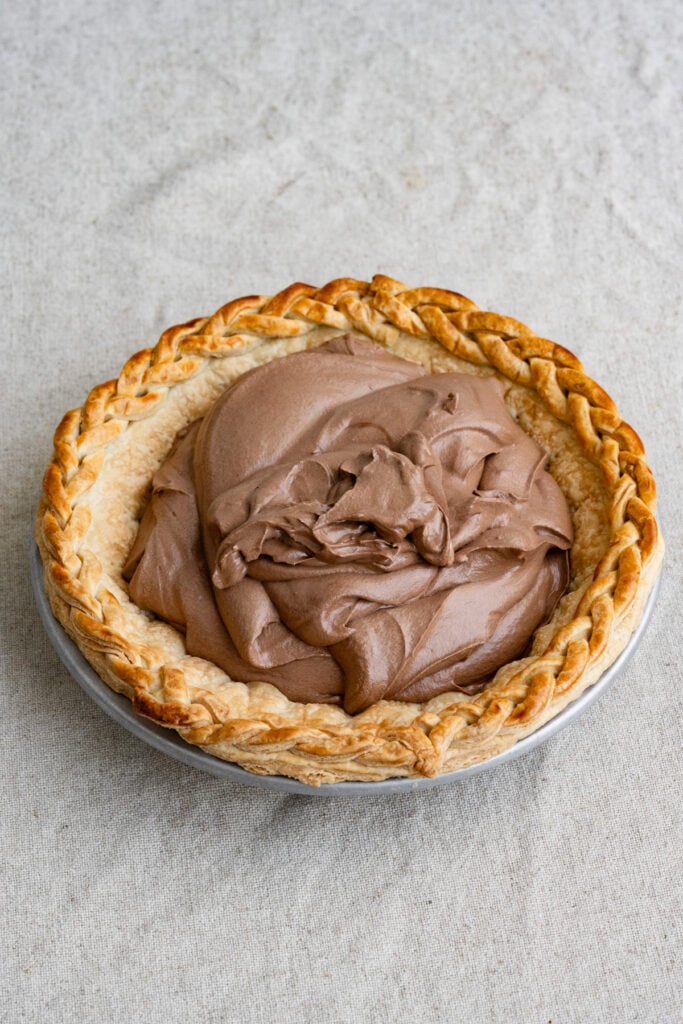
- Fill the cooled pre baked pie crust with the chocolate mousse filling.
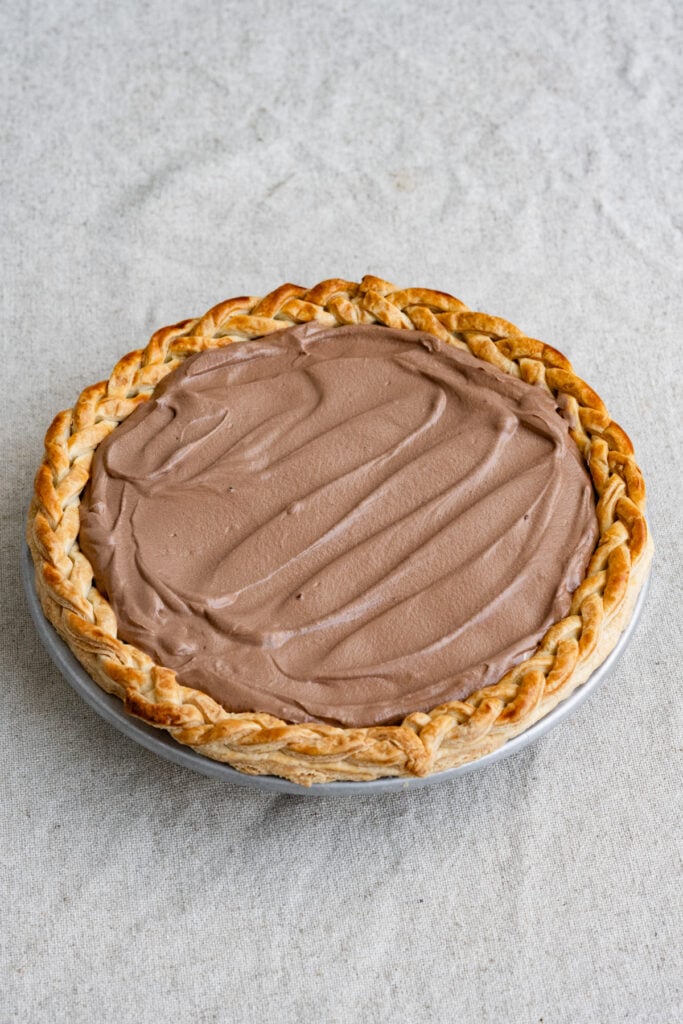
- Smooth out the filling with an offset spatula and refrigerate until firm.
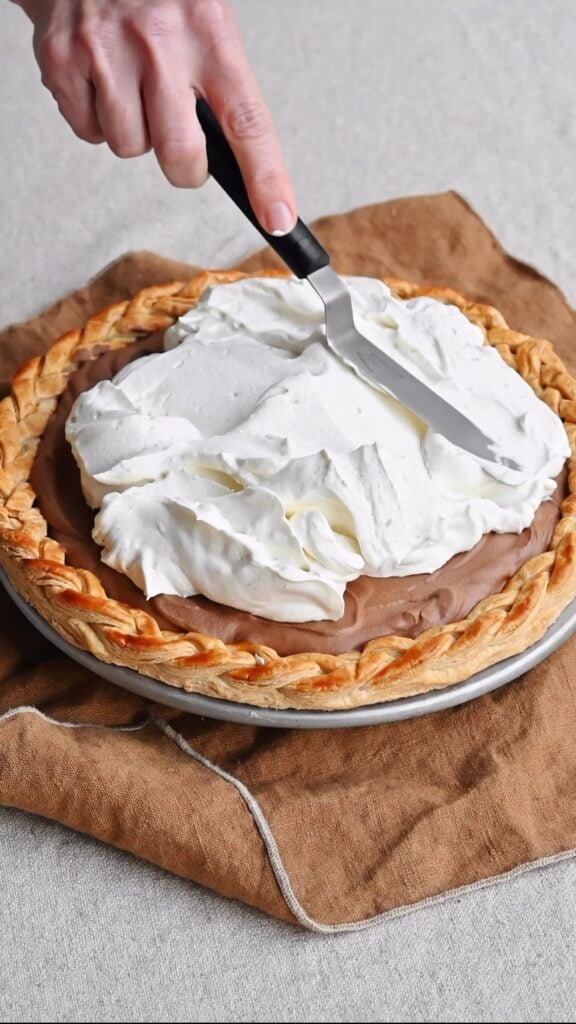
- Make the mascarpone whipped cream and spread it over the firm chocolate pie filling.
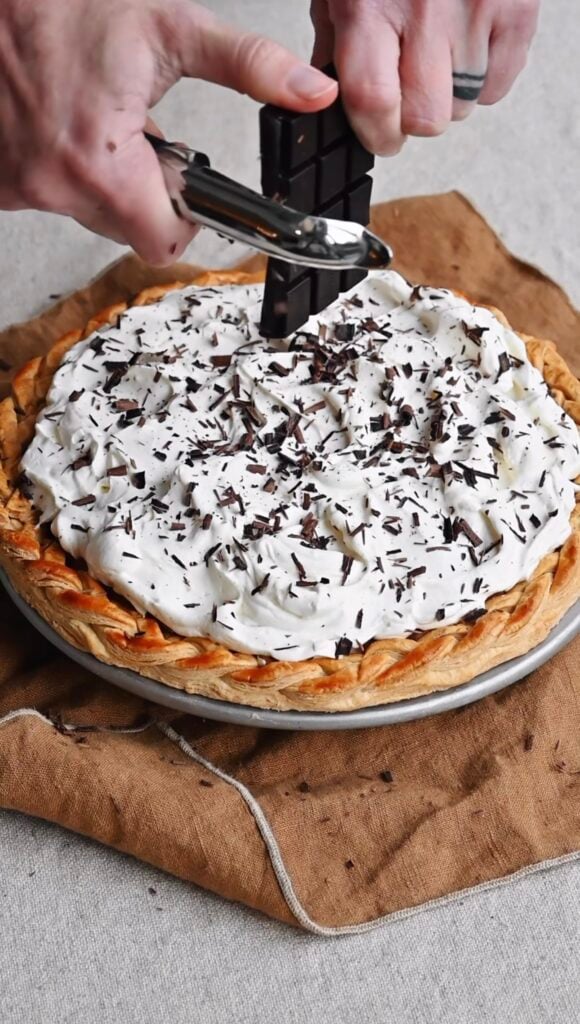
- Take a vegetable peeler and a chocolate bar over the whipped cream to make chocolate shavings.
Jenn’s Pie Tips!
- Metal or Ceramic Pie Pan: I find that metal pie pans give the best heat conduction on a blind-baked crust, but I also love my decorative ceramic pans. Add a few extra minutes to your bake time when using ceramic.
- Blind Bake the Crust: Use my all butter pie crust recipe and fully bake the crust up to 2 days ahead of time. Keep the baked crust stored in an airtight container at room temperature.
- Check the temp: I always use an instant read thermometer to measure the egg and sugar mixture temp accurately.
- Save the cream topping til last! Prepare the chantilly cream topping just before serving to keep it fresh and fluffy.
- Versatility: Customized your toppings with chocolate shavings, a dusting of cocoa powder, chopped nuts, or sliced berries.
- Make-Ahead: The crust and pie filling can be made and chilled for a minimum of 2 hours before serving. Make the pie without the cream topping, cover and store in the fridge for up to 2 days. Top with whipped cream and chocolate shavings just before serving.

★★★★★ Please leave a star rating and review below if you make this recipe! THANK YOU!!
Chocolate French Silk Pie

Recipe Video
Ingredients
All Butter Pie Crust
- Single 9-inch pie crust, blind baked
Chocolate Mousse Filling
- 133 grams (⅔ cup) granulated sugar
- 2 large eggs, room temperature
- 85 grams (½ cup) bittersweet dark chocolate (60-70% cocoa), roughly chopped then melted and cooled
- 1/4 teaspoon fine sea salt
- 76 grams (⅓ cup) unsalted butter, softened to room temperature
- 240 grams (1 cup) cold heavy whipping cream, (35% fat)
- 1 tablespoon powdered sugar/icing sugar
- 2 teaspoons vanilla bean paste or pure vanilla extract
Stabilized Chantilly Cream Topping
- 240 grams (1 cup) cold heavy whipping cream, (35% fat)
- 80 grams (⅓ cup) cold mascarpone
- 60 grams (½ cup) powdered sugar/icing sugar
- 2 teaspoons vanilla bean paste or pure vanilla extract
Chocolate Shavings
- 1/2 bittersweet dark chocolate baking bar (60-70% cocoa)
Instructions
Store Bought Pie Crust
- If using a store bought pie crust, skip ahead to instruction on blind bake the pie crust.
Homemade Pie Crust
- For homemade pie crust, make my all butter pie dough according to the recipe.Single 9-inch pie crust
- Refrigerate the pie dough for a minimum of 1 hr if you plan on using it right away. I usually make mine the day before to have less steps on baking day. Plus, allowing the dough to rest overnight creates a more relaxed dough that is easier to roll out.
- Overnight dough will need about 30 minutes on the counter to warm slightly before rolling. Place dough on a lightly floured surface and lightly coat a rolling pan with flour to prevent sticking. Repeat as needed.
- To roll out the dough for the pan, start from the center and working outwards in all directions, rotating dough clockwise as you go. Dough should be around 1/8 to 1/4-inch thickness and at least 1.5-inches larger than your pie pan.
- Lower the dough into the pie pan and gently press into the bottom and sides with a flat hand. Take a sharp knife or scissors and trim away any overhanging dough from the lip of the pan, leaving a 1/2-inch overhang of pie dough. Tuck any overhanging dough underneath itself and crimp the edges with your thumb and forefingers for an elevated look.
- Dock the pie dough by pricking it across the bottom and sides with the tines of a fork. Place the pan in the fridge (30 minutes) or freezer (15 minutes) to firm until ready to blind bake. A cold, firm dough will shrink less in the oven.
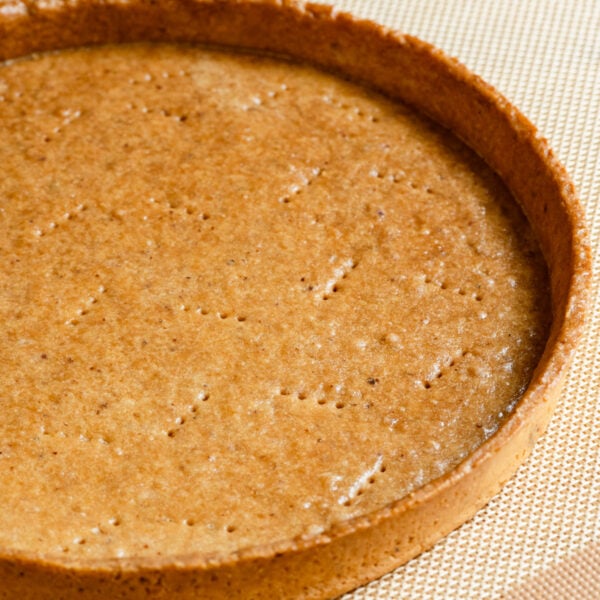
Blind Bake the Pie Crust
- Preheat the oven to 425℉ (220 ℃). Remove the frozen pie crust and line it with overhanging parchment paper. Fill the parchment paper with pie weights, granulated sugar, dried rice or uncooked beans. Make sure to fill it all the way to the crimped edges to help weigh down the crust.
- Place the pie dish on a baking pan, then transfer to the lowest rack of the oven and bake for 15-17 minutes.
- Remove the pie from the oven and carefully lift and remove the paper filled with weights. Reduce oven temp to 375℉ (190℃) return the pie back to the oven for 10-12 more minutes of baking. The crust should be golden brown all over and completely baked. Place pie dish on wire rack and allow to cool completely before adding filling. Keep an eye on the crust, too dark brown is over baked.
Chocolate Mousse Filling
- Place chopped dark chocolate in a microwave safe bowl and melt in 30 second bursts, stirring in between until smooth. Or melt using a bain-marie (heat safe bowl over pot of simmering water) until smooth. Set aside to cool.85 grams bittersweet dark chocolate (60-70% cocoa)
- Place the sugar and eggs in a medium saucepan on low heat and whisk together. Whisk constantly until thermometer reads 160℉ (72℃) when inserted in the mixture. It may take 9-10 minutes for the egg mixture to reach this temperature, but it will ensure the raw eggs are properly cooked.133 grams granulated sugar, 2 large eggs
- Remove the egg mixture from the heat and let cool about 5 minutes. Pour in the cooled melted dark chocolate and salt. Whisk until the chocolate looks smooth and glossy. It will thicken and look a little textured at first. That's ok. Just whisk a little more until smooth.85 grams bittersweet dark chocolate (60-70% cocoa), 1/4 teaspoon fine sea salt
- Make the whipped cream filling while the chocolate mixture cools. Combine the cream, powdered sugar, and vanilla in a large mixing bowl. Using a hand mixer, beat until thick. Place in fridge until ready to use.240 grams cold heavy whipping cream, 1 tablespoon powdered sugar/icing sugar, 2 teaspoons vanilla bean paste or pure vanilla extract
- Place the softened butter into a large mixing bowl. Using a handheld mixer, beat until fluffy. About 30 seconds.76 grams unsalted butter
- Scrape the cooled chocolate mixture onto the butter and beat on medium speed until well combined. The chocolate butter mixture should be thick, smooth, and glossy.
- The chocolate mixture should now be room temperature and ready for the whipped cream. Add the whipped cream to the chocolate in three batches. Fold in the cream carefully with a silicone spatula, careful to prevent deflating the cream by stirring.
- Once all the cream has been incorporated with no white streaks remaining its time to transfer it to the baked pie crust.
- Spoon or pour the chocolate filling into the pie crust and chill in the refrigerator for a minimum of 2 hours or overnight to firm.
Chantilly Cream Topping
- For the best texture, make about 10-15 minutes before you plan to serve the pie. It can also be made up to 1 hour ahead and kept in an airtight container in the fridge.
- Place the mascarpone, cream, powdered sugar, and vanilla in a medium bowl.240 grams cold heavy whipping cream, 80 grams cold mascarpone, 60 grams powdered sugar/icing sugar, 2 teaspoons vanilla bean paste or pure vanilla extract
- Using an electric beater on medium high in a circular motion, whip until thick.
Final Assembly
- Remove chilled pie from the fridge and spoon on the Chantilly Cream Topping across the layer of chocolate filling. Garnish with chocolate shavings and serve.
- Take a vegetable peeler and scrape down the side of a chocolate bar overtop of the pie to release little chocolate curls.1/2 bittersweet dark chocolate baking bar (60-70% cocoa)

This recipe is so creamy and luscious!! My husband loves it and said it was the best chocolate pie he has ever had!! One of his friends who follows you asked me to please make it for him. He and his entire family were so thrilled to get it. They all just raved about how delicious it is and how much they loved it!!
Thank you for such an amazing recipe that has easy to understand instructions!! ❤️
A spectacular French Silk Pie—easy, impressive, and a total Thanksgiving hit!
I made two of these pies in preparation for Thanksgiving, and they turned out fantastic—especially considering my very limited baking experience. I used a pre-made pie crust (my wife wisely suggested the homemade crust might be a bit ambitious for me!) and the filling came together surprisingly easily.
My first pie tasted great, but I accidentally added too much vanilla—still delicious, just a little strong. The second one came out perfect: silky, rich, and incredibly chocolatey. There was even slightly more filling than our store-bought crust could hold, which just meant extra taste-testing for us… no complaints there!
The pie was a hit at Thanksgiving dinner and was the first thing grabbed in the leftovers rush. I’ll definitely be making this recipe again!
Can I assemble the finished product the night before or do you recommend the whipped topping added before serving?
Hi Jill, The whipped cream for the topping is more stable since it has mascarpone in it, so it will keep once assembled, but will lose its pizazz after a couple days in the fridge. You can always make the mascarpone whipped cream and place it in a separate air tight container for a day, then assemble the pie with the whipped cream adding chocolate shavings just before serving. 🙂
Thank you so much for sharing this recipe. I have been waiting for a recipe where the eggs aren’t raw, like we used to do in years past. This looks delicious, I can’t wait to try it!
Made this for Easter and everyone loved it! Now making 2 pies for a party on Friday so less than a week later! Yum!
So glad you enjoyed it!
When you convert from metric to US measurements, both the butter and the mascarpone measurements just say “cup”but not the actual measure . Is it just 1 cup?
Hi Joyce, Not sure where you are seeing this, the measurements are listed out in US by fraction and Metric by grams.
It looks delicious and master class pie. Can I use the same mousse chocolate as my chocolate cake topping?
Thank you in advance.
This pie is freaking amazing. If you whip the mousse and cream right, the filling is light and airy. The crust adds a depth that balances well and leaves you wanting more. We served this to our French neighbors the other day to rave reviews!