
This post contains affiliate links. Please see our disclosure policy.
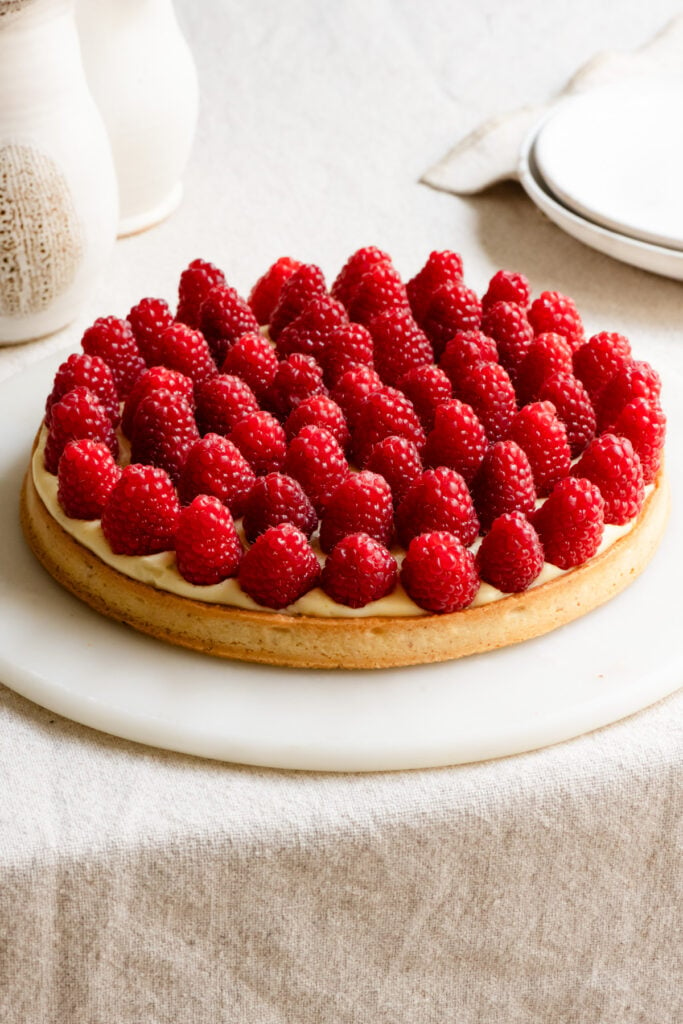
Create a beautiful French tart crust just like you see in the French pastry shop windows with this easy sweet tart dough. It’s a bit more tender than American pie crust and comes together easily with just a few ingredients. This pâte sucrée has a touch of almonds for a lovely nutty profile that pairs perfectly with fruit and chocolate tarts.
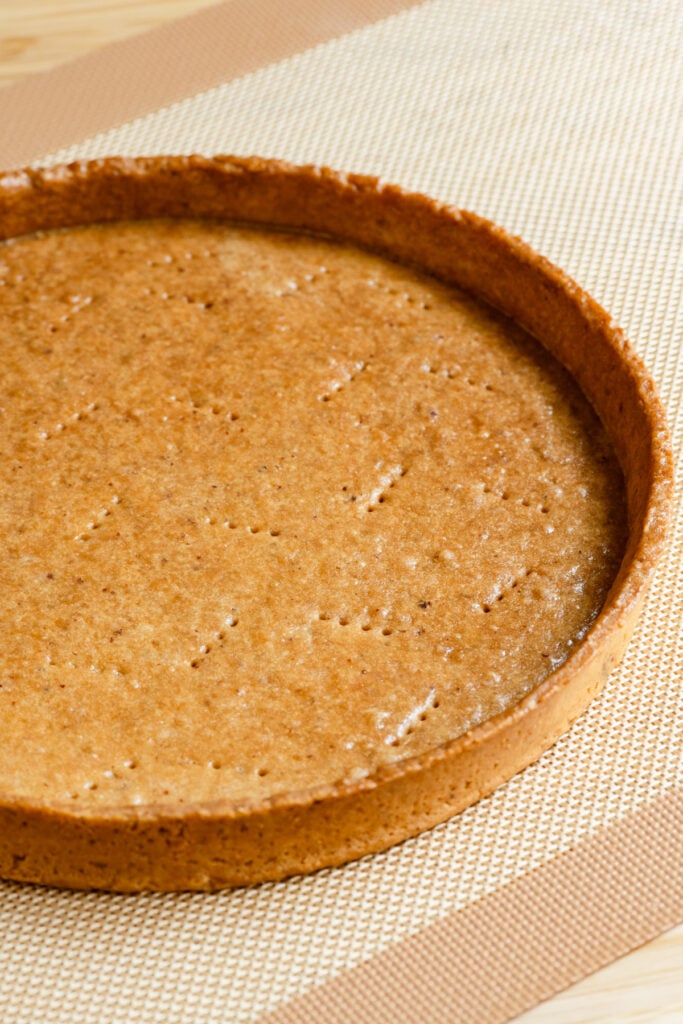
Pâte Sucrée (aka sweet tart crust) can be made either by hand or in a mixer. Once the dough comes together it will need to rest and chill for at least 1 hour before rolling out. I like to use with a simple 9-inch or 22 cm pastry ring for making tarts. But, you can certainly use a removable bottom, 9-inch fluted tart pan.
Table of Contents
Key Ingredients & Test Notes
- All Purpose Flour: I’m using an all purpose flour with 11% protein. A touch more protein than pastry flour at 9-10% and less gluten than some all purpose flours. I find this to be the sweet spot for a great tart crust without the dough being too fragile to work with.
- Almond Meal: I swapped a portion of the flour for almond meal, which is unblanched almond flour with flecks of the brown skin. This gives the dough a light nuttiness and gorgeous texture contrast.
- Test Note: The almond meal can be evenly swapped for blanched almond flour.
- For a nut free tart dough, simply replace the almond meal with equal parts all purpose or pastry flour.
- Butter: It’s not French pastry without French butter. Rich cultured European style butter with 82% butterfat brings tenderness to the dough. It’s also easier to work with even while cold, making rolling out and lining the dough so much less work.
- Powdered Sugar: Just like in shortbread cookie dough, powdered sugar creates a lovely smooth tart dough texture.
- Eggs: To bind everything together, we’ll need fresh eggs. The best way to measure egg quantity is with a scale.
- Test Note: Most standard large eggs weigh 50 grams without the shell. This recipe calls for just a touch more at 60 grams. I find it easier to crack eggs into a small cup, beat with a fork and then re-measure the amount needed for the recipe.
Stand Mixer
I prefer using a stand mixer to make pâte sucrée because it speeds up the process and makes mixing the dough almost effortless. If you don’t have one, you can use a bowl and arm power. It may just need a few extra minutes when creaming the butter and sugar together with a hand whisk. Use softened butter and a hand whisk, followed by mixing with a spatula and your hands in the recipe method below.
How to Roll Out Tart Dough
After making my pâte sucrée dough, I shape it into a disk, wrap it in plastic wrap, and chill it for at least an hour. This resting period allows the gluten in the flour to relax and gives the starches time to absorb moisture, helping the dough hold its shape. It’s an important step for creating a tart dough that’s easy to roll out and sturdy enough for baking.
- The first step is to simply let the dough sit at room temperature for a 10 minutes. As the butter softens, the dough becomes more pliable and easier to work with.
- To prevent the pastry from drying out, I prefer to roll the dough between two sheets of parchment paper instead of using a floured work surface. I gently roll the softened dough to the thickness and size needed for the recipe, then chill it so it can firm up slightly before lining my tart ring or pan.
Hot to Roll Pâte Sucrée Video:
How to Line a Tart Ring
This is how I learned to line tart rings at French pastry school, a method known as fonçage. The dough is rolled out larger than the ring, trimmed, and then genlty pressed inside for a flush vertical seal.
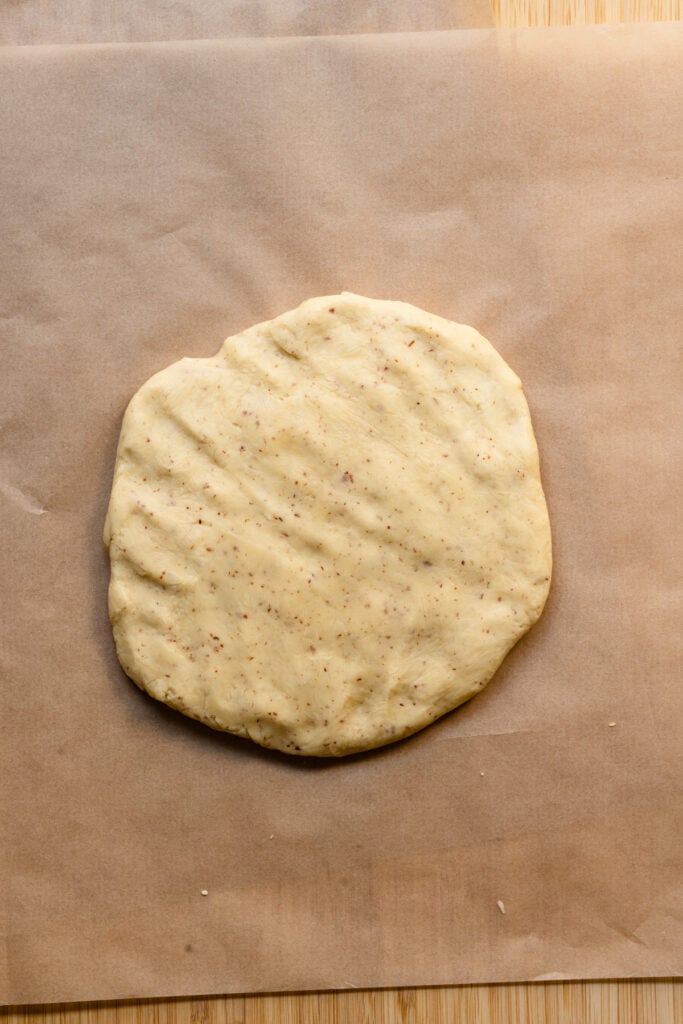
- Place the cold tart dough disc between two sheets of parchment paper. Roll the tart crust out to a rough circle larger than your pastry ring. The dough should be 1/8-1/4 inch (3-6mm) thick.
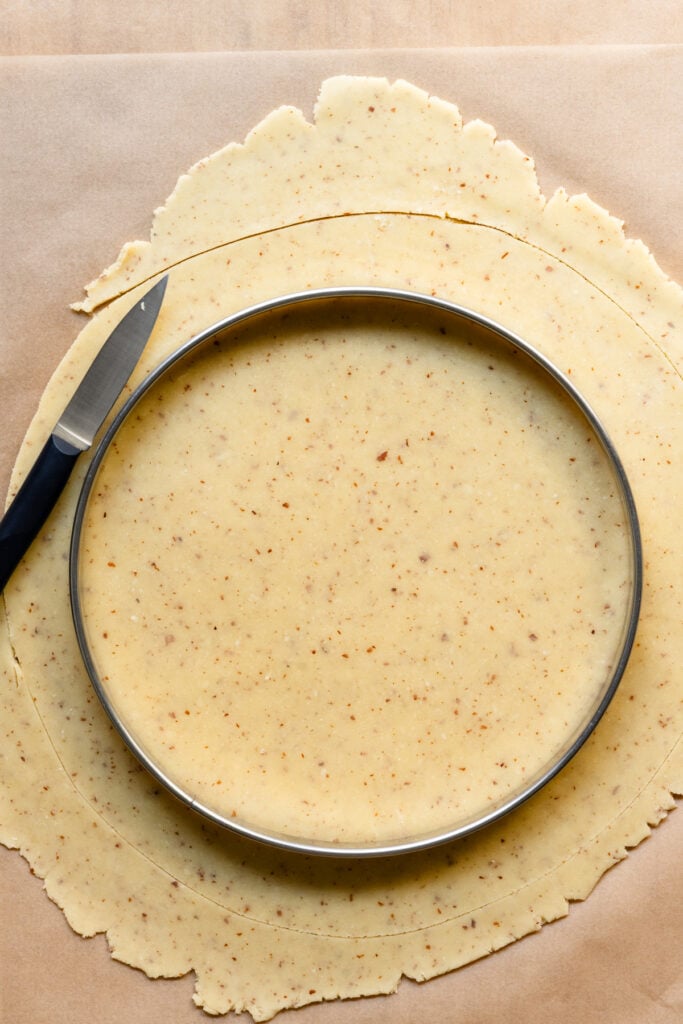
- Place the tart ring on top of the dough. Cut a circle that’s about two fingers wide around the ring. (1.5 inches)
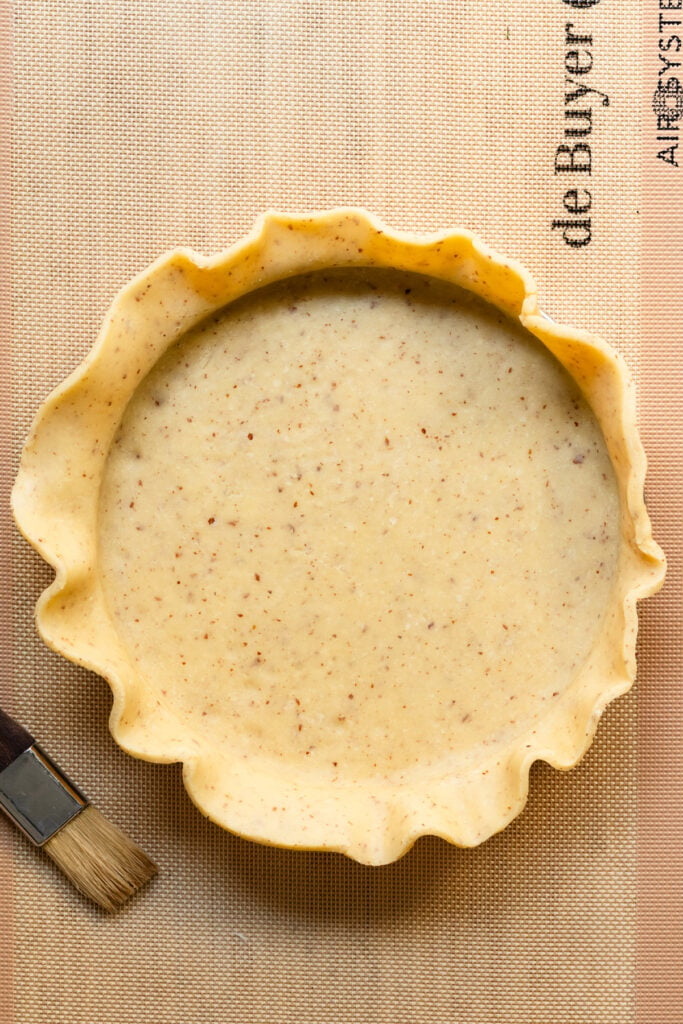
- Set the pastry ring on parchment paper or a silicone mat. Carefully lower the dough into the buttered tart ring. Let it sink down into the corners and against the inside of the ring.
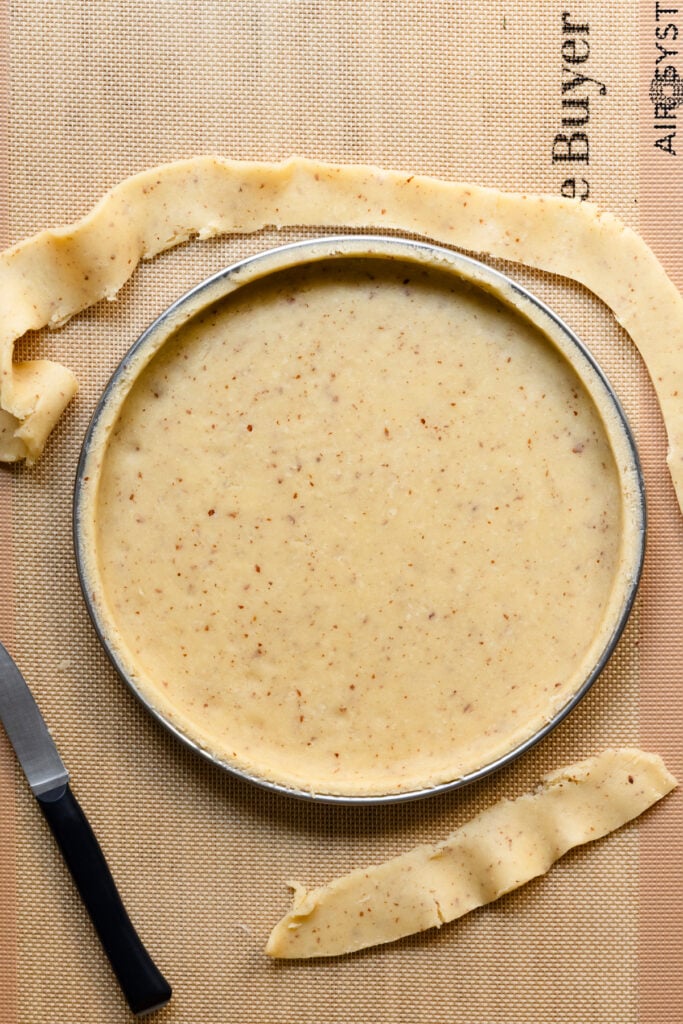
- Gently press the dough into the ring to create a vertical right angle sided crust. Use the bristles of a pastry brush or a flat finger to press the dough into the ring without squishing down the dough’s thickness. Once the ring is evenly lined, trim away the overhang with a sharp knife.
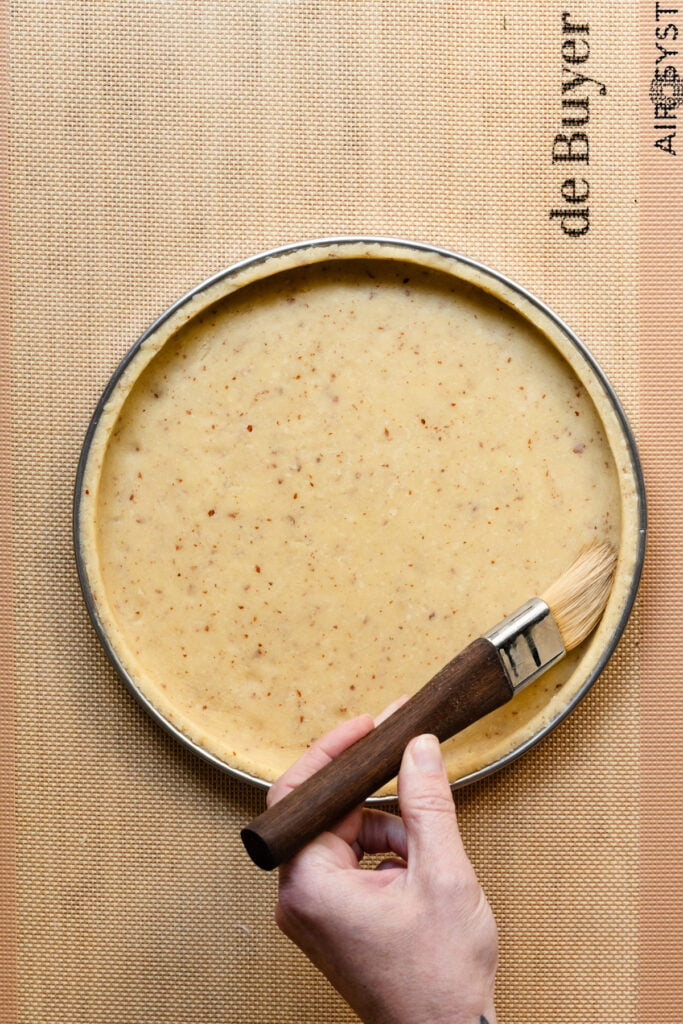
- Ever so gently press the dough into the corners with the side bristles of a pastry brush. Use your fingertips to smooth the rough edges where the excess dough was trimmed away for a nice finish.
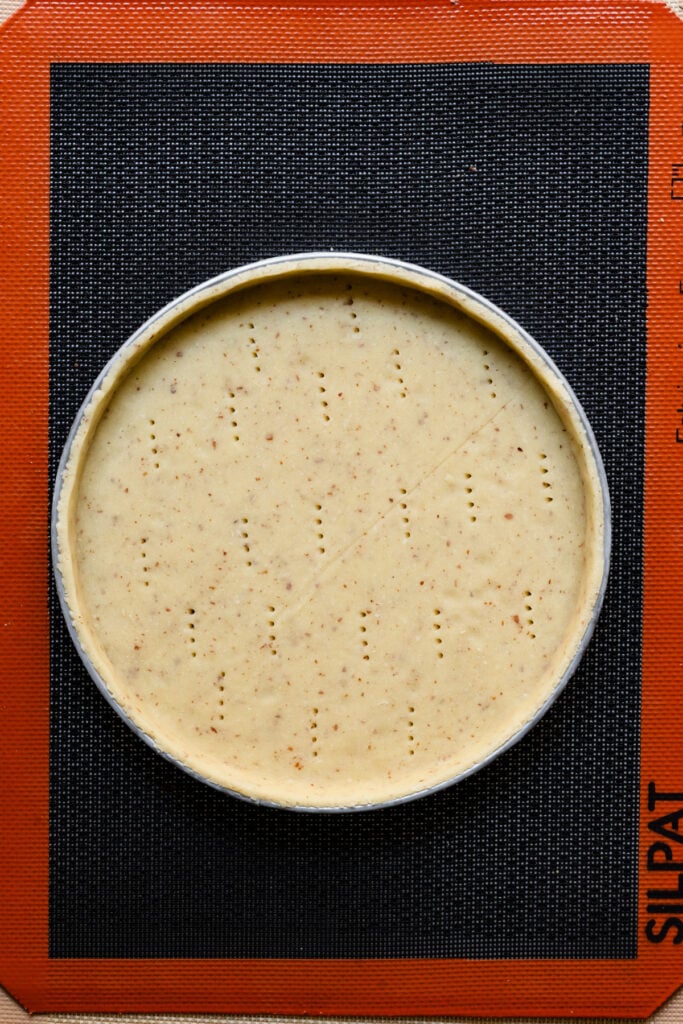
- Depending on the tart recipe, I like to prick the dough with the tines of a fork. This helps to prevent shrinkage while blind-baking. Chill or freeze the dough lined pastry ring until ready to use.
How to Line a Deep Pastry Ring
For deeper tart rings or tart pans you will need the entire dough recipe. Tart rings with taller sides (about 1.5 inches / 3–4 cm) are easiest to line using a two-step method. First, cut a circle of dough for the base, then cut strips to line the sides of the ring. Once assembled, press the lined ring down firmly onto the base circle to seal the two together.

- Roll out one half of the pastry dough to 1/8–1/4 inch (3–4 mm) thick. Cut out a circle using the tart ring, then chill until firm.
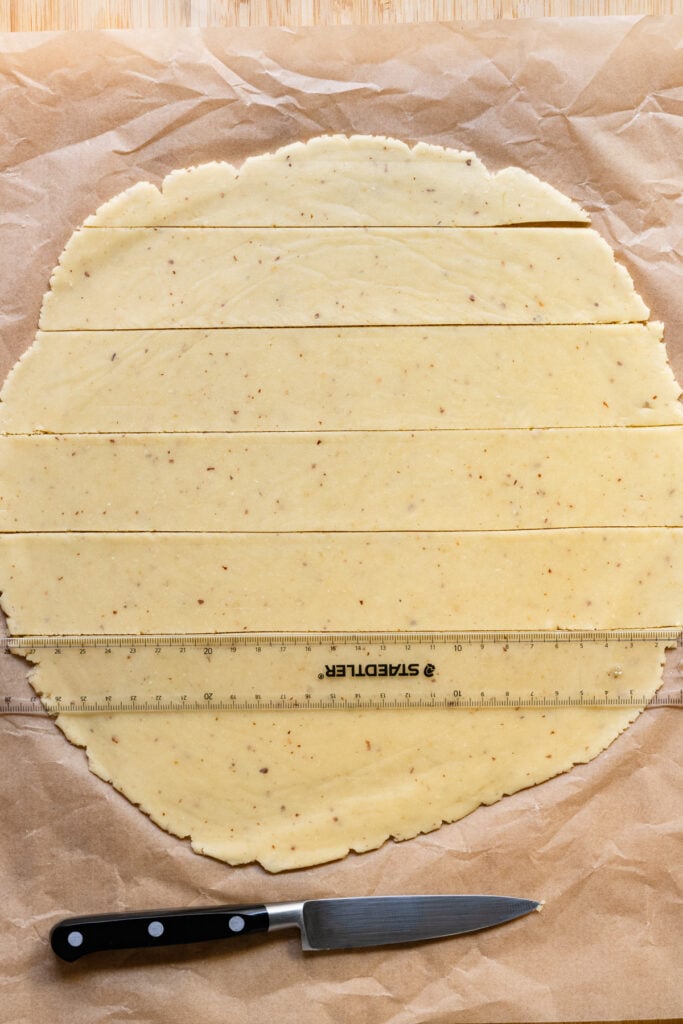
- Roll out the remaining dough to the same thickness. Cut strips slightly wider than the height of the tart ring. Chill the strips before lining the tart ring.
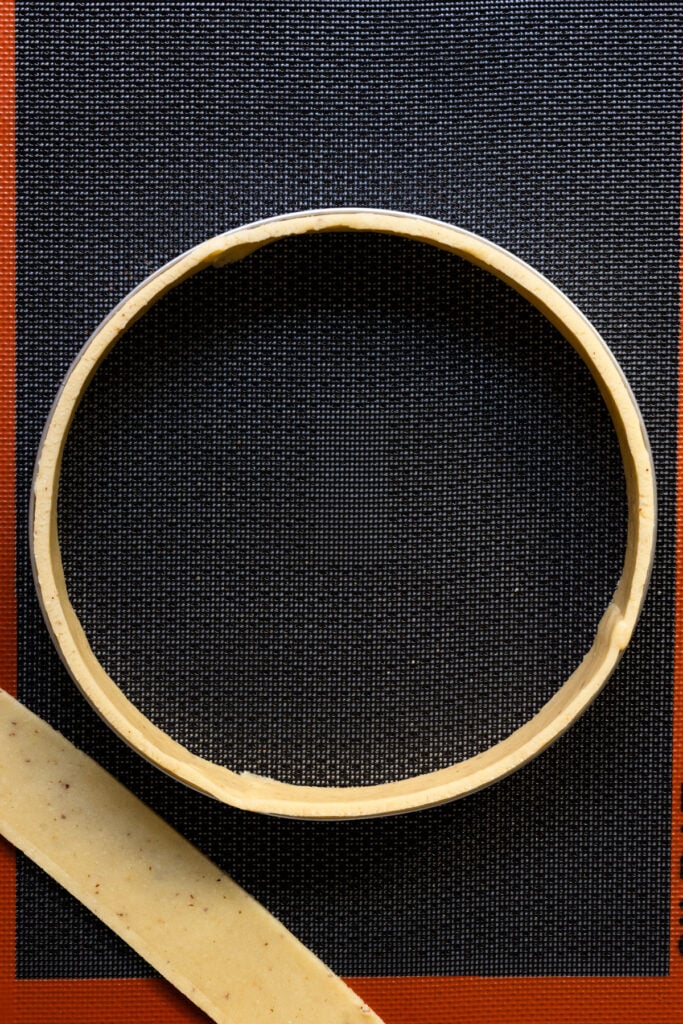
- Line the inside of the tart ring with the chilled strips, sealing any overlaps with your fingertips. Press the dough into the corners and against the sides of the ring to ensure a snug fit.
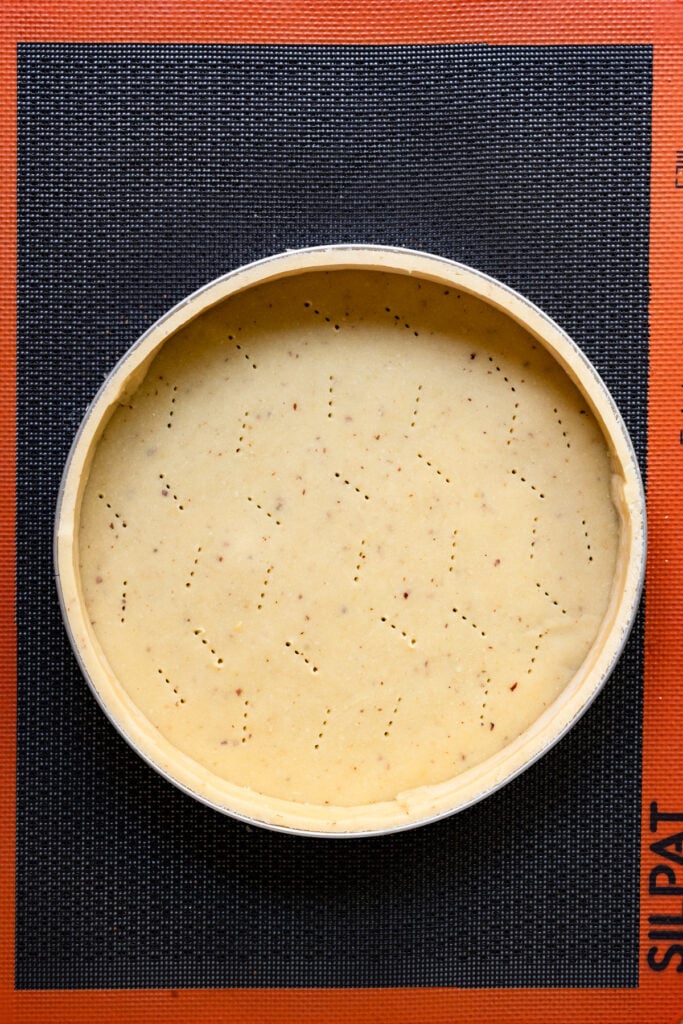
- Press the lined tart ring onto the base to seal, dock with a fork, trim the excess, and freeze until firm before baking.
Hot to Line a Deep Pastry Ring Video:
How to Blind Bake Pâte Sucrée Tart Crust
Blind baking dough can be a little intimidating at first, but it’s a necessary step to prevent an under-baked crust. I also fully blind bake the crust for recipes with a no-bake filling like my chocolate s’mores tart. This sweet pastry dough recipe will hold its shape in the oven if properly lined into a pastry ring or tart pan.
If you’re new to blind baking, you can always line the chilled tart shell with parchment paper and fill with pie weights for the first half. Otherwise I’ve found you don’t really need to. Plus the paper sometimes squishes my nice clean pastry edge.
- Types of Ovens
- Professional bakeries and many home ovens have access to convection (aka fan assisted) ovens. These work great to circulate the warm air around the tart for a nice even bake. You can also achieve a nice result with a conventional oven with top and bottom heating. Though keep an eye on your pastry as it can sometimes brown more quickly.
- Oven Temperature
- Fan Assisted Oven: Prebake crust at 325°F (160°C)
- Conventional Oven: Prebake crust at 350°F (180°C)
- Partially Baked Tart Crust
- Most recipes call for a partially baked tart crust before adding filling and baking again. To par-bake a standard 9-inch (22cm) tart shell, bake on the middle oven rack for 20 minutes, then let cool completely before adding any filling and baking again as recipe indicates.
- If you’re using pie weights bake for 15 minutes, then remove the parchment paper lining plus the pie weights and bake for another 5-8 min.
- Fully Baked Tart Crust
- Bake empty tart shell for 35 minutes on the middle oven rack. The tart should be evenly browned and golden. Allow to cool completely. Brush a thin coating of egg wash on the inside and outer sides of the tart shell. Return to the oven and bake for a further 5 minutes for a shiny sealed crust.
- When using pie weights, simply remove them after 15 minutes of baking and continue baking empty until golden brown.
Baking with Pie Weights
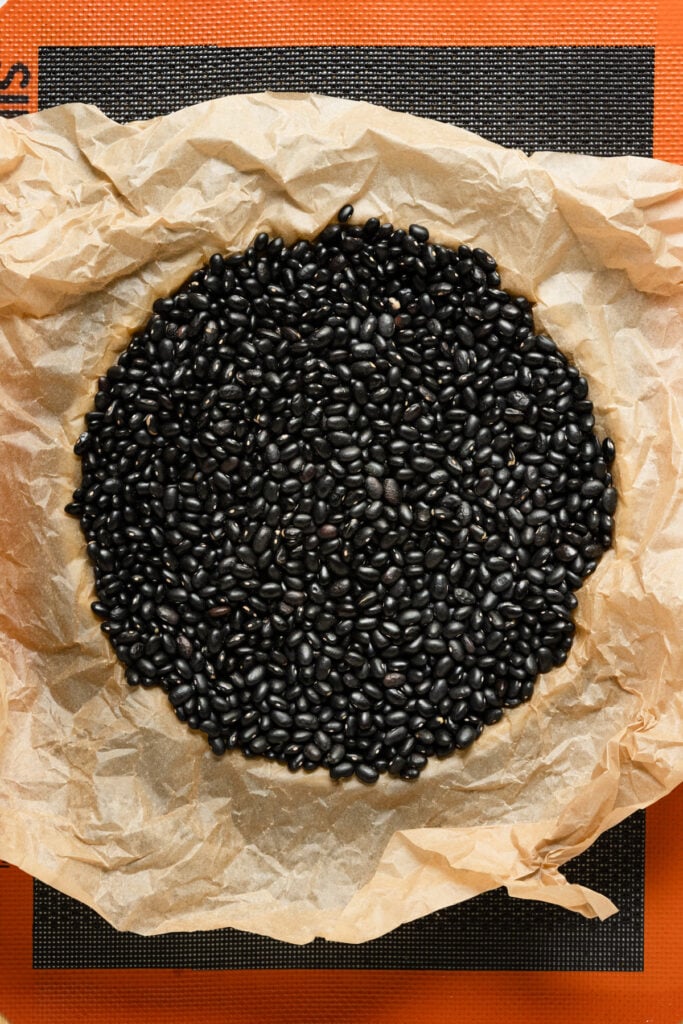
- Unbaked tart shell lined with parchment paper and dried beans for pie weights.
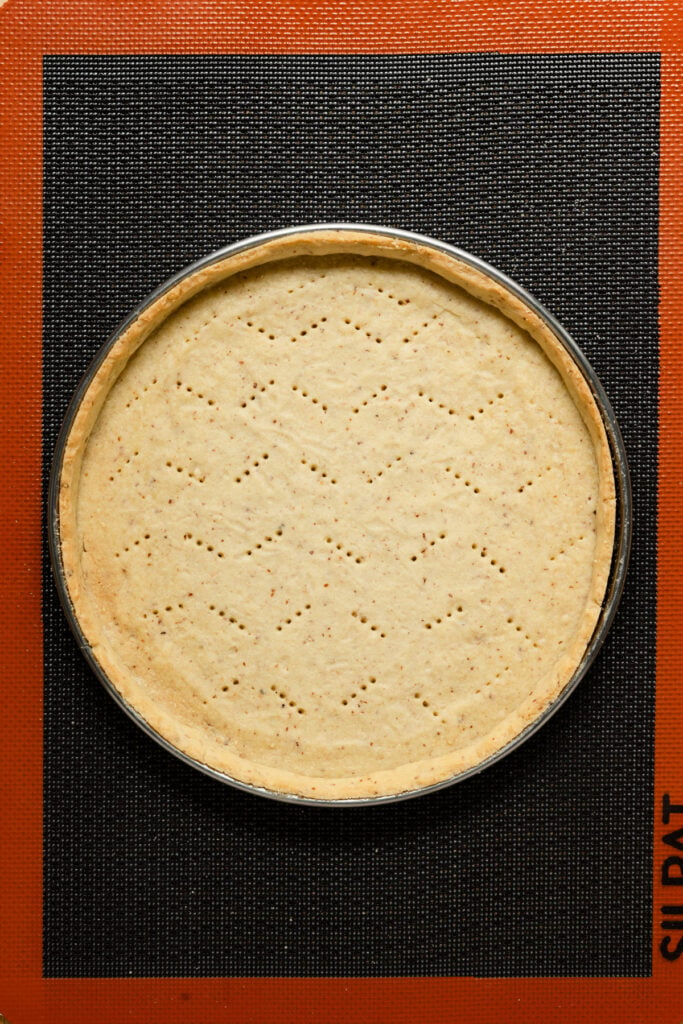
- Par baked tart shell after 15 minutes lined at 350°F (180°C) conventional oven or 325°F (160°C) fan oven, and 5 minutes after removing pie weights. This is now ready to add a filling like almond cream and bake again.
Baking Without Pie Weights
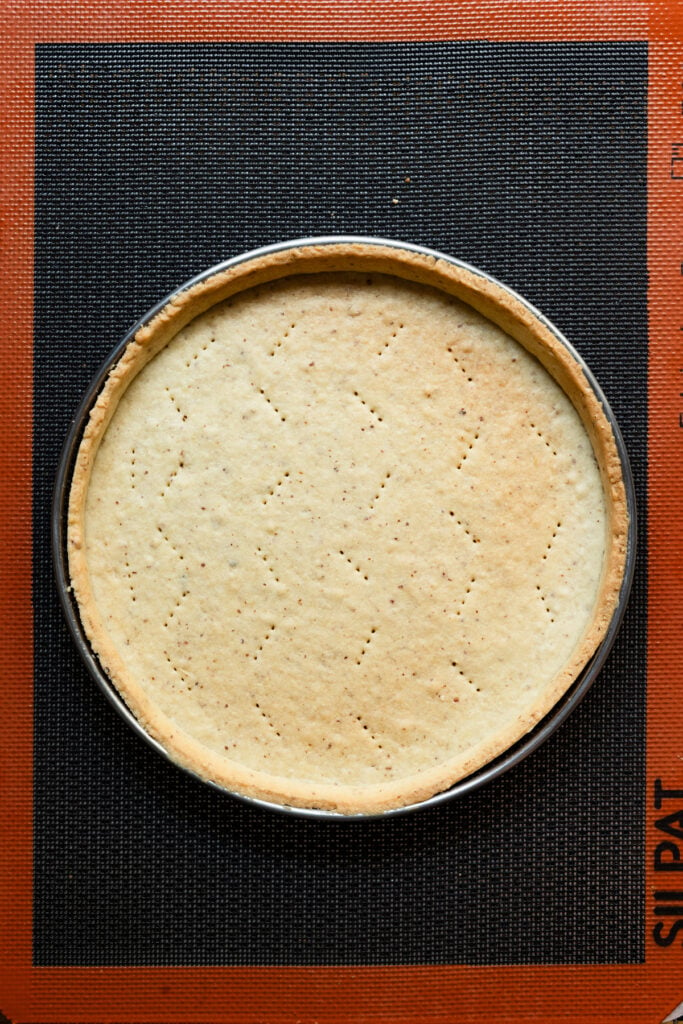
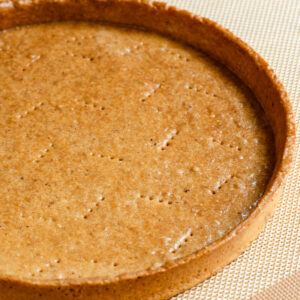
- Partially baked tart shell after 20 minutes without the use of pie weights. Oven temp used is 350°F (180°C) conventional oven or 325°F (160°C) fan oven. The tart shell must be well lined, docked, and completely frozen before going into the oven.
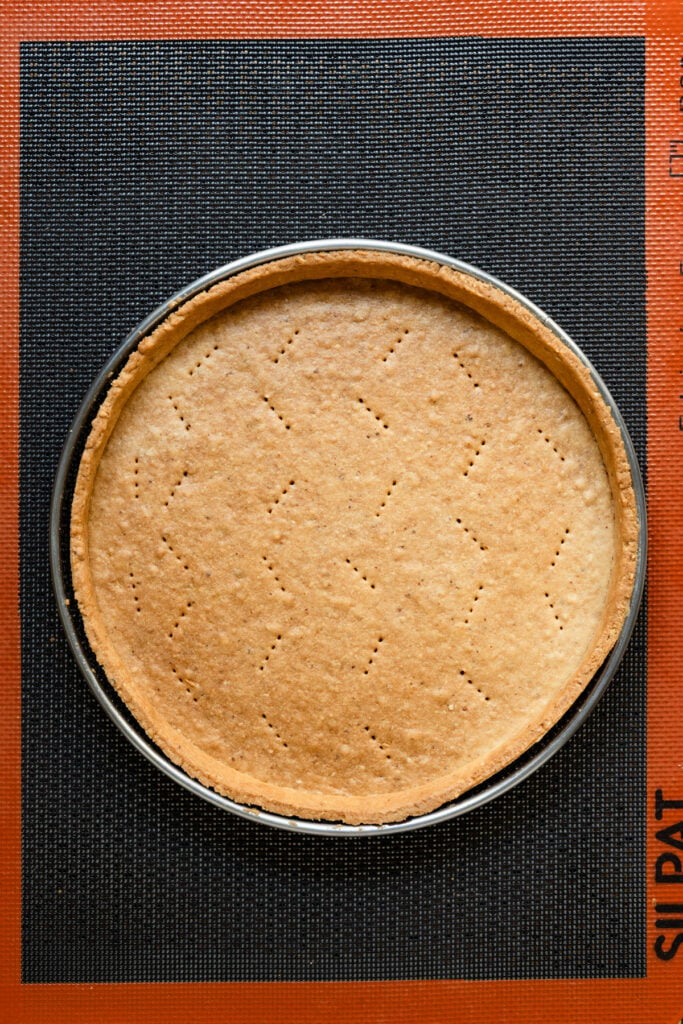
- Fully blind baked tart shell after 35 minutes without the use of pie weights.
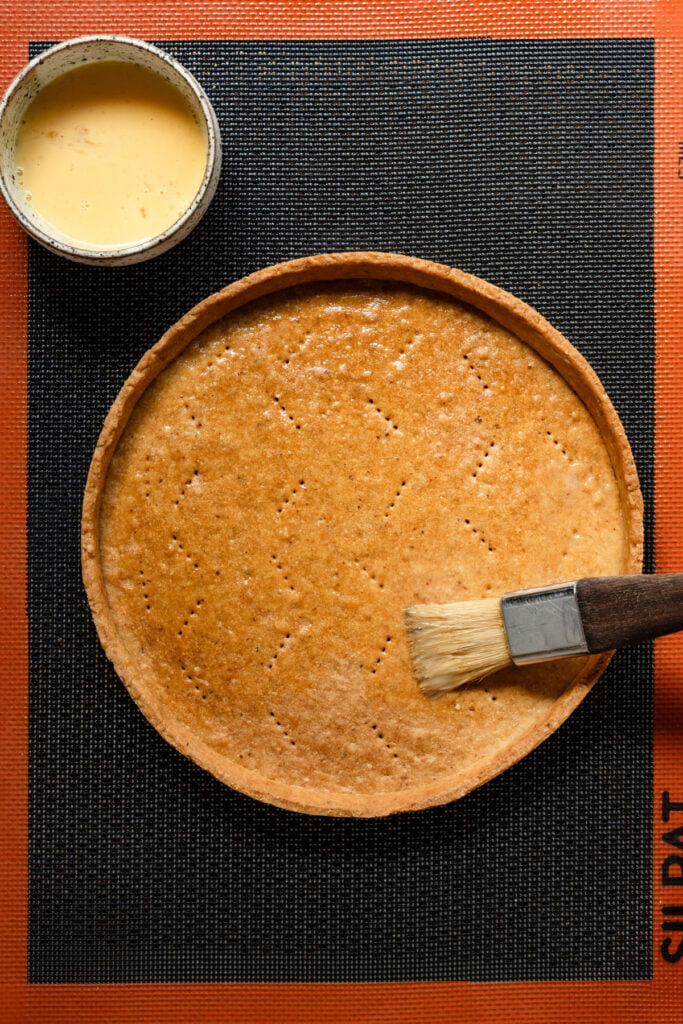
- Cool fully blind baked crust completely. File edges of the tart shell for a smooth finish. Paint a thin coating of egg wash on the inside and outer crust edges.
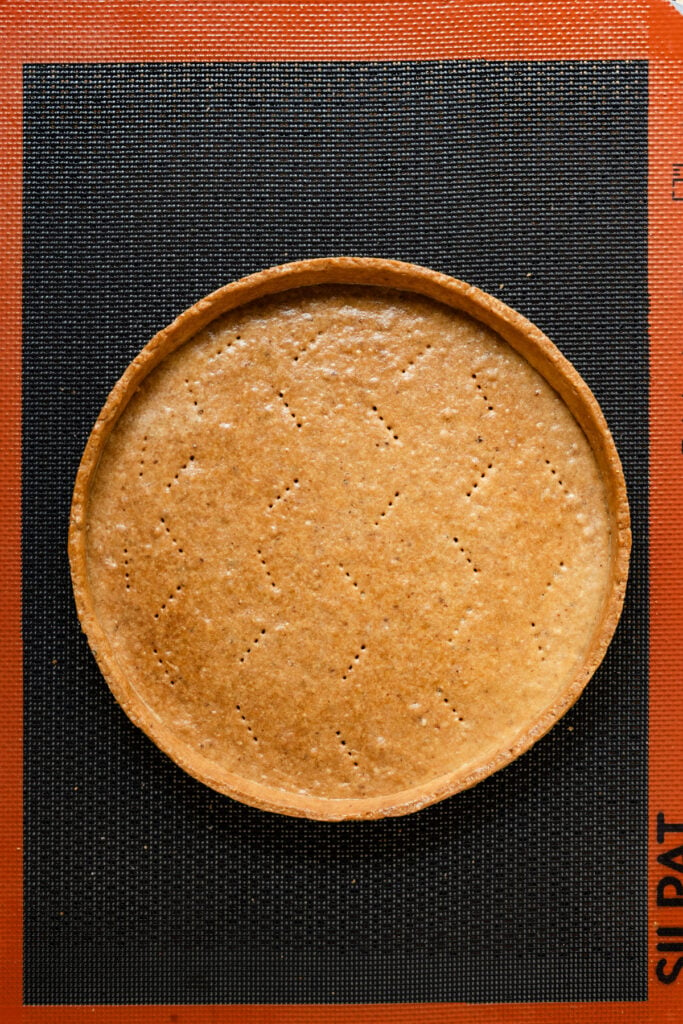
- Bake for an additional 5 minutes for a shiny crust that sealed for adding wet no-bake fillings like jams, mousse, or pastry cream.
Jenn’s Tart Crust Tips
- Mixing: This dough can be made either in a stand mixer or by hand. Be careful not to beat the dough too much with the stand mixer.
- Baking Surface: Use a perforated baking mat and perforated pan if lining a tart ring. For tart pans with a removable bottom, place the pan on a baking sheet.
- Chill It: Always work with cold dough. If the dough becomes too soft while you’re lining the pastry ring or tart pan, just pop it back in the fridge. Wait about 10-15 minutes minutes and then go back to lining your pan.
- No Stress: Don’t worry if you accidentally tear your dough. Just patch it back together with a spare piece or press it together with your fingertips.
- Prevent Shrinkage: Freeze the crust for at least 30 minutes after lining the pan before baking. I do this will all of my pie doughs to help them keep their shape in the oven.
- Clean Edges: After baking I like to create a smooth professional looking edge on my crust. As best I can! Simply take a microplane and file away any rough or uneven spots.
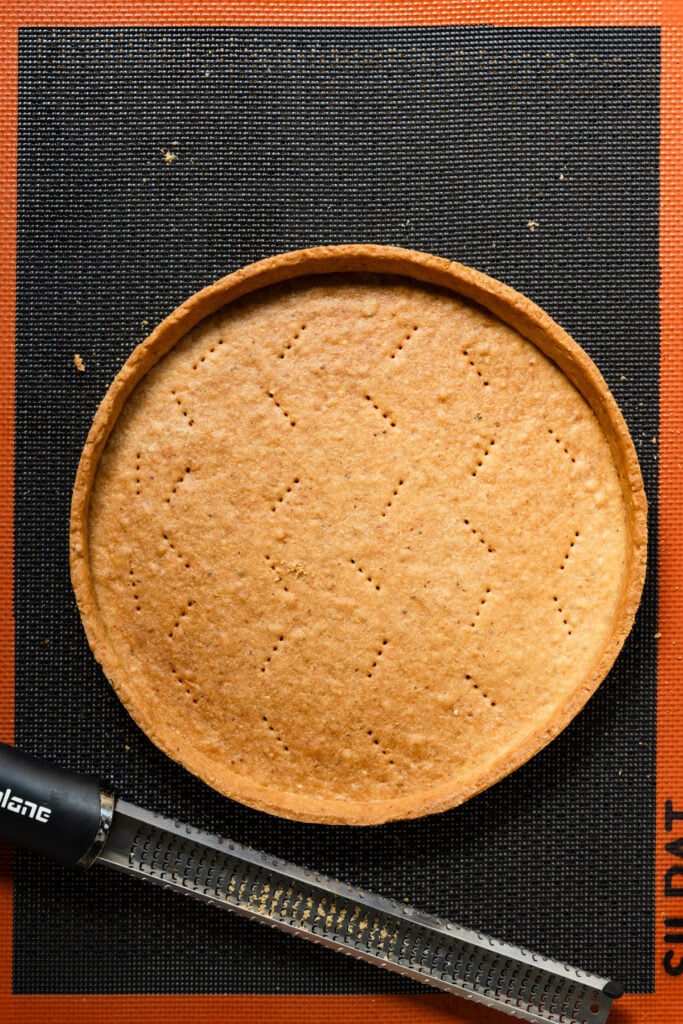
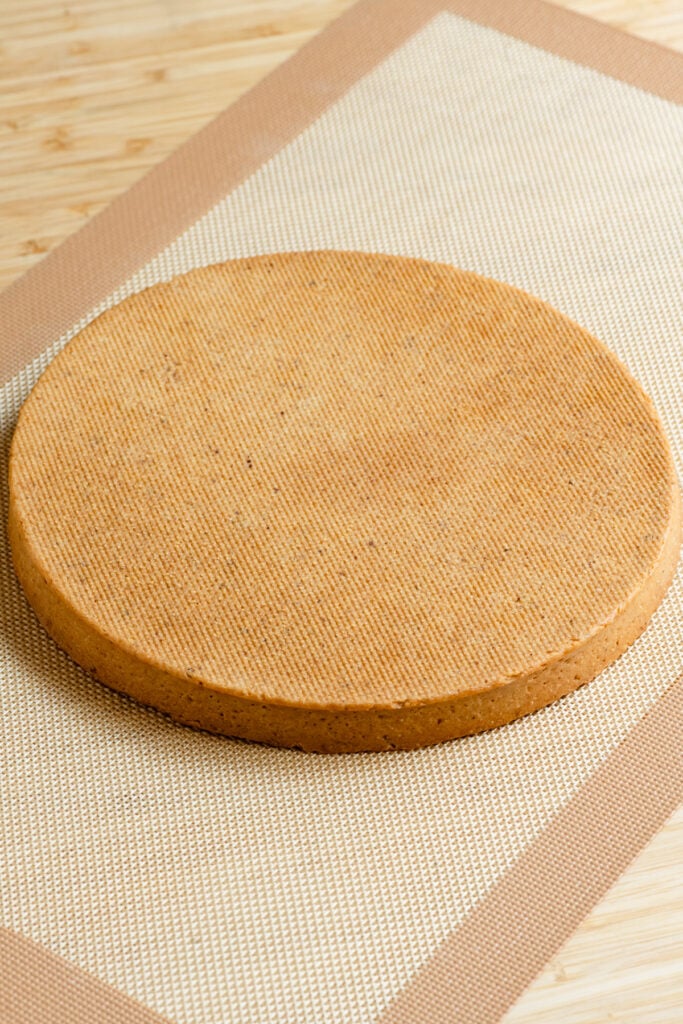
- I’ve started baking my fruit tarts on perforated silicone mats and a perforated baking pan. I love the even bake it gives the crust. Not too mention this lovely texture design on the bottom. Even if you don’t necessarily see the bottom of a crust as often as the top, it’s nice to have a little extra pizazz.
Make Tartlets
This recipe can also be used is to make mini tarts. Using the full batch of dough, I can make twelve individual 4-inch tarts. I use 4-inch perforated tart rings, lined with dough, frozen, and then fully baked until the shells are golden and crisp.
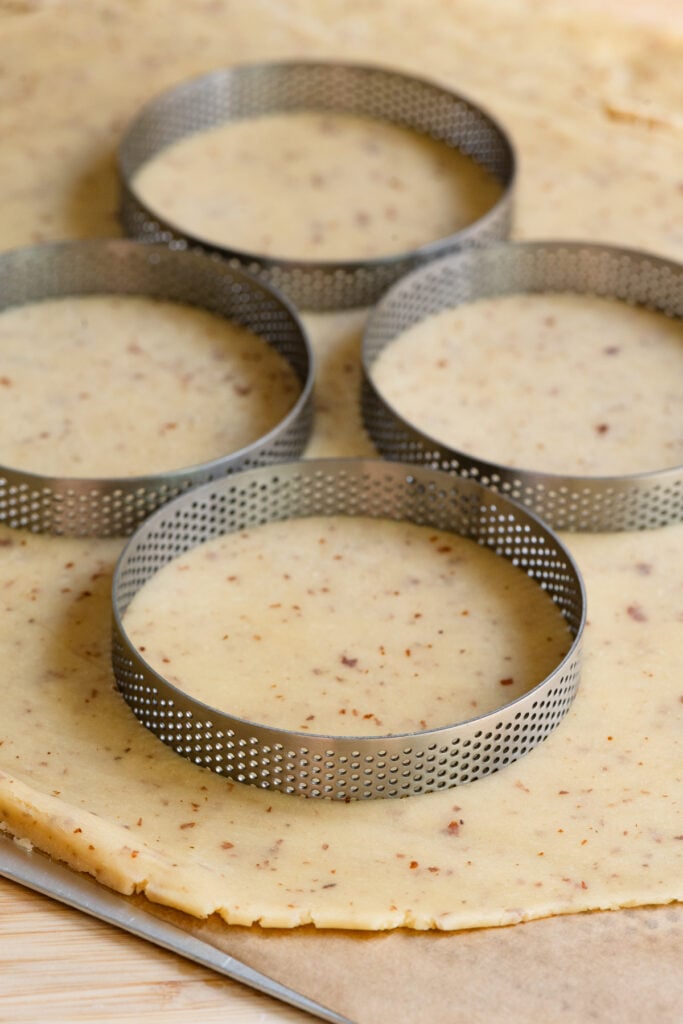
- Roll out half of the pate sucrée dough to 1/8-1/4 inch thickness. Cut out circles with the tart rings for the bottom of the tarts.
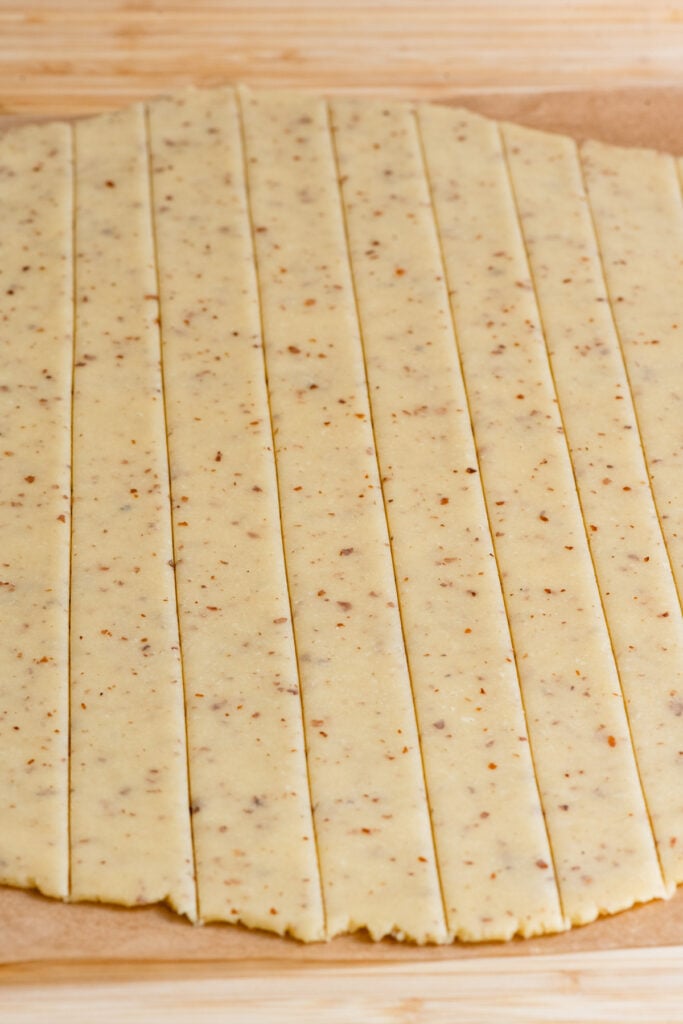
- Take the second half of dough, roll out to the same thickness. Cut strips slightly wider than the sides of the ring. And long enough to line the inside.
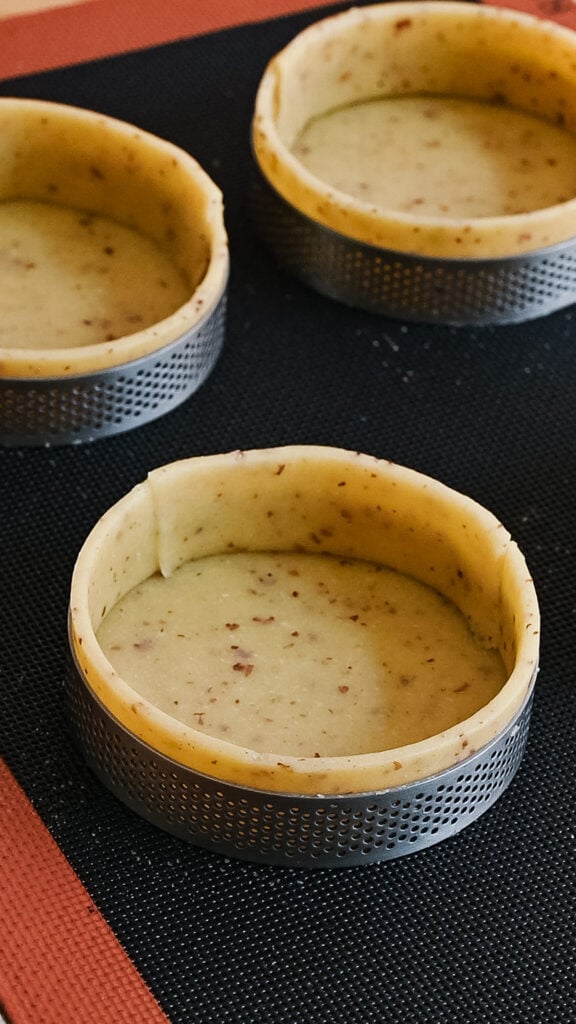
- Chill the dough rings and strips in the fridge for about 15 minutes, to make them easier to handle. To line, place rings on prepared baking pan. I use a perforated mat and pan, but you can use parchment paper. Place the dough disc into the ring for the bottom of the tart. Line the sides with the strips, gently pressing against the ring. Squeeze any overlaps together.
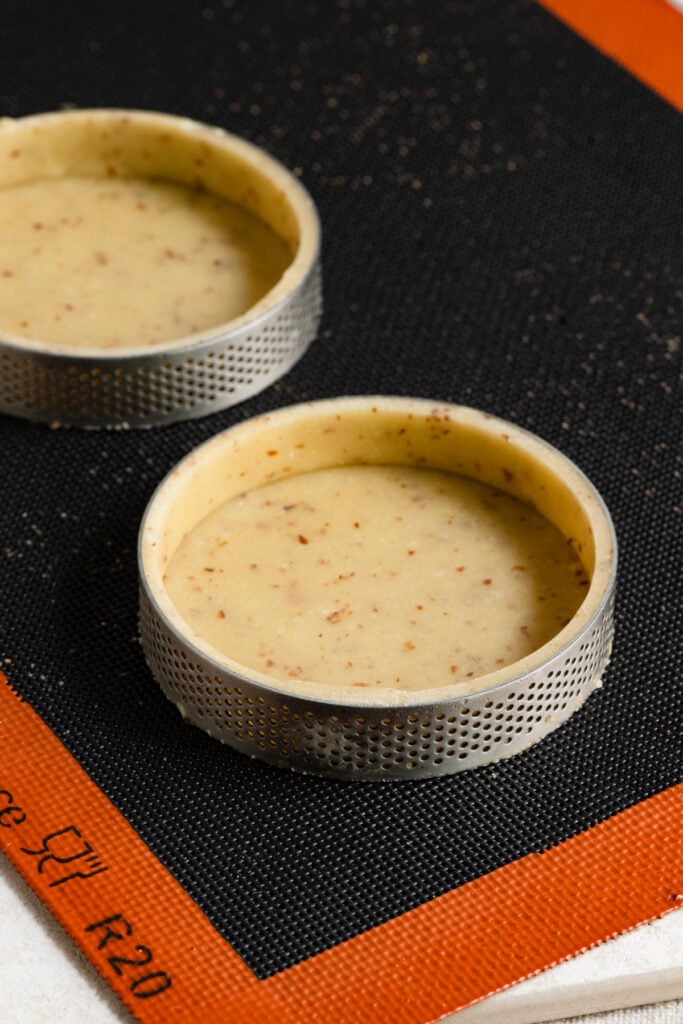
- Freeze the lined tart shells completely. Trim away overhang with a knife before baking. I do not line my mini shells with baking weights. They will hold their shape in the oven if well adhered to the ring and frozen.
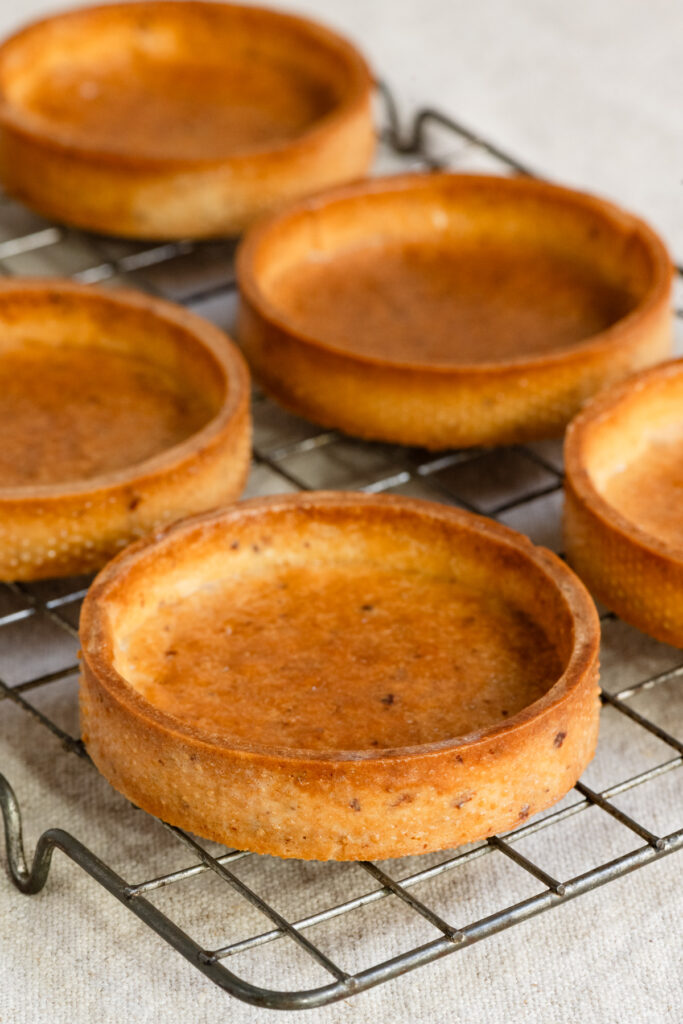
- Bake frozen tart shells for 25 minutes at 350°F (180°C) conventional oven on the middle rack. Let cool slightly, brush the inside and outer rim with a coating of egg wash. Return tarts to the oven and bake for an additional 5-8 minutes until golden brown. Cool completely before adding no-bake filling.
★★★★★ Please leave a star rating and review below if you make this recipe! THANK YOU!!
Sweet Shortcrust Pastry – French Pâte Sucrée
Equipment
- electric stand mixer or by hand
Recipe Video
Ingredients
- 310 grams all purpose flour, 11% protein, sifted (can swap evenly for pastry flour 9-10% protein)
- 40 grams almond meal, unblanched almond flour
- ½ tsp fine sea salt
- 150 grams unsalted European style butter (82% butterfat), softened
- 110 grams powdered sugar
- 60 grams (1 extra large) egg, room temperature, beaten with a fork
Instructions
Using a Stand Mixer
- In the bowl of a stand mixer fitted with the paddle attachment, cream the butter and sugar together until smooth.150 grams unsalted European style butter (82% butterfat), 110 grams powdered sugar
- Using a mixing bowl, whisk together the flour, almond meal, and salt.310 grams all purpose flour, 40 grams almond meal, ½ tsp fine sea salt
- On low speed mix in 1/2 of the beaten egg and 1/2 of the flour mixture. Mix until combined. Scrape the bottom and sides of the bowl with a spatula. Repeat with the remaining ingredients to form a soft cookie dough texture.60 grams egg
- Scoop any crumbs stuck to the bottom of the bowl and pack the dough together by hand.
Mixing by Hand
- Place softened butter in a mixing bowl and whisk by hand until creamy.150 grams unsalted European style butter (82% butterfat)
- Add the powdered sugar to the butter and whisk until you have a smooth texture. Use a little elbow grease here.110 grams powdered sugar
- Add in the egg and salt and mix well again.60 grams egg, ½ tsp fine sea salt
- Finally, mix in the flour and almond meal until roughly combined.310 grams all purpose flour, 40 grams almond meal
- Turn the dough out onto a clean work surface. Begin working the dough with the palm of your hand to combine the ingredients into a smooth dough. Use a bench scraper to scrape the dough off the work surface if needed.
Shape, Rest & Use
- Pack the dough into a flat disc with your hands. The total weight should be 650 grams, which can be divided in half for two 22cm tarts.
- Wrap the dough in plastic film and rest in the fridge for a minimum of 1 hour or better overnight.
- Roll out between two layers of parchment paper for the desired thickness of your recipe. For tarts I use a thickness of 1/8-1/4 inch (3-6mm) to line tart rings and tart pans. Always freeze the crust after lining the pan for at least 30 minutes before baking.
- If at anytime the dough become too soft to work with, pop it back in the fridge or even the freezer for a few minutes to firm back up.
Notes
- Egg: The amount of egg in the recipe needs to be weighed. I crack two eggs in a small bowl, beat well with a fork and then measure out 60 grams for the recipe.
- Storage: Wrap tart dough in plastic film and refrigerate for up to 3 days before using. Place dough on the counter for about 30 minutes before rolling out.

I used this recipe to make your blueberry flan tart and I was happy with the results. The crust held up well even over a few days in the fridge. Now I’d like to try making a few 3” tartlet shells using the same recipe. I gave it a trial run yesterday but the dough became too warm and it was fairly impossible to work with. Initially I’d planned to cut circles slightly wider than the rings and ‘drop’ the dough into the rings, what you refer to as foncage method. That failed me so I started over attempting to use the two step method, and I messed that up too. Mainly, I let the dough get too warm.
My question for you is simply, which of the two methods do you recommend for small tart rings and what’s the secret for getting it to work? I’m guessing foncage should work, but my issues with that is that I have trouble rolling out the dough large enough to cut the number of circles I need without creating a lot of waste. Anyway, any tips you can provide would be appreciated.
Hi Gordon, The trick is to keep the dough cold enough to handle, just like pie dough or shortbread dough. I will roll it out and then chill again before cutting. Lining with warm dough will cause it to tear. You can even pop it in the freezer for a few minutes. For small tart rings it’s always best to do the foncage method. This would involve cutting rings out larger than the ring you want to line so that after you tuck it in, there will be overhang to trim. If at any time the dough is too soft, pop it back in the fridge or freezer to firm slightly. If the dough feels too firm gently slide between the palm of your hands and the heat from your hands will warm it enough to be pliable. It’s a pretty forgiving dough if it tears, you can patch with another piece. And always freeze it solid after lining before blind baking, as warm dough will shrink in the oven, just like regular pie dough.
On the waste part: Divide this dough in half and shape into discs. Wrap both in plastic wrap and chill. Roll one out at a time, I find slightly closer to 1/4 inch thickness to be easiest to work with. Chill then cut. Any leftover pieces can be packed back together and re-used. Like leftover shortbread cookie dough, you can gently roll them across your work surface with the heel of your hand to pack back together, shape into a disc, chill then re-roll.
Basically anytime you work with a dough that has a lot of butter, it needs to be chilled if it gets soft. My friend is the freezer bc it takes just a minute if your pan will fit:)
Lining rings does take a bit of practice, in pastry school I lined rings all day for a week with a French chef over my shoulder for extra tips. It just takes a little practice. Small regular tart shells are easier, bc you can just lay the dough across the pan, sink it into the corners and roll a rolling pin over the top to cut it. Rings are the more advanced method 🙂
Hope this helps, please let me know if you have more questions.
One other tip! I really really like using perforated rings, the dough sticks better to them, especially when blind baking. I don’t even butter the ring if its perforated. The trick is to press the dough enough that it is flush with the ring but not press so hard that you squish it thinner. And if you’re blind baking the small rings, they shouldn’t need to be lined with baking weights.
Love your website, any chance to get recipes in cup/ounces or a conversion link somewhere 😯? I plan to make the pastry crust this afternoon, somehow …. Thanks Jenn
Amy Rivera
Hi Amy! Thank you so much! The majority of my recipes have both measurements, although in some cases I have them only listed in grams as weight is the best way to replicate the recipe. This one has been formulated for evenly rounded numbers and has been tested over 30 times using weight measurements, coming out the same each time. Using cups can often cause a varying weight and isn’t always accurate, which is why I create and test all of mine with a small kitchen scale. I also have a page listing out my ingredients and conversion if needed. Happy to help with any dough and lining questions, though they may not be real in time as I live in France and our time zone is a bit later than the US 🙂 Would love to know how the pastry works out for you. Jenn