This post contains affiliate links. Please see our disclosure policy.

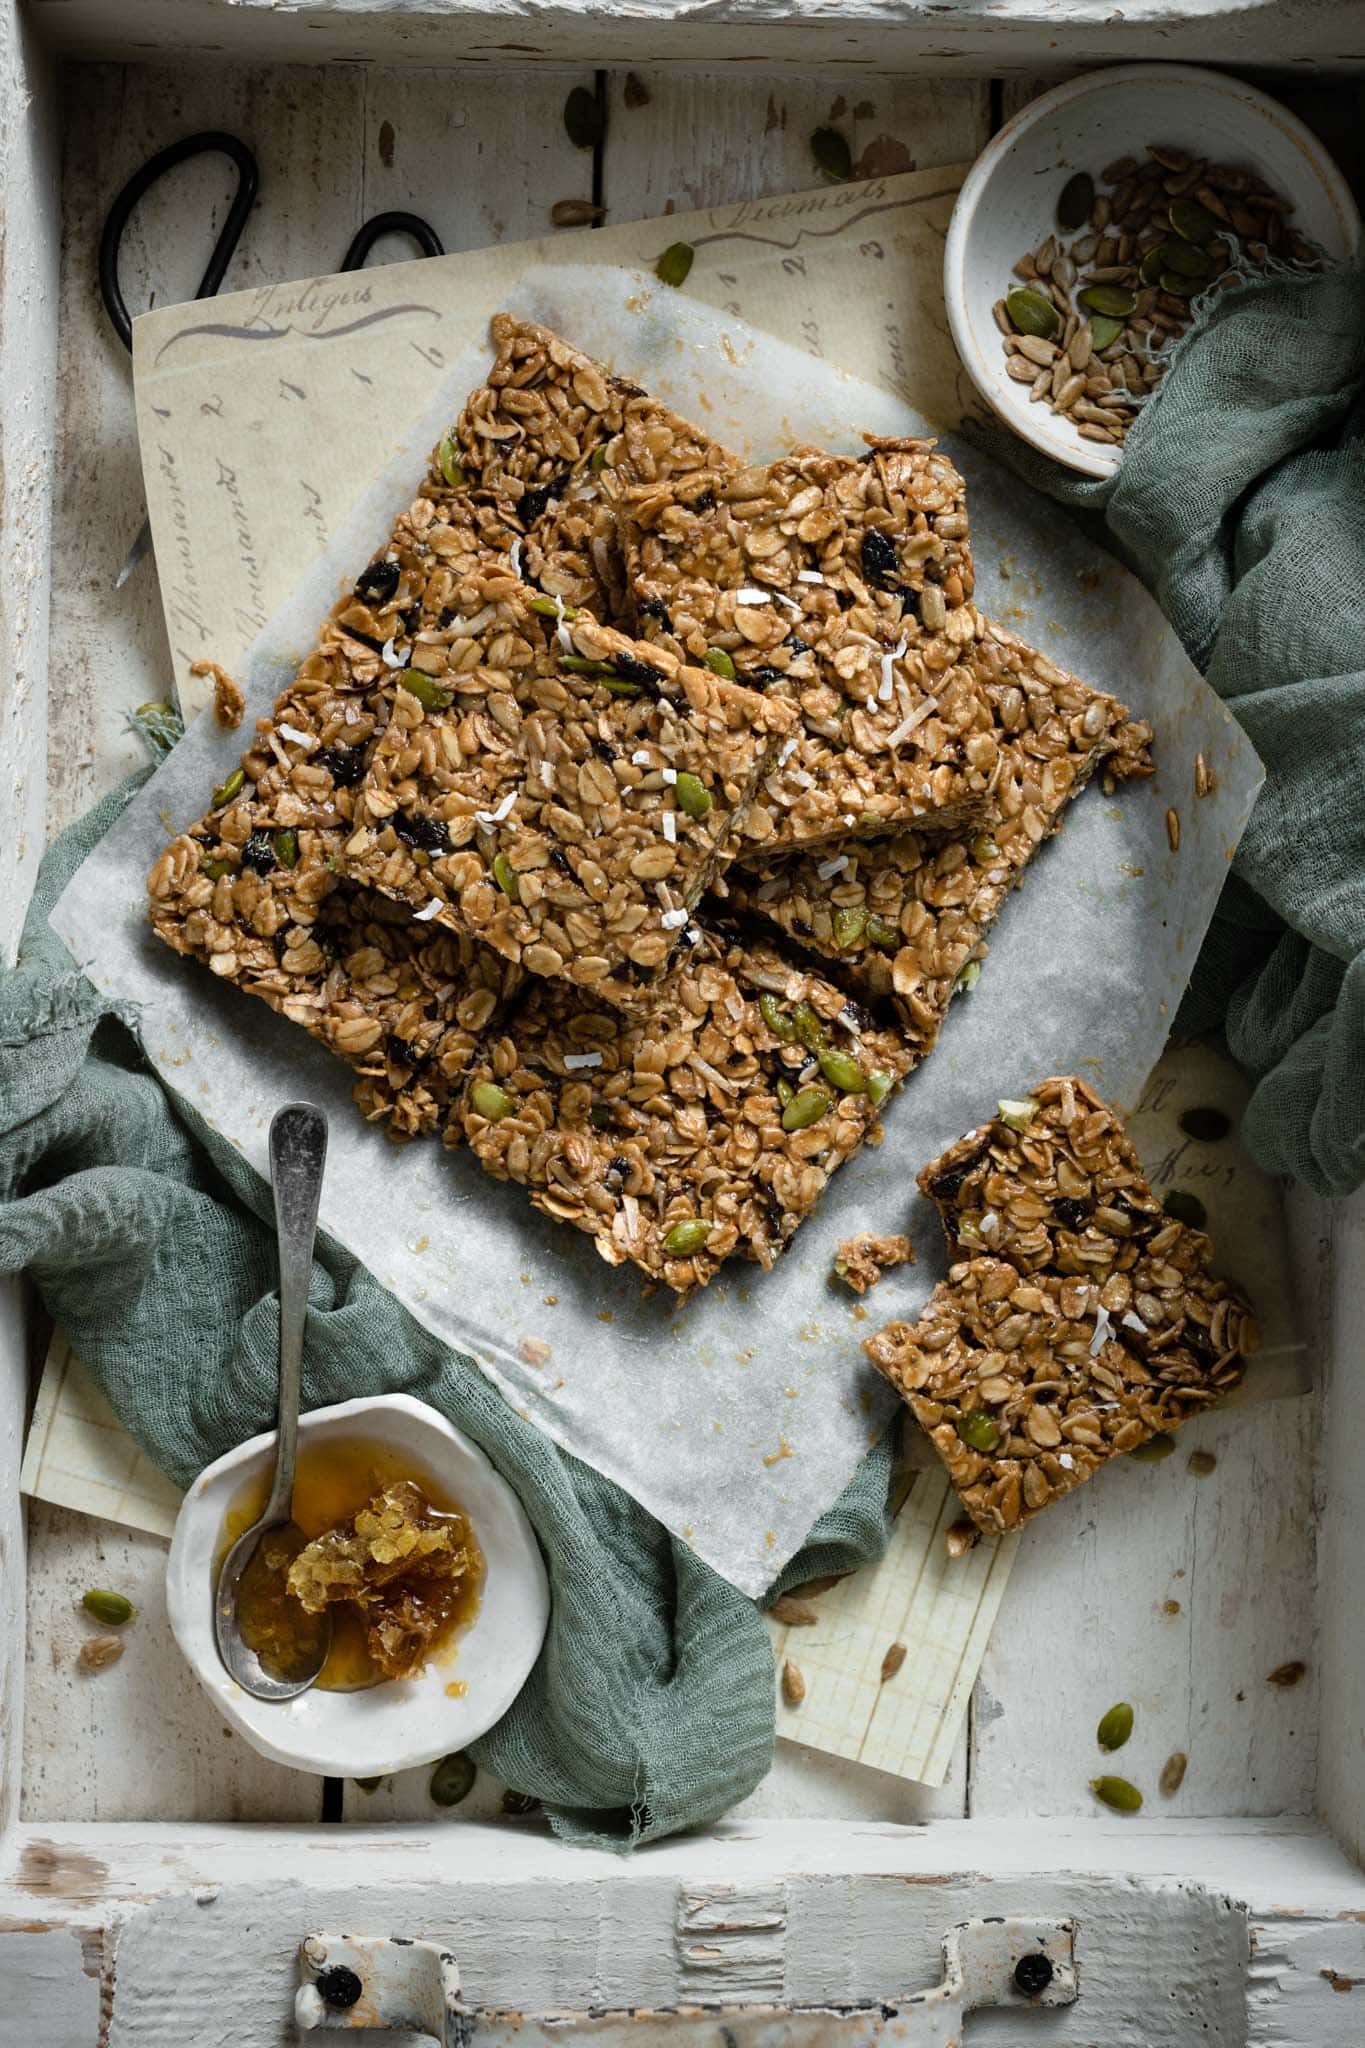
Homemade Chewy Granola Bars made with crunchy peanut butter, honey mixed seeds, dried cherries, shredded coconut, and oats are super easy to make. These naturally gluten free granola bars can be enjoyed for breakfast or a snack. No need to bake, just mix the ingredients together, press into a pan, chill, then eat!
🌿 Ingredients You Need & Why
- Old-fashioned oats – These are the heart of the bars, giving them that perfect chewy texture. I love how they hold everything together without feeling too heavy. If you’re gluten-free, just be sure to grab certified gluten-free oats.
- Unsweetened shredded coconut – Adds a soft hint of tropical coconut.
- Roasted sunflower seeds, pumpkin seeds, chia seeds – For a salty crunch and a little dose of healthy fats and protein.
- Dried cherries – A sweet-tart bite that keeps that adds contrast to the nuts.
- Creamy peanut butter – This is what makes the bars rich, satisfying, and just a little indulgent. It helps bind everything together and gives that classic nutty taste we all love. Swap for any type of natural nut butter.
- Honey – Works with the peanut butter to hold the bars together, and adds a lovely warm sweetness.
- Coconut oil – Helps melt everything into a smooth mixture and adds just a subtle richness. You’ll stir it in with the peanut butter and honey for that perfectly glossy finish.
How to Make Chewy Granola Bars
- Mix all your dry ingredients together in a large bowl.
- You can substitute any dried fruit in place of the cherries.
- Any smooth nut butter will do.
- Heat the sunflower butter, honey, and oil together just enough to combine and stir into a smooth mixture. Do Not over heat or boil.
- Add the vanilla in after the sunflower butter mixture is smooth.
- Use a rubber spatula to scrape the sunflower mixture out of pan and into bowl of dry ingredients.
- Fold until well mixed and coated.
- Use a 8×8-inch or 9×9-inch square baking pan to form the granola bars.
- I prefer to run a long strip of parchment paper across each side that overhangs. So there is parchment paper overhanging on all four sides. Then, I place an additional square of parchment paper on the bottom of the pan.
- Lining the pan this way helps prevent sticking, and makes it easier to lift the entire square out and place on the counter for easy cutting.
- Use the rubber spatula to even out the granola mixture in the pan. Chill for 1 hour.

Storage & Leftovers
Once the bars are sliced, pop them in the fridge or freezer to keep them fresh. You can leave them in the pan and cover it, or stack them in an airtight container, just slip a piece of parchment between the layers so they don’t stick together. They’ll stay good in the fridge for up to a week, or you can freeze them for up to 2 months. I like them cold straight from the fridge, but if they’re frozen, give them about 20 minutes at room temp to soften up before you dig in.
★★★★★ Please leave a star rating and review below if you make this recipe! THANK YOU!!
Homemade Chewy Granola Bars

Equipment
- 8 or 9-inch square pan
Ingredients
- 2 cups old fashioned oats
- 1/3 cup shredded coconut, unsweetened
- 1/2 cup roasted sunflower seeds
- 1/4 cup pumpkin seeds
- 1/2 cup dried Cherries, chopped
- 1 teaspoon chia seeds
- 1/2 teaspoon cinnamon
- 1/2 tsp fine sea salt
- 3/4 cup creamy peanut butter
- 1/2 cup honey
- 2 tablespoons coconut oil
- 1 teaspoon pure vanilla extract
Instructions
- Line an 8×8-inch or 9×9-inch square pan with parchment paper.
- Combine all dry ingredients into a large bowl and stir together.2 cups old fashioned oats, 1/3 cup shredded coconut, 1/2 cup roasted sunflower seeds, 1/4 cup pumpkin seeds, 1/2 cup dried Cherries, 1 teaspoon chia seeds, 1/2 teaspoon cinnamon, 1/2 tsp fine sea salt
- In a medium saucepan on medium low heat, stir together peanut butter, honey, and coconut oil until combined and smooth. (DO NOT boil).3/4 cup creamy peanut butter, 1/2 cup honey, 2 tablespoons coconut oil
- Add vanilla extract to the melted peanut butter butter mixture and stir.1 teaspoon pure vanilla extract
- Spoon the wet mixture into the dry ingredients. Stir with a rubber spatula until well mixed and evenly coated.
- Scrape mixture into square pan.
- Use spatula or fingers to softly press evenly into pan.
- Place pan in the fridge to chill and firm for at least one hour.
- Remove firm granola from pan, slice and enjoy!


