This post contains affiliate links. Please see our disclosure policy.
You’ve found the perfect easy beginner friendly bread recipe! Baked in a dutch oven, this savory garlic and herb bread is one of personal favorites to make. Flavored with parmesan reggiano cheese, fresh basil, thyme, rosemary, and oregano. A single loaf perfect for slicing, dipping into olive oil, or making sandwiches.

Every time I eat this bread, I’m transported back to Tuscany, the cobblestone streets, and markets fragrant with herbs and fresh loaves. You can enjoy the same flavors at home with this simple, flavorful bread perfect for dipping in olive oil or serving alongside pasta and salads. It’s an easy, rewarding bake for beginners, and when you’re ready to try another yeast bread recipe, check out my Artisan Bread.

Key Ingredients & Test Notes
- All-Purpose Flour (11–11.7% protein) adds tenderness and lightness to the dough, balancing the strength of the bread flour. The lower protein content keeps the crumb soft and prevents the loaf from turning too chewy or dense.
- Bread Flour (12-12.7% protein) provides the gluten structure that gives this loaf its satisfying chew and airy rise. The higher protein content also helps the dough hold its shape and develop that classic artisan-style texture.
- Test Note: I like to use King Arthur Bread Flour for its reliable 12.7% protein level, it produces a beautifully elastic dough that bakes up with a golden, crisp crust.
- Granulated Sugar adds just a hint of sweetness and helps feed the yeast during fermentation, promoting a stronger rise and balanced flavor.
- Instant or Fast-Acting Yeast is the leavening powerhouse in this recipe. It activates quickly in warm water and gets right to work creating lift and structure.
- Test Note: Be sure your yeast is not expired!
- Fine Sea Salt strengthens the gluten structure and deepens the bread’s flavor. It also helps moderate yeast activity, ensuring a controlled rise.
- Parmigiano–Reggiano Cheese infuses the dough with a nutty, savory sharpness that pairs beautifully with the fresh herbs.
- Test Note: Use freshly grated Parmigiano Reggiano rather than pre-grated, it integrates more evenly and gives better flavor.
- Fresh Herbs (rosemary, basil, thyme, oregano) layer aromatic, earthy notes throughout the loaf.
- Test Note: Chop herbs finely so they distribute evenly in the dough.
- Fresh Garlic adds depth and a subtle savoriness that enhances the herbs and cheese.
- Test Note: Finely mince or press the garlic so it melts into the dough during baking, larger chunks can create uneven flavor pockets.
- Warm Water (105–110°F / 40–43°C) hydrates the flour and activates the yeast.
- Test Note: Water that’s too hot can kill the yeast. Use a thermometer or dip your finger in it, if it feels like warm bathwater its food.
How to Make Garlic and Herb Bread
Baking bread requires time and a little patience. This loaf gets its tangy flavor by incorporating a slow cold proof alongside the usual dough resting time. Proofing or proving your dough is a technique where dough is allowed to ferment, creating carbon dioxide that makes the dough rise. During this time the yeast is reacting with the starch from the flour. For this bread we are allowing time for two proofs before baking.
Prepare the Yeast
Either Active Dry Yeast or Instant Yeast can be used when making the dough. If you choose active dry yeast, you must add some of the warm water to the yeast with sugar, to “activate” the yeast. For instant yeast, just mix the yeast in the flour mixture, no need for any other steps.
Mix the Dough
Use a stand mixer with a dough hook attachment for best results. Or you can knead the dough by hand for 8-10 minutes on a lightly floured work surface. Check for gluten formation with a “windowpane test” before resting the dough.
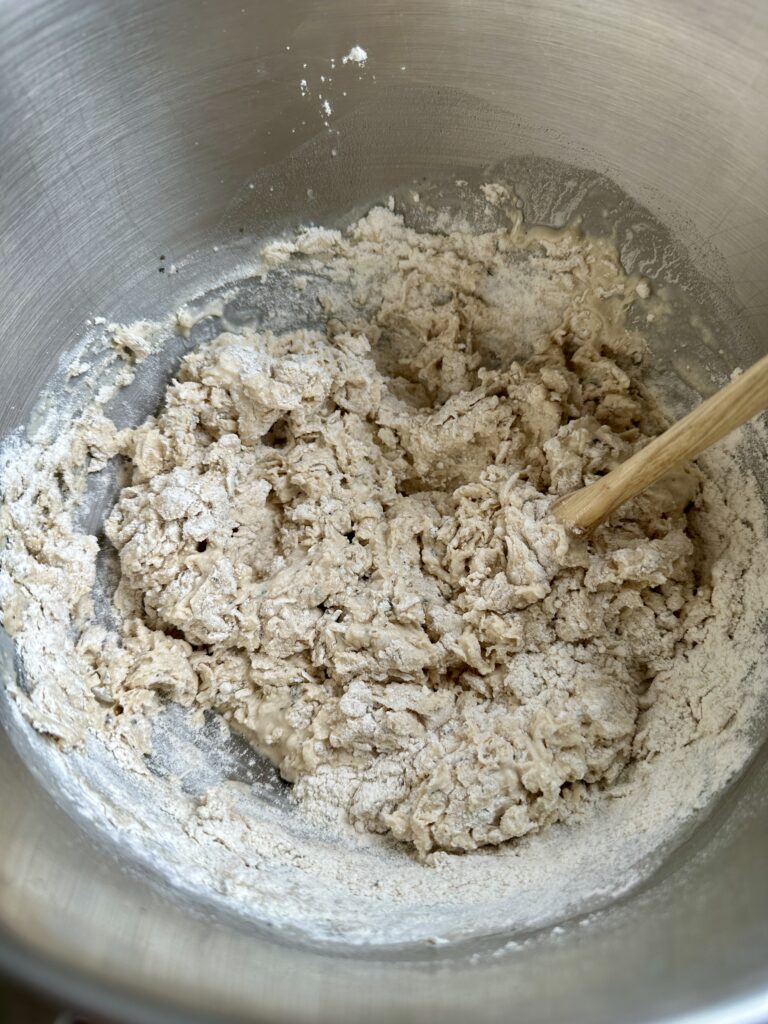
- Whisk the flour, herbs, garlic, salt, and yeast into the bowl of a stand mixer. Pour in the warm water and stir together with a wooden spoon until all the flour is incorporated and you have a sticky dough.
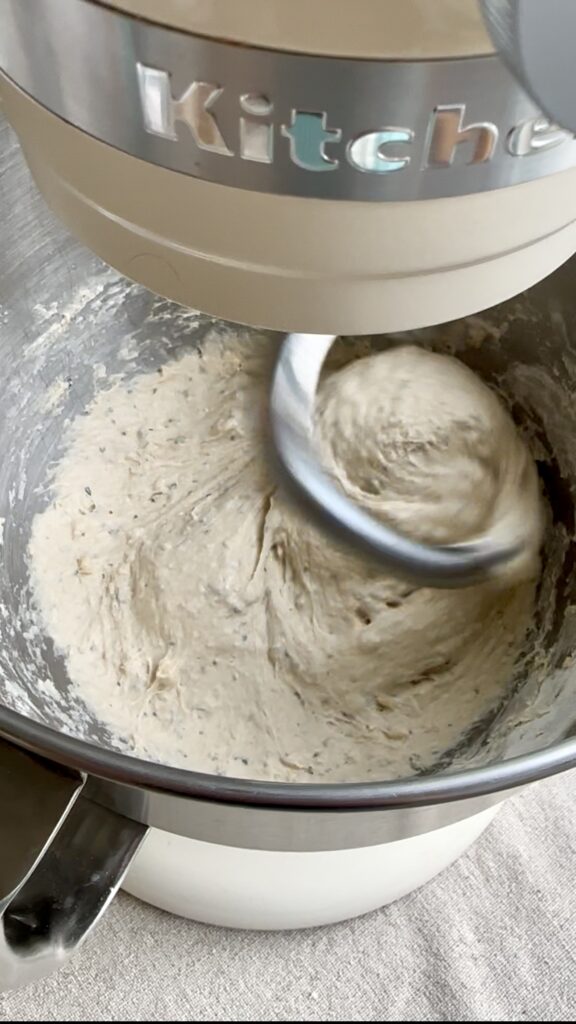
- Place the bowl on the stand mixer and using the dough hook on medium-high speed to work the dough for 4-5 minutes.
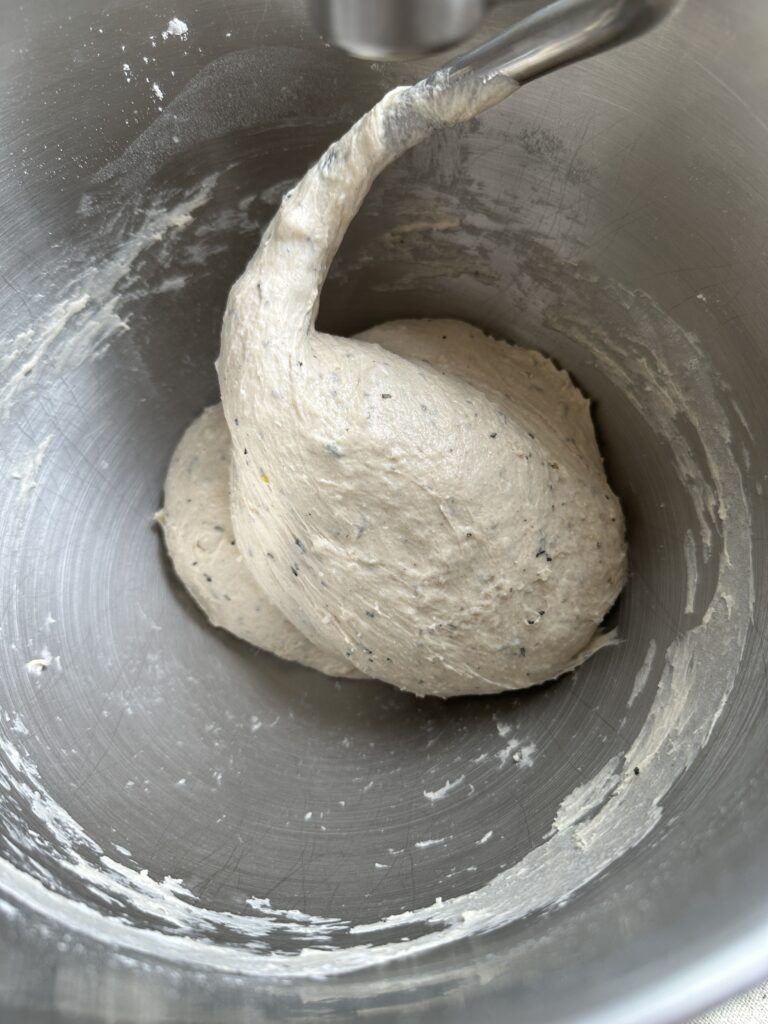
- The dough should stick to the hook and pull away from the sides of the bowl.
- Pull the dough from the hook and cover the bowl with a tea towel or plastic wrap to rest.
Resting the Dough
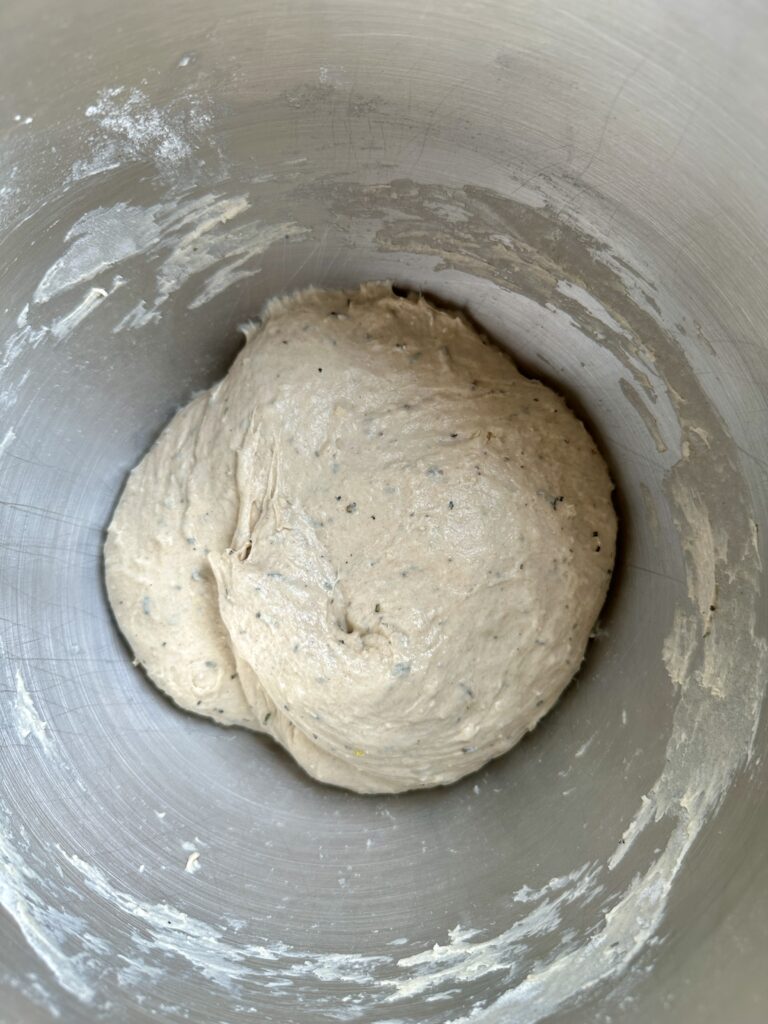
First Warm Rise
Once the dough is made, cover the mixing the bowl with a tea towel, and let the dough rise at room temperature for 2 hours. I like to place my bowl by a warm window or in a cold oven with the light on.
Option #1 Refrigerating the Dough
After the first warm rise, you can choose to to leave the dough in the fridge for 8+hours will result in a tastier bread, that has more developed flavor and a little sourdough like tang. Simply cover the bowl with plastic wrap and place in the fridge. The colder temperature slows down the fermentation process of the yeast and prevents the dough from continuing to rise. The enzymes in the yeast transform the starch into sugar resulting in more flavorful, slightly tangy herb bread.
Remember, this refrigeration step is done after the first warm rise. So don’t skip that step. You can also leave the dough in the fridge to rest for up to 3 days until ready to bake.
Option #2: Skipping Refrigerating the Dough
If you are just craving bread and must have a loaf the same day, go ahead and skip the refrigeration step. The dough will however still need a second warm rise or proof before baking.
Shaping and Final Rise
When you’re ready to bake, the dough needs to be gently shaped for a final rise. For both the refrigerated dough or dough that skipped the fridge follow the next steps.
- Transfer the dough to a lightly floured surface and gently shape into a loaf.
- Stretch the sides of the dough onto itself into the center, to form a rough round shape. Pinch the seams together and then flip the dough over. With cupped hands moving in circular motion, gently shape the dough into a ball.
- Transfer the dough onto a sheet of parchment paper.
- Lower the dough into a large bowl and cover it with a kitchen towel. Let rest for 1-1.5 hours in a warm draft free location.
- While the dough is resting, prepare the dutch oven for baking.
Baking
Lower the the parchment paper with the dough into the HOT dutch oven. Bake the bread for about 35 minutes and then remove the lid and bake for another 10 minutes for a golden crust.

Storage & Leftovers
Room Temp: Store leftover bread in an airtight paper bag at room temperature for 1-2 days of freshness. If the bead begins to get firm on the second day wrap the loaf in aluminum foil and continue to store at room temperature for an additional 1-2 days.
★★★★★ Please leave a star rating and review below if you make this recipe! THANK YOU!!
Dutch Oven Garlic and Herb Bread

Equipment
- 5.5 quart Cast Iron Dutch Oven
Ingredients
- 150 grams (1 ¼ cups) all purpose flour, 11-11.7% protein
- 350 grams (2 ¾ cups) bread flour , 12.7% protein
- 1 tablespoon granulated sugar
- 2 ¼ teaspoons instant or fast acting yeast
- 1 1/2 teaspoons fine sea salt
- 1/4 cup (¼ cup) Parmigiano–Reggiano cheese, finely grated
- 1 tablespoon fresh rosemary , finely chopped
- 1 tablespoon fresh basil, finely chopped
- 1 tablespoon fresh thyme , finely chopped
- 1 tablespoon fresh oregano, finely chopped
- 3 fresh garlic cloves, finely chopped
- 360 grams (1 ½ cups) warm water, (105-110 F), more if needed
Instructions
Make the Dough
- Using the bowl of a stand mixer, whisk together the bread flour, all purpose flour, salt, grated Parmigiano–Reggiano cheese, herbs, garlic, sugar and yeast.150 grams all purpose flour, 350 grams bread flour , 1 tablespoon granulated sugar, 2 ¼ teaspoons instant or fast acting yeast, 1 1/2 teaspoons fine sea salt, 1/4 cup Parmigiano–Reggiano cheese, 1 tablespoon fresh rosemary , 1 tablespoon fresh basil, 1 tablespoon fresh thyme , 1 tablespoon fresh oregano, 3 fresh garlic cloves
- Pour in the warm water and gently mix with a wooden spoon until all the flour is incorporated and the dough is sticky. *If dough seems dry, add one tablespoon of water.360 grams warm water
- Place the bowl on the stand mixer and using the dough hook on medium-high speed for work the dough for 4-5 minutes. The dough should stick to the hook and pull away from the sides of the bowl.
First Warm Rise
- Once the dough is formed, cover the mixing the bowl with a tea towel, and let the dough rise at room temperature for 2-3 hours, until doubled in size. I like to place my bowl by a warm window or in a cold oven with the light on.
Option #1: Long Cold Fridge Rest
- Cover bowl with plastic wrap and place in the fridge to chill for overnight for 12 hours. Or from 3-5 days to increase the tanginess in the dough to resemble sourdough. The dough will rise and fall while its chilling, and that's totally normal.
- Remove the dough bowl from the fridge and let sit at room temperature for about 10 minutes. Scrape the dough onto a floured surface and with lightly floured hands or a bench scraper gently shape the dough into round shape.
- Take your floured hands and pull up from one side stretching the dough inwards and folding it back onto itself. Moving around the dough clockwise continuing to stretch and fold to create a rough round shape. Dust with more flour as needed. Pinch together the seams and flip the dough over.
- Transfer dough using a bench scraper onto a piece of floured parchment paper, seam side down and carefully lower into a large bowl. Cover the bowl with a tea towel and place in a draft free location to rise at room temperature for 1 hour. The dough may not double in size, but it will puff slightly and rise more in the oven.
Option #2: No Fridge
- Scrape the dough onto a floured surface and with lightly floured hands or a bench scraper gently shape the dough into round shape.
- Take your floured hands and pull up from one side stretching the dough inwards and folding it back onto itself. Moving around the dough clockwise continuing to stretch and fold to create a rough round shape. Dust with more flour as needed. Pinch the seams together and flip the dough over.
- Transfer dough seam side down onto a piece of floured parchment paper using a bench scraper and carefully lower into a large bowl. Cover the bowl with a tea towel and place in a draft free location to rise at room temperature for 1 hour. The dough may not double in size, but it will puff slightly and rise more in the oven.
Bake Loaf
- Preheat your oven to 475℉ ( 240℃) and place your Dutch Oven on the middle to lowest shelf to warm for about 20 minutes.
- Now that the dough has rested, you score your bread down the middle using a sharp knife or bread lame.
- Use oven mitts to carefully remove the preheated dutch oven and place carefully on your stove top or heat proof surface. Remove the rested dough from the bowl by lifting up on the parchment paper. Gently lower down the dough into the HOT dutch oven by holding the sides of the parchment paper and then place the lid on top.
- Place the dutch oven back into the heated oven and bake the bread for about 35 minutes, then remove the lid and let it bake for final 10 minutes uncovered for a nice golden crust.
- Once fully baked, remove the dutch oven from the heated oven.
- Carefully lift the loaf from the dutch oven by pulling up on the parchment paper. Place the bread directly onto a wire cooling rack to completely cool before slicing.
- Slice the loaf and serve with dipping oil, cheeses, or fruit spreads.
Notes
- All Purpose: King Arthur Flour 11.7% protein
- Bread Flour: King Arthur Bread 12.7% protein


Does this do well with doubling , or is it best to do one batch at a time ?
Thank you
This is the first bread I have ever made. I found it extremely easy, directions were right on and the taste is delicious. I used the refrigeration method since I was on a time constraint. I left it in the fridge overnight and it turned out. Perfect. I also added everything bagel seasoning on the top before I baked.
Sage is listed in the description, but the recipe has none? It appears it’s been switched out for thyme?
Hi Lisa, This recipe doesn’t have sage, but feel free to add it if you like. It will definitely taste lovely in a mixture of herbs.
I was looking for a bread recipe that I could use some of my fresh herbs. I can’t wait to try this recipe!
I made two loaves of this for our family Christmas party tonight. Everyone from ages 1-65 loved the bread! Thank you for the recipe!
Yay Senja!! I’m so glad you love it:)